

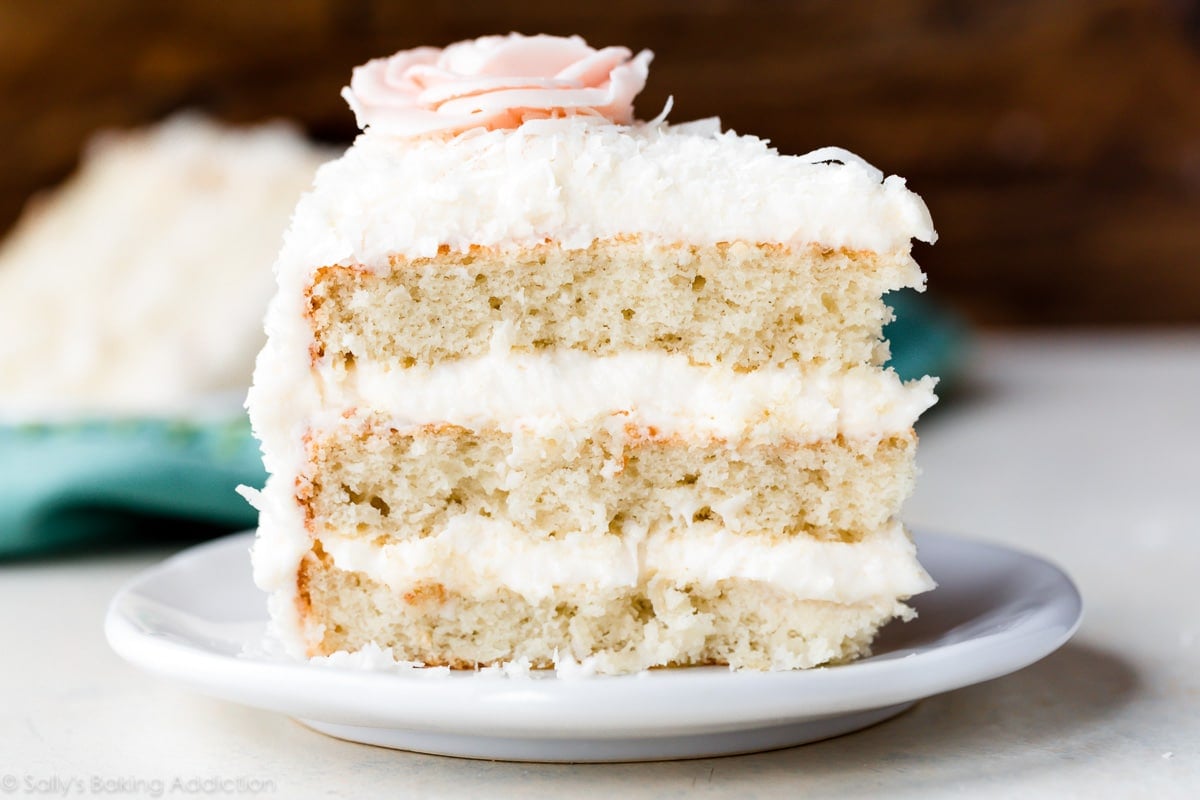
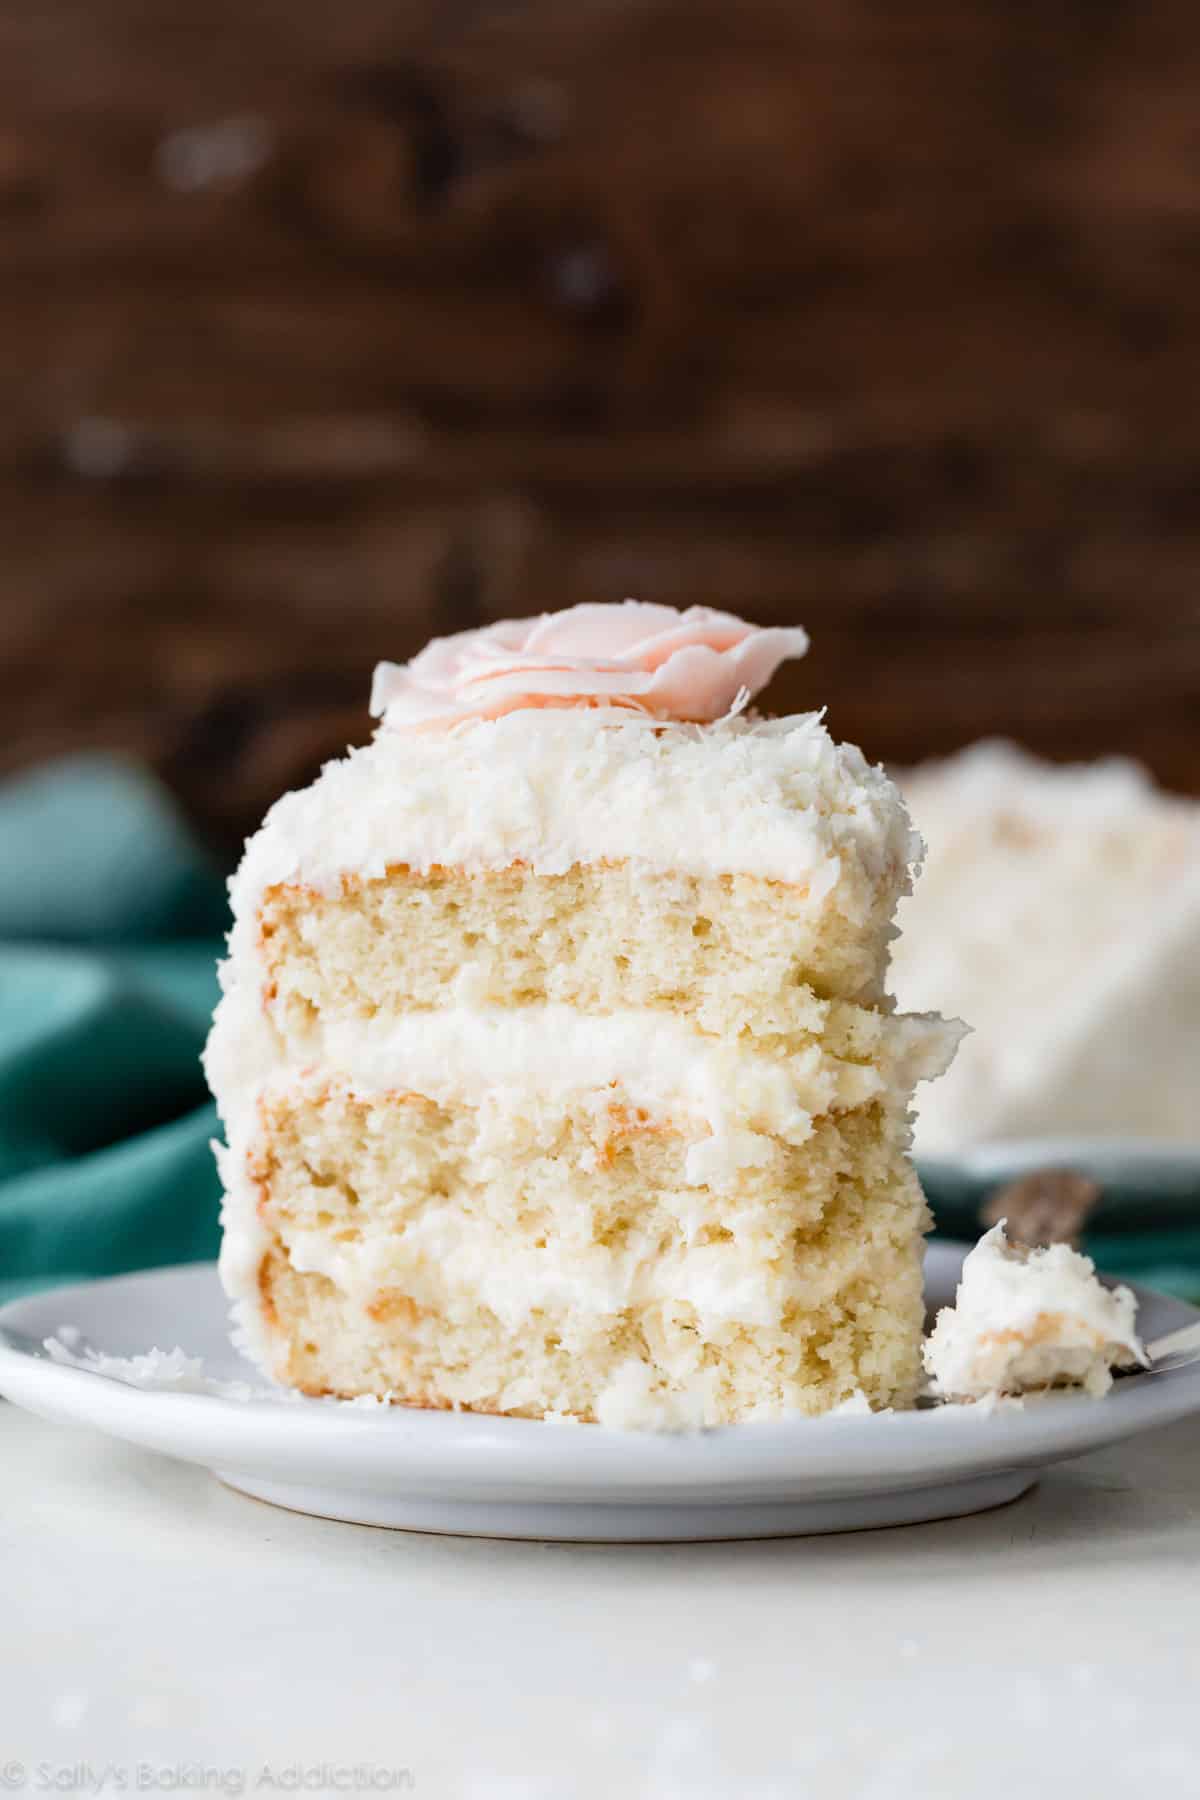
This perfect coconut cake sets the bar for homemade cakes everywhere. It’s supremely moist with a soft fluffy crumb and intense coconut flavor. To ensure success, follow this recipe carefully including using cake flour, egg whites, sour cream, and canned coconut milk.
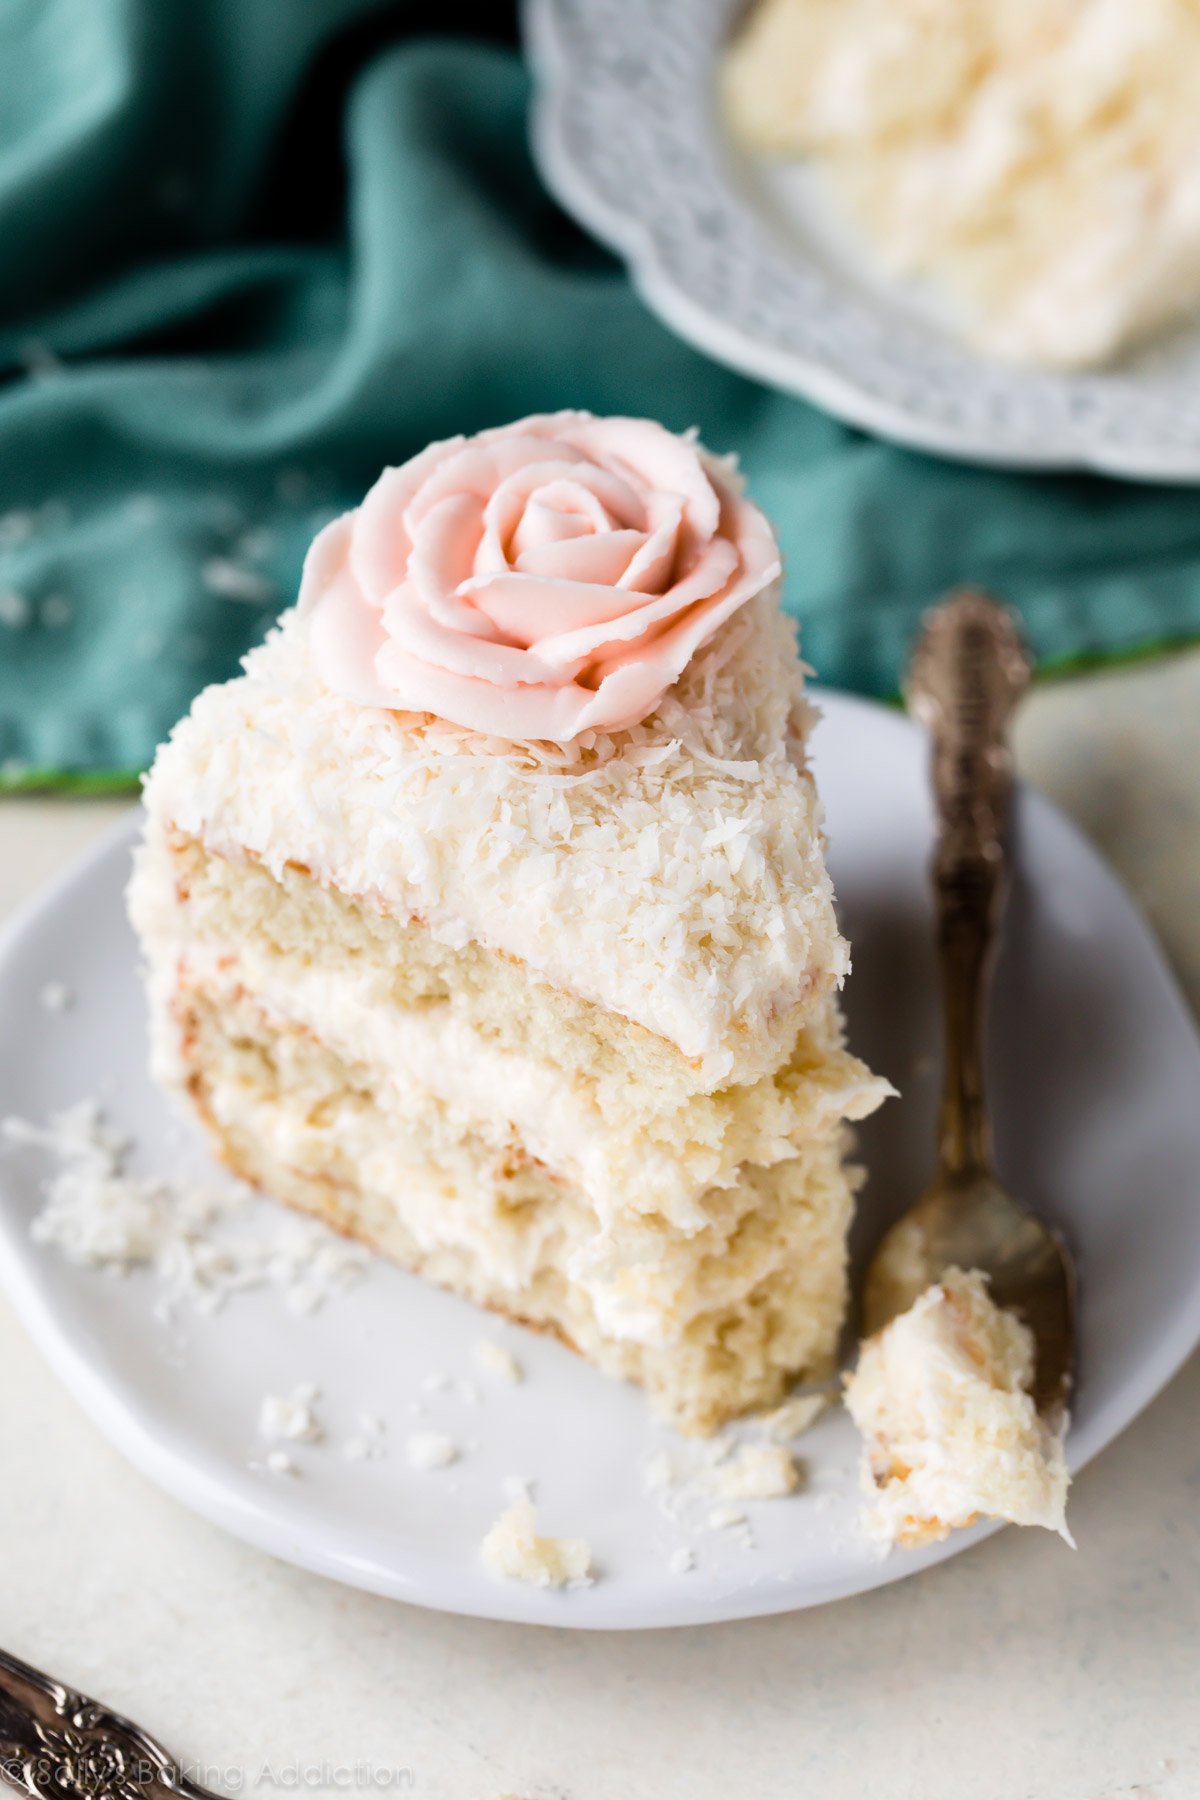
At the request of many readers, let me introduce you to the best coconut cake I’ve ever had. Homemade with love for coconut lovers everywhere, this cake exceeds my expectations. Complete with silky coconut cream cheese buttercream, she’s absolutely perfect and juxtaposes bold flavor with a light crumb.
I endlessly tested this cake recipe. In fact, I’m pretty sure my head turned into an actual coconut during the process. Is there shredded coconut caked into the crevices of my kitchen floor and backsplash? Yes.
5 Reasons to Love This Coconut Cake Recipe
- Not Dry: This coconut cake is mega moist. There’s no point wasting your time (or calories!) on dry cakes.
- Intensely Flavorful: Using coconut milk, shredded coconut, and coconut extract, you are guaranteed an intensely flavorful coconut cake.
- Soft & Fluffy: By following the recipe carefully, as well as using the power ingredients described below, you are guaranteed a soft-as-silk coconut cake crumb.
- Any Shape: Use this cake batter for coconut Bundt cake, coconut cupcakes, a 2-layer cake, 3-layer cake, or a coconut sheet cake.
- Gets Along With Everyone: Use the frosting recipe below or try strawberry frosting, lemon frosting, brown butter cream cheese frosting, champagne frosting, or chocolate buttercream. Add raspberry cake filling between the layers or drizzle salted caramel on top! With so many ways to customize, this coconut cake is always a crowd-favorite when looking for Easter dessert ideas.
Coconut Cake Video Tutorial
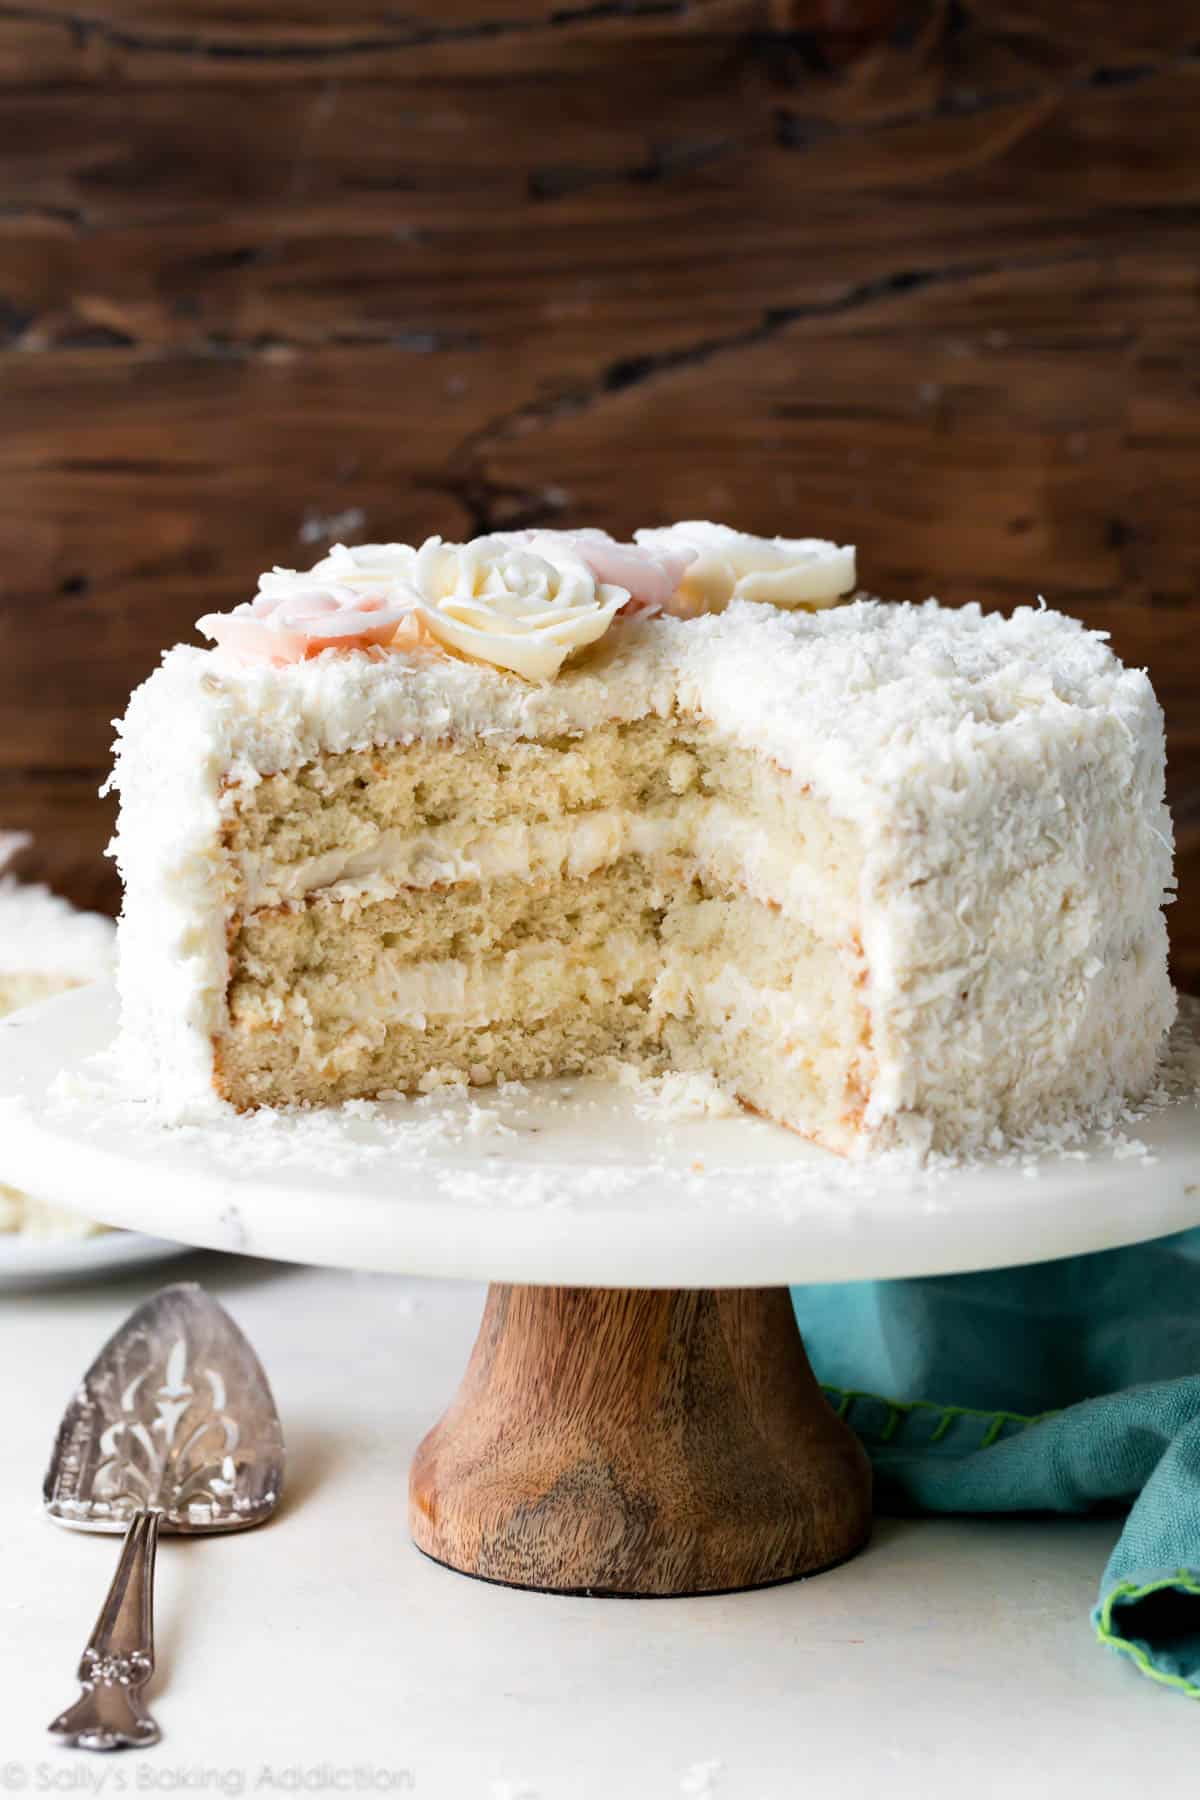
This recipe sets the bar for homemade cakes everywhere. It’s simply exquisite and is sure to be one of your favorite spring dessert recipes and Easter brunch recipes. Talk about a show stopper!
How to Make Coconut Cake
I adapted this recipe from my favorite white cake. Its pristine crumb, fluffy texture, and stick-to-your-fork moisture guarantee cake success. In fact, I have the recipe memorized and even used it as the base of pistachio cake, cookies & cream cake, espresso cake, burnt sugar caramel cake, and strawberry cake. The recipe is cake gold and I knew it would be the perfect starting point for a fluffy and moist coconut cake.
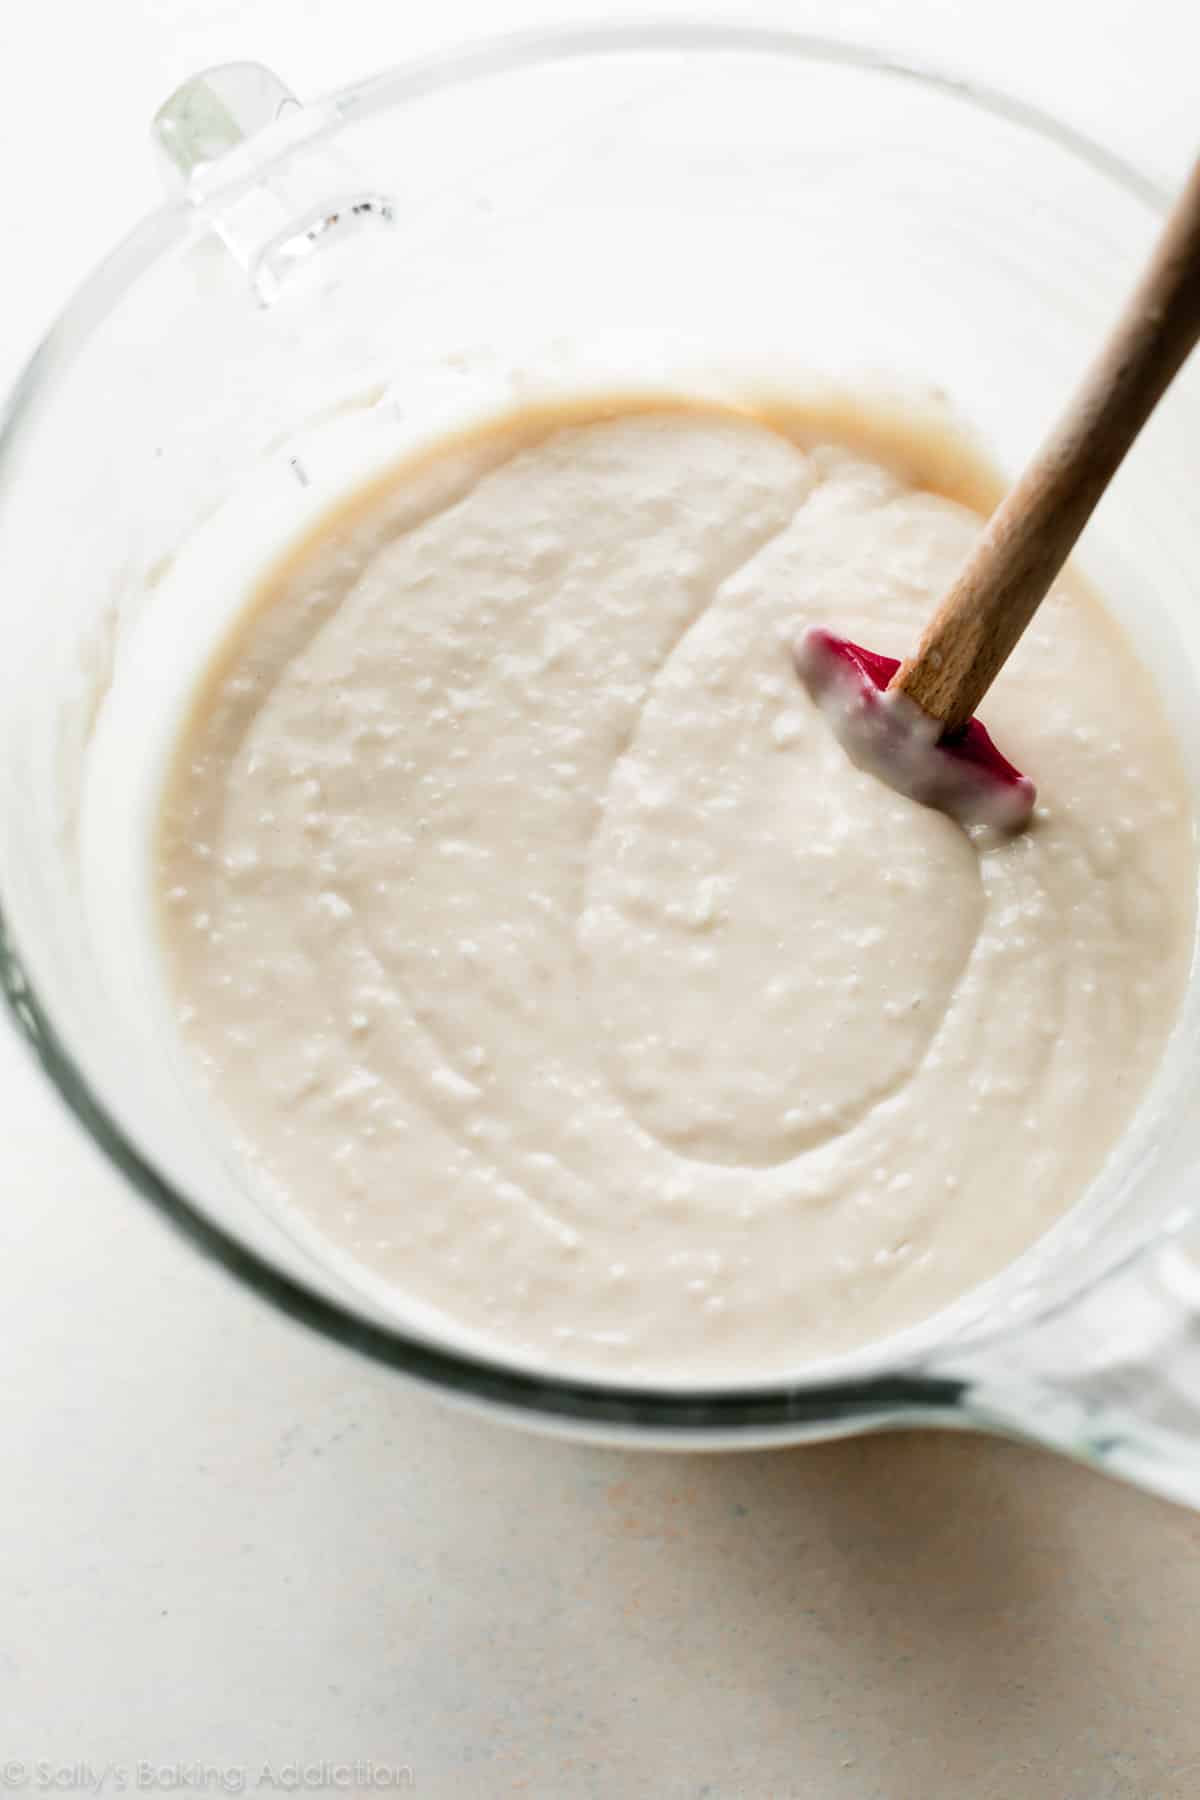
Your coconut cake journey begins with two mixing bowls. Dry ingredients in one and wet ingredients in another (see full recipe instructions below). Combine the two in your mixer, along with coconut milk and sweetened shredded/flaked coconut. That’s it! Your coconut cake batter is ready to bake.
Creamed butter and sugar provide a solid base for this cake recipe. Use room temperature butter, and remember that room temperature is cooler than you think.
Another tip: Use all room temperature ingredients, including the eggs and sour cream. Why? Ingredients bond together very easily when they’re warmer, which creates an evenly textured baked good. Cold ingredients do not emulsify together. Period.
Use These 6 Power Ingredients
Cake is literally nothing without its ingredients and these power players are the difference between dense dry cake and light moist cake.
- Cake Flour: Cake flour produces the softest cake. If you don’t usually buy cake flour, make the exception here. It’s sold in the baking aisle with the other flours. You can use leftovers in any of these cake flour recipes. If you can’t find it, try making this cake flour substitute.
- Egg Whites: Egg yolks are wonderful for moisture, but they’re heavy and weigh down cakes. We use whole eggs in my coconut Easter cake which is much more dense, like a pound cake. To keep this coconut cake light and fluffy, use only egg whites. We’ll add the moisture back in with sour cream.
- Sour Cream: The moist maker! This cake melts in your mouth.
- Coconut Extract: I tested this recipe with and without coconut extract. We loved it both ways, but coconut extract is necessary for best coconut flavor. It’s in the baking aisle near the vanilla extract.
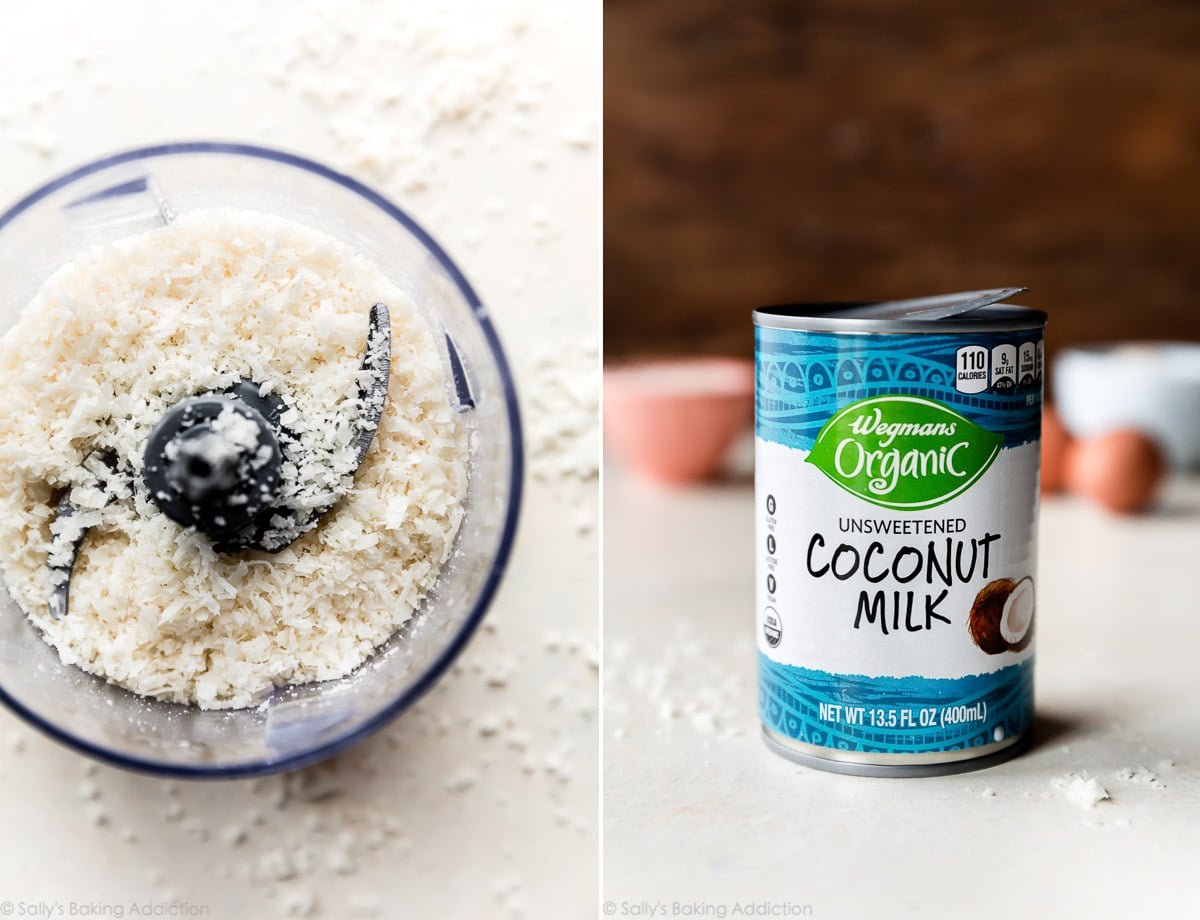
- Canned Coconut Milk: Canned coconut milk is a cooking ingredient, not a beverage. It’s creamier and thicker than regular milk and usually found near the Thai food products. Do not use the refrigerated coconut milk beverage that comes in a carton, because the two are very different.
- Sweetened Shredded Coconut: I recommend using sweetened shredded coconut, also called sweetened flaked coconut. It’s moister than unsweetened coconut and that makes a big difference in the cake’s texture. I reduced the added sugar in the cake batter to make up for the sweetness. Sweetened coconut is sometimes sold as long skinny shreds, a size some find off-putting in cake. Therefore, I recommend pulsing them in a food processor so they’re smaller.
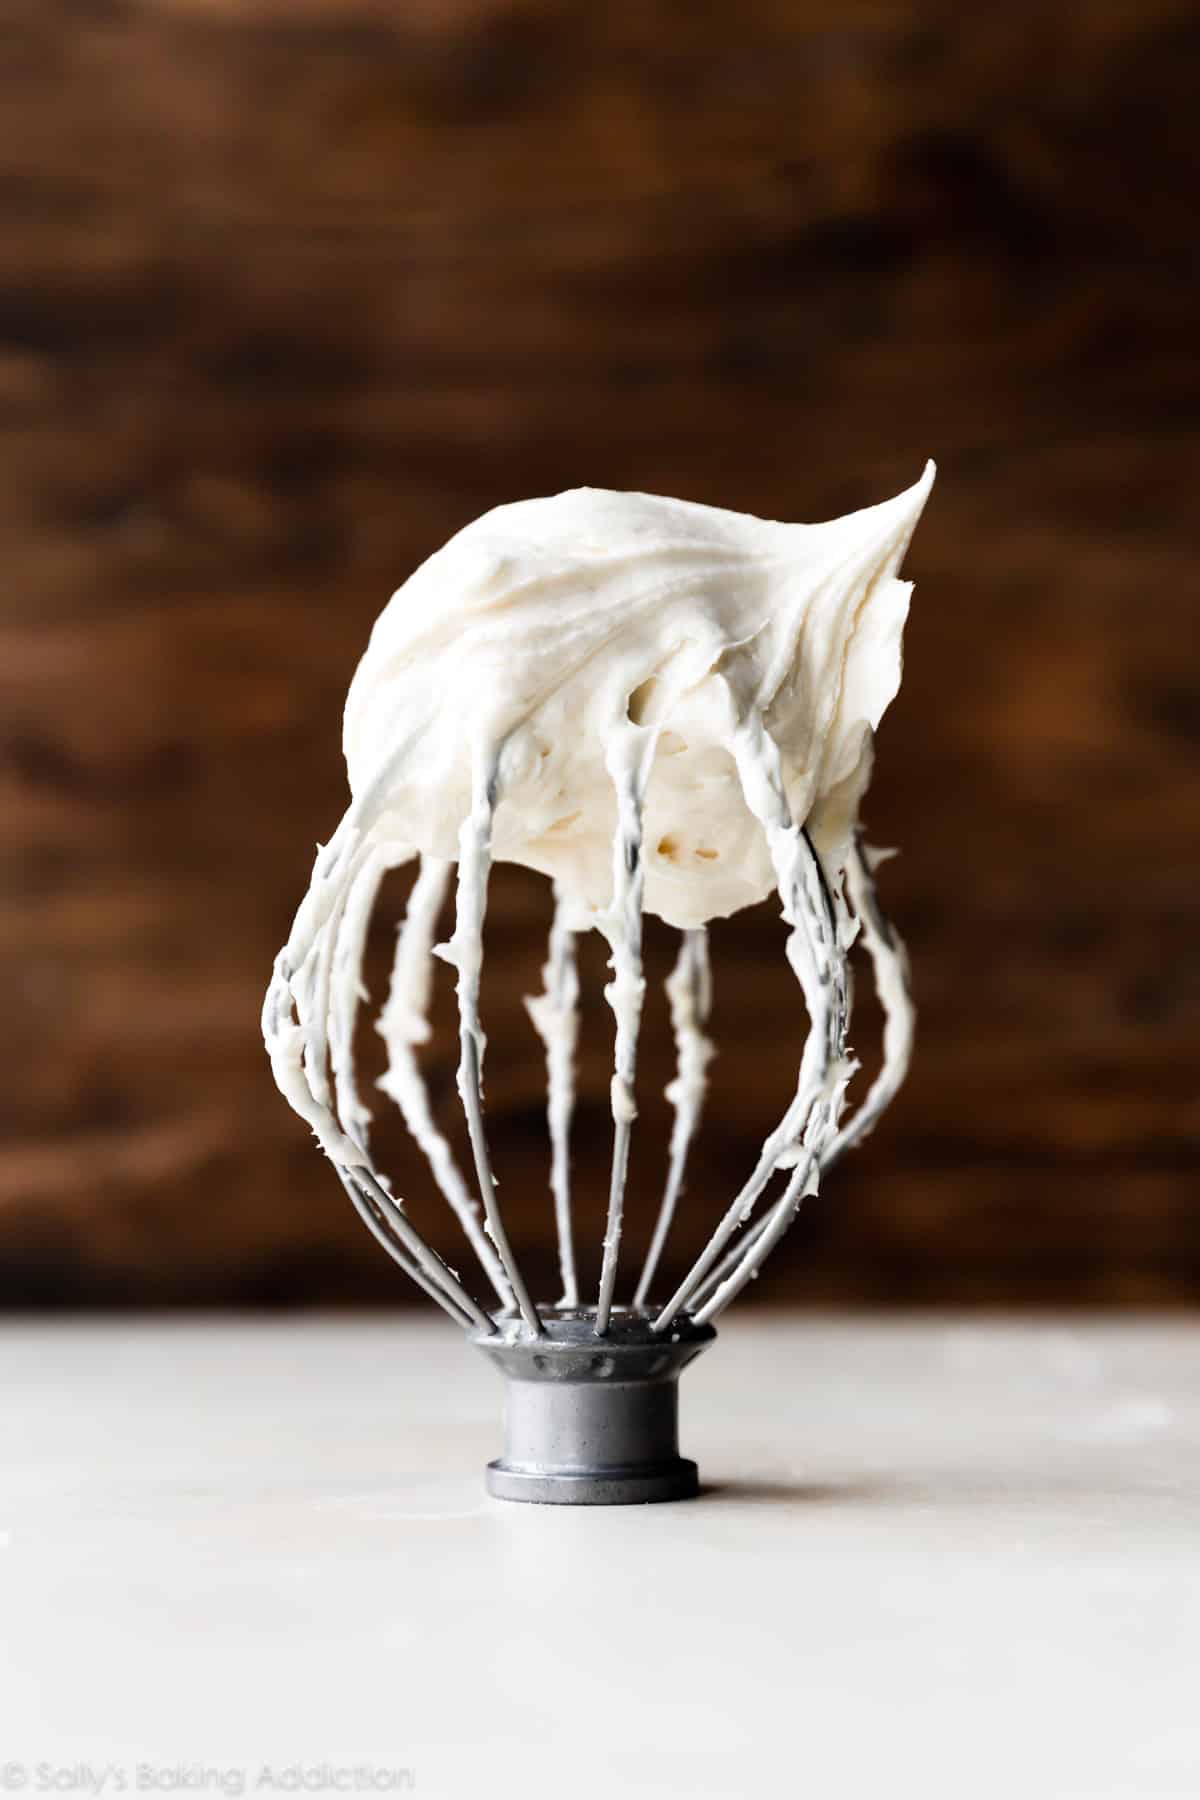
Coconut Cream Cheese Buttercream Frosting
What do you love about vanilla buttercream? It’s buttery, sweet, and smooth.
And what about cream cheese frosting? It’s creamy, silky, and tangy.
Let’s combine the two, then add coconut milk and coconut extract. It’s even creamier and silkier than the coconut frosting on these coconut chocolate Easter cupcakes so that glides onto the cake seamlessly. (Which is a happy bonus because decorating a layer cake can be quite the task. See more below.)
If you prefer a non-cream cheese option, use my vanilla buttercream instead—use canned coconut milk instead of milk and add 1/2 teaspoon coconut extract.
How to Frost a Layer Cake
Alright, let’s do this.
- Cool cakes completely. Sounds obvious, but even the tiniest bit of warmth will melt the frosting. As a result, the layer cake will slip, slide, or even cave in!
- If your cakes have a dome on top, level them off with a cake leveler or serrated knife. Flat-topped cakes ensure a straight and sturdy layer cake.
- Choose a serving plate, cake turntable, or cake stand. The exact cake stand I use in these pictures is no longer available, but here is a similar option.
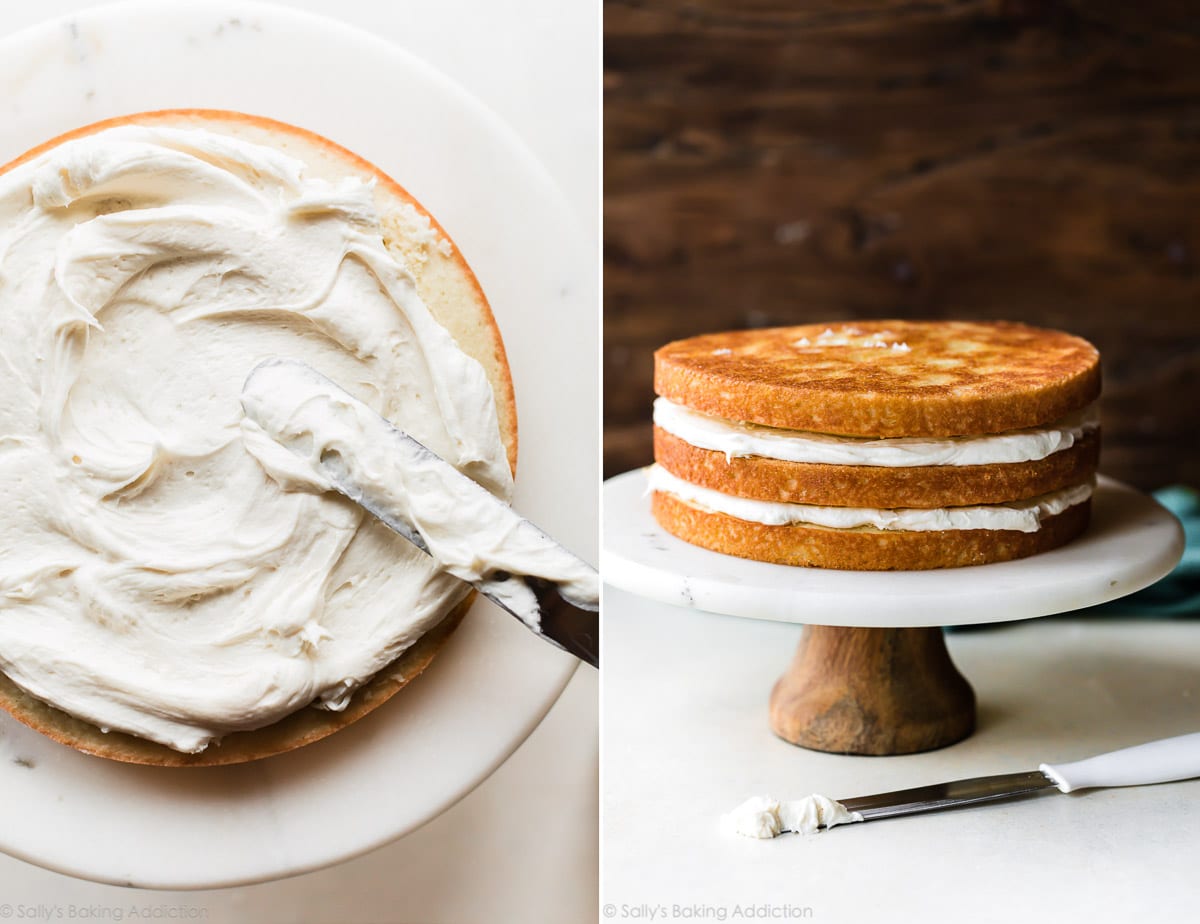
- Place the bottom layer on the cake stand. Using an icing spatula, spread 1 and 1/2 cups of frosting in an even layer on top. Bring the frosting just over the edge of the cake; this will be helpful when it’s time to frost the sides.
- Place the second layer top-side-down on top. Make sure it aligns with the bottom cake layer.
- Spread 1 and 1/2 cups frosting evenly on top, just as you did with the bottom layer.
- Place third layer top-side-up on top. Again, make sure it’s perfectly aligned.
- Divide the remaining frosting in half. (Just eyeball it.) Dollop half of the frosting on top of the cake and use an icing spatula to smooth it to the edges. Apply *some* of the remaining frosting all around the sides of the cake, then use a bench scraper to smooth it in a thin layer. Apply the rest of the frosting on the sides of the cake, then bench scrape to smooth it all out.
- Wipe any excess frosting off of the cake stand.
You can watch me decorate this coconut cake in the video tutorial above or you can use this detailed how to assemble and decorate a layer cake post as your guide. Don’t stress; if you take your time and make sure the cake layers are totally straight, you’re all set.
But I Don’t Want to
Skip the drama and make a coconut sheet cake instead! Sheet cakes are easier to frost because they’re only one layer. See my recipe note about different size coconut cakes.
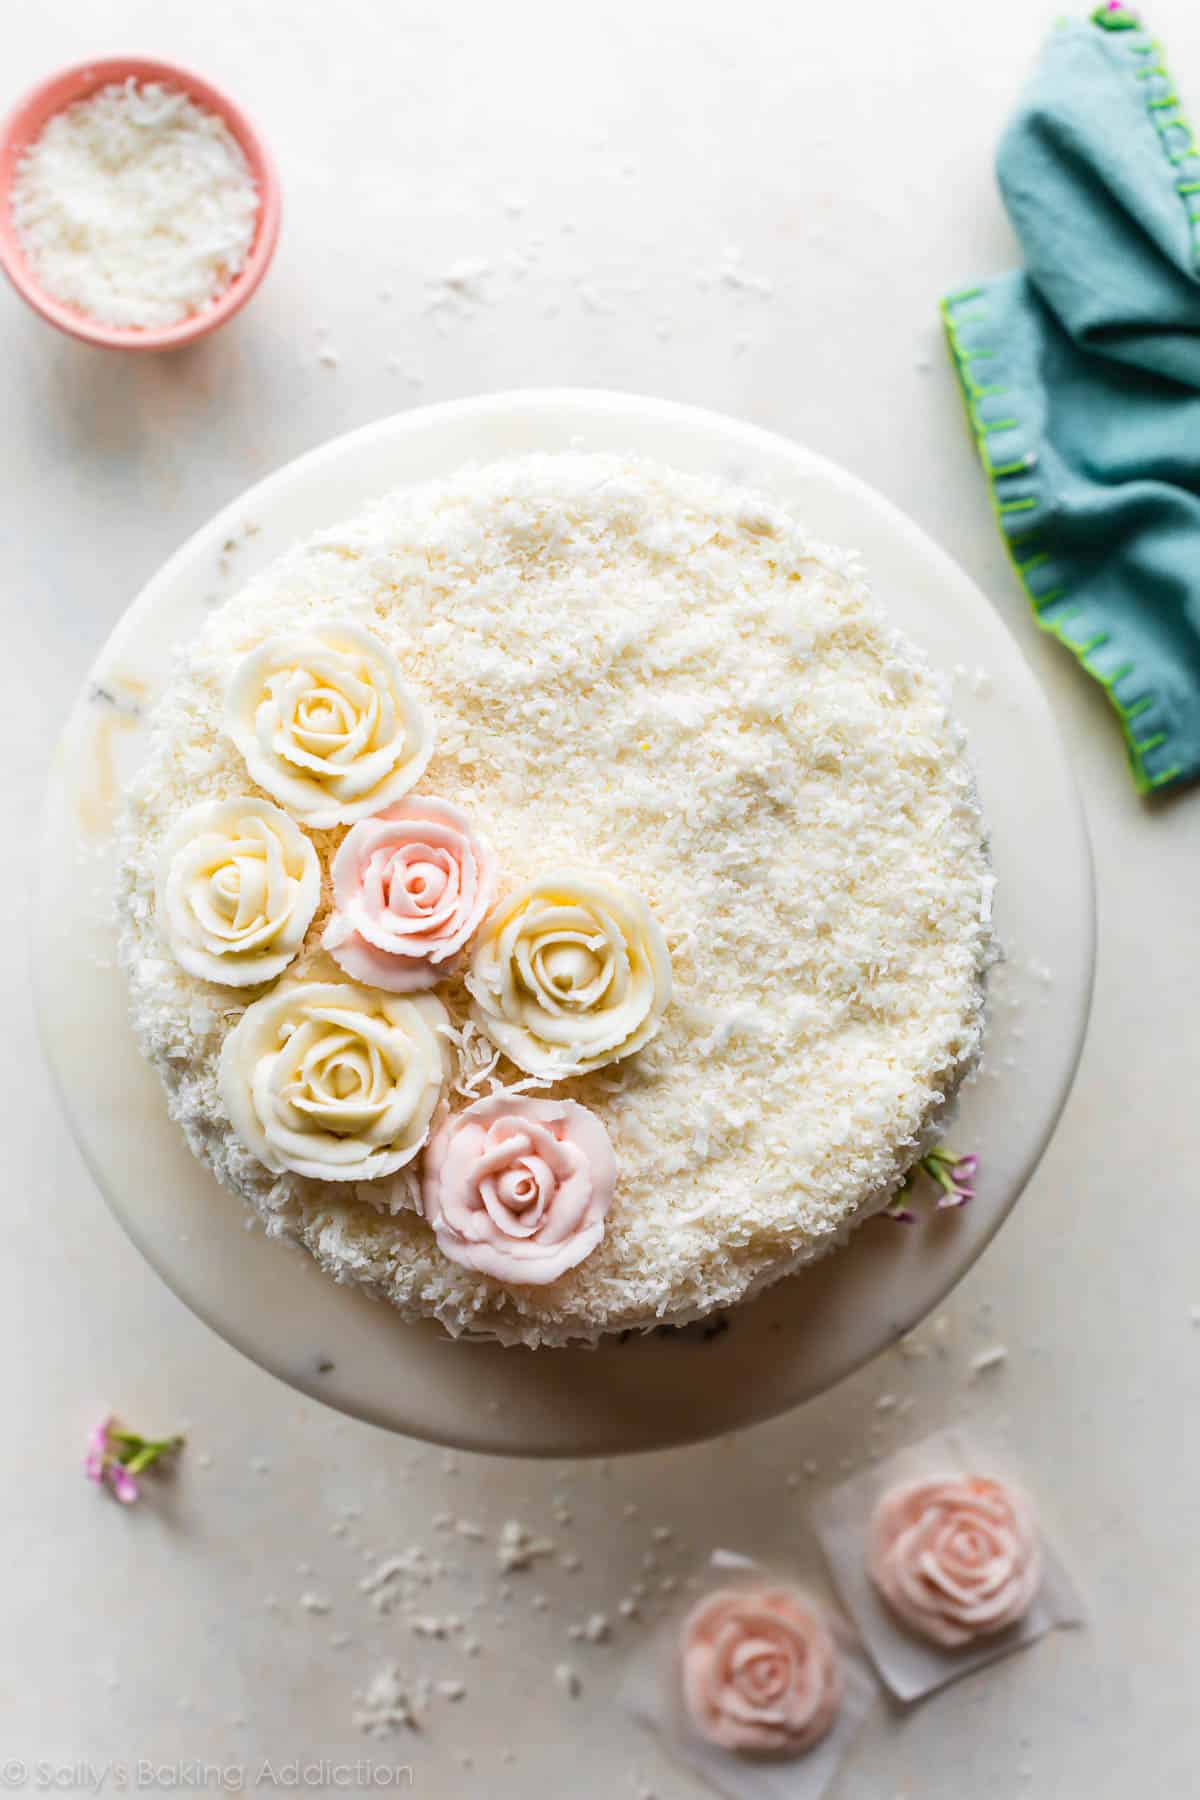
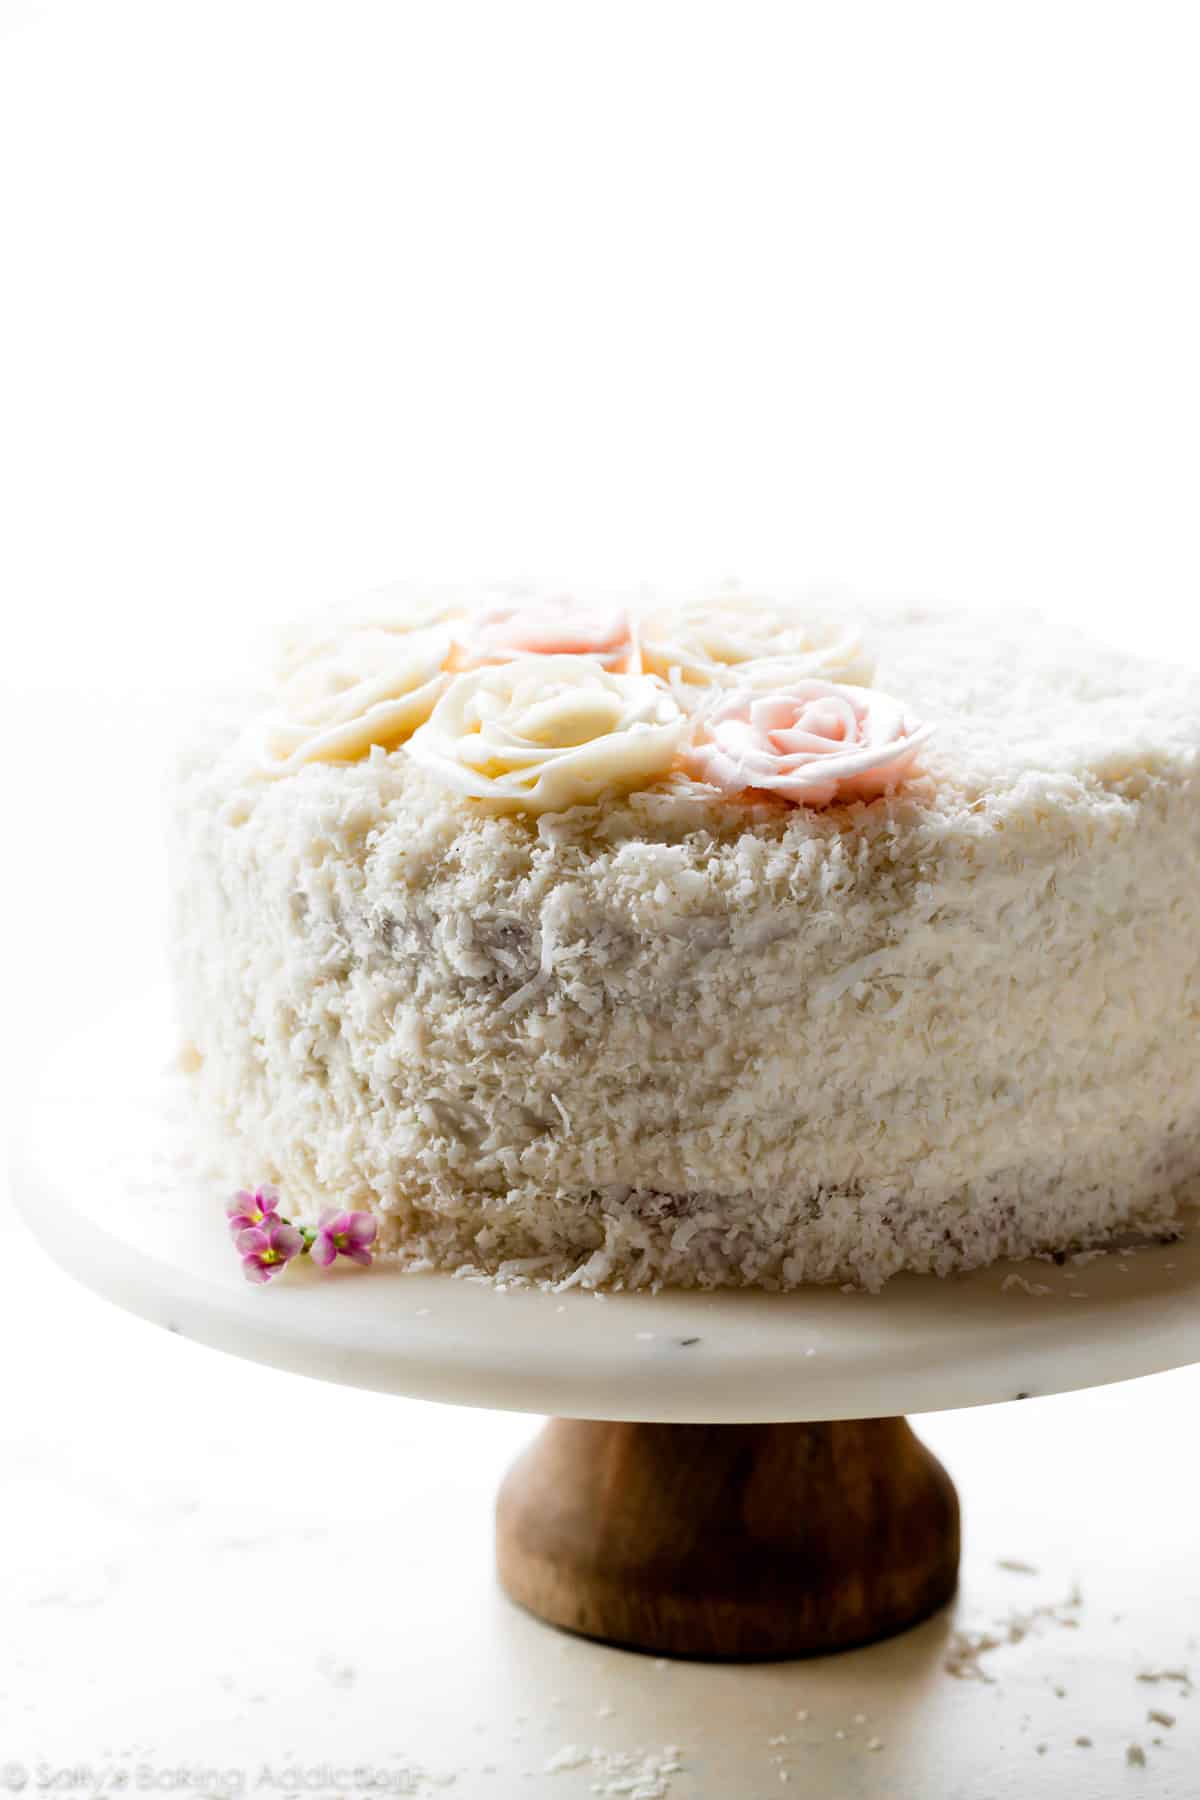
What About the Buttercream Roses?
Let’s give my assistant, Stephanie, a round of applause. This was her first time making “3D” buttercream roses and look how beautifully they turned out! She made the buttercream roses at my house and I froze them until it was time to decorate the coconut cake. She followed this video tutorial. Keep in mind that the cream cheese buttercream WILL NOT work for the intricate buttercream roses. Instead, use my vanilla buttercream and add 1 extra cup of confectioners’ sugar. You need very stiff buttercream for these roses. You also need small squares of parchment paper and:
Loosely cover the roses, then freeze or refrigerate them until ready to decorate, up to 1 week. No need to thaw prior to decorating the cake. Peel off parchment square and place the buttercream rose on the cake. If you’re traveling with the cake, I recommend securing the roses with a tiny dollop of cream cheese buttercream underneath.
Looking for something easier? Use Wilton 1M piping tip for these easy two-toned frosting buttercream roses.
More Classic Cake Recipes
Flavor is the name, moist is the game. These are some of my favorite classic cake recipes!
- Pound Cake
- Vanilla Cake
- Carrot Cake
- Red Velvet Cake
- Strawberry Cake (made from real strawberries)
- Lemon Blueberry Cake
- Chocolate Cake
Coconut Cake
- Prep Time: 35 minutes
- Cook Time: 22 minutes
- Total Time: 4 hours
- Yield: 12 servings
- Category: Dessert
- Method: Baking
- Cuisine: American
Description
This perfect coconut cake sets the bar for homemade cakes everywhere. It’s supremely moist with a soft fluffy crumb and intense coconut flavor. For success, follow this recipe carefully including using cake flour, egg whites, sour cream, and canned coconut milk.
Ingredients
- 2 and 1/2 cups (285g) cake flour (spooned & leveled)
- 2 teaspoons baking powder
- 1/2 teaspoon baking soda
- 1 teaspoon salt
- 3/4 cup (12 Tbsp; 170g) unsalted butter, softened to room temperature
- 1 and 2/3 cups (330g) granulated sugar
- 5 large egg whites, at room temperature
- 1/2 cup (120g) sour cream, at room temperature
- 2 teaspoons pure vanilla extract
- 1 teaspoon coconut extract
- 1 cup (226g/240ml) unsweetened canned coconut milk, at room temperature*
- 1 cup (80g) sweetened shredded coconut
Coconut Cream Cheese Buttercream
- 1 cup (16 Tbsp; 226g) unsalted butter, softened to room temperature
- 8 ounces (226g) full-fat brick cream cheese, softened to room temperature*
- 5 cups (600g) confectioners’ sugar
- 2 Tablespoons (30ml) canned coconut milk
- 1/2 teaspoon pure vanilla extract
- 1/2 teaspoon coconut extract
- 1/8 teaspoon salt
- 2 cups (160g) sweetened shredded coconut
Instructions
- Preheat oven to 350°F (177°C). Grease three 8-inch cake pans, line with parchment paper rounds, then grease the parchment paper. Parchment paper helps the cakes seamlessly release from the pans. (If it’s helpful, see this parchment paper rounds for cakes video & post.)
- Make the cake: Whisk the cake flour, baking powder, baking soda, and salt together. Set aside.
- Using a handheld or stand mixer fitted with a paddle or whisk attachment, beat the butter and sugar together on medium-high speed until smooth and creamy, about 2 minutes. Scrape down the sides and up the bottom of the bowl with a rubber spatula as needed. Beat in the egg whites until combined, then add the sour cream, vanilla extract, and coconut extract. Beat until combined. Mixture will look curdled as a result of the varying textures and solid butter combining. Scrape down the sides and up the bottom of the bowl as needed. With the mixer on low speed, slowly add the dry ingredients and coconut milk. Beat on low speed until combined, then add the shredded coconut. Whisk it all by hand to make sure there are no butter lumps at the bottom of the bowl. The batter will be slightly thick.
- Pour batter evenly into cake pans. Weigh them to ensure accuracy, if desired. Bake for 21–24 minutes or until the cakes are baked through. To test for doneness, insert a toothpick into the center of the cake. If it comes out clean, it’s done. Allow cakes to cool in the pans set on a cooling rack for 1 hour, then remove from the pans and place the cakes directly on the rack to continue cooling. The cakes must be completely cool before frosting and assembling.
- Make the frosting: In a large bowl using a handheld or stand mixer fitted with a whisk or paddle attachment, beat the butter and cream cheese together on medium speed until creamy and smooth, about 2 minutes. Add confectioners’ sugar, coconut milk, vanilla extract, coconut extract, and salt with the mixer running on low. Increase to high speed and beat for 3 minutes. Add more confectioners’ sugar if frosting is too thin, more coconut milk if frosting is too thick, or an extra pinch of salt if frosting is too sweet.
- Assemble and decorate: Using a large serrated knife, slice a thin layer off the tops of the cakes to create a flat surface. Discard (or crumble over ice cream!). Place 1 cake layer on your cake stand, cake turntable, or serving plate. Evenly cover the top with 1 heaping cup (about 250–300g) of frosting. Top with second cake layer and evenly cover the top with another heaping cup of frosting. Top with the third cake layer. Spread the remaining frosting all over the top and sides. I use and recommend an icing spatula to apply the frosting and a bench scraper to smooth the sides. Sprinkle coconut on top of the cake and apply it to the sides. This can get a little messy and you can watch me do it in the video tutorial. See blog post above about buttercream rose decoration.
- Refrigerate cake for at least 20 minutes before slicing. This helps the cake hold its shape when cutting, though it’s still a pretty fluffy cake!
- Cover leftover cake tightly and store in the refrigerator for up to 5 days.
Notes
- Make Ahead & Freezing Instructions: The cake layers can be baked, cooled, and covered tightly at room temperature overnight. Likewise, the frosting can be prepared, then covered and refrigerated overnight. When ready to decorate, let the frosting sit at room temperature to slightly soften for about 15 minutes, then give it one more mix with the mixer on medium speed for about 1 minute before frosting cake. Frosted cake or unfrosted cake layers can be frozen for up to 2–3 months. Thaw overnight in the refrigerator and bring to room temperature before decorating/serving.
- Special Tools (affiliate links): 8-inch Cake Pans | Electric Mixer (Handheld or Stand Mixer) | Glass Mixing Bowls | Whisk | Cake Stand or Cake Turntable | Icing Spatula | Bench Scraper | Cake Carrier (for storing)
- Cake Flour: For the best results, I strongly recommend cake flour. You can find cake flour in the baking aisle and I have many more recipes using it. If you can’t find it, try making this cake flour substitute.
- Egg Whites: Egg whites (no yolks) are KEY to the cake’s fluffy texture. For best success, I recommend using fresh eggs instead of carton egg whites. (Using an egg separator is really handy!) Here are all my recipes using leftover egg yolks. Success tip: Eggs separate much easier when they’re cold.
- Canned Coconut Milk: Canned coconut milk is a cooking ingredient, not a beverage. It is usually unsweetened, so make sure you’re using unsweetened. It’s usually found in the grocery store near the Thai food products. Do not use refrigerated carton coconut milk beverage. You need 1 cup for the cake, not the entire can. You use 2 more Tablespoons in the frosting.
- Sweetened Shredded Coconut: I recommend using sweetened shredded/flaked coconut. It’s moister than unsweetened coconut and that makes a big difference in the cake’s texture. If desired, pulse the coconut shreds in a food processor to chop them up so they aren’t as long inside and outside of the cake. Chopping the coconut is optional.
- Cream Cheese: Use brick cream cheese, not cream cheese spread. If desired, you can use this vanilla buttercream instead (no cream cheese). Use canned coconut milk instead of milk and add 1/2 teaspoon coconut extract.
- 9×13-Inch Sheet Cake: Simply pour the batter into a greased and lightly floured 9×13-inch pan and bake for 40 minutes or until a toothpick inserted in the center comes out clean.
- 2-Layer Cake: Prepare two 9-inch cake pans in step 1. Divide batter between pans and bake for 24–26 minutes or until a toothpick inserted in the center comes out clean.
- Bundt Cake: This cake batter will fit into a greased 10-cup or larger Bundt pan. I’m unsure of the exact bake time (likely around an hour); use a toothpick to test for doneness. Same oven temperature.
- Cupcakes: Fill cupcake liners 2/3 full. Bake at 350°F (177°C) for 19–21 minutes. Yields about 2–3 dozen. Or try my vanilla cupcakes recipe and substitute canned coconut milk for whole milk, 1/2 teaspoon coconut extract for the vanilla bean, and add 3/4 cup (60g) of sweetened shredded coconut.
- Why is everything at room temperature? All refrigerated items should be at room temperature so the batter mixes together easily and evenly. Read more about the importance of room temperature ingredients.


Reader Comments and Reviews
This cake is delicious. The coconut flavoring is just enough. Even friends who don’t care much for coconut loved it. I used only half of the shredded coconut on the frosted cake. Just remember to take your cake out of the refrigerator an hour before serving – I forgot that step and we impatiently waited to eat it. Sally, I would just like to say that I love your videos in your recipes. I’m a visual person and find them so helpful.
Hello Sally!
I made your coconut cake recipe for a wedding themed event for our Wine Club that my husband and I were hosting last week. I made all the desserts for the event and not a piece of any of it was left. Particularly impressive was the coconut cake. Thought you might like to have a picture of it.
Best regards,
Karen B.
Jacksonville, FL
I’m struggling to source sweetened shredded coconut in the UK. Can I use anything as an alternative?
Hi Lucia, you can use unsweetened coconut without any other changes. The cake will still be plenty sweet!
I want to use my two nordicware 6” round cake pans. Have you ever tried with the smaller pans? I say nordicware because they are a bit more of a heavy wall, and not dark pans. Anyway, let me know if you get the chance.
Hi Lynne, This would be too much batter for 6 inch pans, so we recommend using our coconut cupcakes batter for three 6 inch cake pans (if you only need two layers, freeze the third for later!). (Skip the caramel filling and chocolate frosting.) Follow the baking instructions for 6 Inch Cakes and you can halve this frosting recipe instead. Happy baking!
The first time I made this cake it was absolutely delicious! The second time I made this cake it was dense, not light and fluffy like it was the first time. I used the weighted measurements so unless I measured wrong, I don’t believe that was the issue. Could I have over mixed? Or over baked? What would cause it to lose its fluffy texture? I want to make it again, but I wish I knew what I did wrong the second time!
Hi Emily, if the cake seemed dense, it’s likely that the batter was over mixed. An easy fix for next time!
Wow this was amazing!!! So moist, light and fluffy.
I love the cake so much that I was wondering if I ever wanted to make a vanilla version of cake with the coconut cream for a special flavor (and keep all other ingredients) but omit the shredded coconut and coconut extract, would that elimination mess up the consistency?
Thanks so much!!
Hi Caroline, we can’t see why not! So glad you love this cake.
This cake is amazing. I made it for my mom’s birthday and everyone loved it. I made 2 9 inch cakes and then chilled them and cut them in half to make 4 smaller ones. SO GOOD. The frosting is amazing- I would recommend doubling it if you plan on piping some decoration. I also did less powdered sugar, maybe 4 cups for double everything else. It’s still super sweet. Amazing recipe!!!!
I have been baking my entire life (since I was 5!) and this is the best cake I have ever made.
What a fabulous recipe. The buttercream cream cheese icing is amaaaaazing!
Yum!
This cake is SPECTACULAR!!! I am definitely more of a cook than a baker, but wanted to replicate a coconut cake I had from a fancy bakery, so I tried this and it was relatively easy to make and turned out so well that my family is now requesting it 🙂
QUESTION: Would this work in an 18″ x 13″ x 1″ half sheet pan? Asking because it would be a big thin rectangle that I could cut 3×2 and end up with six 6″ x 6.5″ pieces. (aiming for two small rectangle 3 layer cakes.) Hope I explained that well.
Hi Kate! So glad you love this cake. Here is everything you need to know about converting recipes to different Cake Pan Sizes. This cake recipe yields about 7-8 cups of batter.
Thanks!
Would it be possible to bake this in a loaf pan?
Hi Des, You could bake this cake batter in loaf pans (fill about half way). Same temperature, but we’re unsure of the exact bake time needed. Keep a close eye on it and use a toothpick to test for doneness.
Thank you!
Could I double this or would I get a better result by mixing each batch separately
We recommend making separate batches, Kate!
Why are egg whites used in the Fluffy and Moist Coconut Cake and whole eggs in the Lemon Coconut Cake? I want to make the coconut /lemon curd cake…But. I want my cake to be fluffy and moist too 🙂
I am a fan of your recipes!
Hi Debbie, we use only egg whites here for a pristine white color and a light and fluffy texture. The lemon coconut cake is ever so slightly denser and benefits from the extra moisture and support of whole eggs. Both are still wonderfully fluffy and moist!
i,ve made this recipe a few times for my cake buisness and it is absolutely the most amazing cake . light fluffy and moist i,ve had so many compliments
definitely a staple recipe in my cake menu
Hey Sally! I need to make this GF. Should I keep everything the same with the exception of the flour? My niece has a bday coming up and she requested a. GF coconut cake. I’ve been using your recipes for a long time now and you’ve never steered me wrong. What are your recommendations?
-a loving uncle
Hi David, we haven’t tested a gluten free version of this recipe, but some readers have reported success using 1:1 flour substitutes (like Cup4Cup). If you try it, let us know how it goes!
Should I toast the coconut before putting it in the cake?
Hi Annie, we would not advise adding toasted coconut to the batter since the texture would be a little hard. You could absolutely decorate the cake with toasted coconut if you wish!
While baking this cake for the second time, I accidentally used Almond Extract instead of Coconut. Dare I say it was even better.
I’ve never had or made a coconut cake before – this one is perfect! The flavor is light, not overpowering coconut. Thank you for all of the cake options too – I made a 2 layer 9″ cake.
This is mine and my husband’s absolute favorite cake! I was wondering though if this could be made with fresh coconut?
Hi Sally! What to do when I have only one cake pan?
Hi Alesia! You can use your one pan to bake the cake in two or three layers, leaving the extra batter sitting covered at room temperature until your pan is ready to use again.
I get wildly different amounts if I measure or weigh the flour. I know it’s a bit different, but even fluffing and spooning the flour, about 1 and 3/4 cups of cake flour is giving me 285g and I’m not sure which I should go with and which will effect other ingredient quantities?
What would you suggest?
Hi Amanda, the weights are always the most accurate!