

Even if you’ve never made homemade bread or worked with yeast before, this homemade crusty artisan bread is for you. It’s the perfect beginner recipe because it only requires 4 ingredients without any special pans or mixer, there’s no kneading or complicated shaping involved, and 95% of the work is hands-off. Bread masters will appreciate this recipe too because it delivers with delicious flavor, a slightly crisp and mega chewy crust, and those signature soft holes inside like ciabatta or French bread.
Bread Beginners—Start Here
Have you ever wanted to master homemade bread? Real, crusty, chewy, delicious bakery-style loaves that taste incredible with dips, soups, sauces, and comforting dinners? This is where you start. This artisan bread recipe is for beginners, but even bread masters will appreciate its flavor and ease. It’s so fresh, so flavorful, and so surprisingly easy because it basically makes itself.
You only need 4 ingredients without any special pans or mixer, there’s no kneading, no poolish or dough starter required, and you can add herbs, cheeses, and spices to make a variety of bread flavors.
This base recipe will soon be on repeat in your kitchen. After you realize how easy it is to make real homemade bread, you’ll find any excuse to bake a loaf. You can even turn it into garlic bread and homemade croutons.

What is Homemade Artisan Bread?
When it comes to bread, the term “artisan” doesn’t mean 1 particular thing. But, generally, artisan bread is homemade, fresh, crusty, and deliciously rustic-looking. An artisan is a skilled worker, one who works with their hands. But ironically, there isn’t much “work” involved with this recipe.
Why You’ll Love This Bread Recipe
- Easier than you ever imagined
- Soft + flavorful
- Chewy, slightly crisp crust
- Shape however you want
- No special pans, poolish, or dough starter required
- Only 4 ingredients
- You decide the length of time it rests
One reader, Mena, commented: “Wow! I had never made bread until I tried this recipe. Followed instructions carefully and watched the video. Beautiful golden crust and airy center. It was delicious! Thank you, Sally! ★★★★★”
Another reader, Marliz, commented: “Love the bread and I really enjoy the flexibility of leaving the dough in the refrigerator. Will definitely make this on the regular! No need to carefully plan rising times with cooking and eating times. Just prepare a few days ahead and put it in the refrigerator. Works so well! Very easy and tasty. I kept it as one big loaf. ★★★★★”
Another reader, ACM, commented: “One word: Outstanding! Fantastic recipe and can accommodate your favorite herbs and spices, nuts and fruit, or cheese. Make one! ★★★★★”
Like sandwich bread, whole wheat bread, focaccia, homemade English muffins, seeded oat bread, and homemade bagels—the process is surprisingly easy. If you’re new to yeast, reference my Baking with Yeast Guide for answers to common yeast FAQs.
Only 4 Ingredients
The crustier and chewier the bread, the less fat in the dough—also known as a “lean dough.” We’re using a lean dough for our artisan loaf today. (If you’re curious, a “rich dough” is a soft bread dough with the presence of fat, such as butter and eggs—the kind we need for overnight cinnamon rolls, sweet potato dinner rolls, brioche, and honey butter rolls.) Without fat, we’re left with the basics.
- Bread Flour: While you can use all-purpose flour in this recipe, I strongly recommend using bread flour. Just like when we make olive bread, pizza bread, and asiago-crusted skillet bread, bread flour produces a stronger, chewier bread and that makes a big difference in a recipe with only 3 other ingredients.
- Instant Yeast: Instant yeast is key in this recipe. While you can use active dry if that’s all you have, any quick rise or instant yeast will produce flavorful results in less time. I use more yeast in this recipe compared to my cranberry nut no-knead bread and no-knead jalapeño cheddar bread. Why? Those doughs rest and rise at room temperature. However, for more flavor and just as much rise, I use more yeast and let this dough rest in the refrigerator. (Cool air slows the fermentation process.)
- Salt: You can’t make good bread without salt and for best flavor, I recommend a coarse salt, such as coarse sea salt. I find the bread’s flavor lacking with regular table salt.
- Water: I normally encourage you to use warm liquid with yeast because warm liquid helps the yeast work faster. However, use cool or room temperature water here. Not freezing cold, not super warm—cool to touch. 70°F (21°C) is great, but the exact temperature doesn’t matter as long as it’s not hot or warm. The cooler the water, the longer the dough takes to rise and, usually, the better the bread’s flavor. (This is important since there are so little ingredients to add substantial flavor!) We use the same cool water method for no knead honey oat bread.
- Optional Cornmeal: Dusting the pan with cornmeal adds a pop of flavor and a little crunch to the bottom crust. This is completely optional. If you have it, use it. If you don’t have it, don’t worry about it.
You can also add herbs and seasonings such as garlic, rosemary, dill, chopped onion, jalapeño, shredded cheese, chopped nuts, dried cranberries, etc. My no yeast bread is the quick bread alternative here—you can add flavors to that loaf, too!
Baker’s Tip: Avoid adding too much flour to the dough as you work with it. The stickier it is—and the longer it sits in the refrigerator—the more likely you’ll have those big airy pockets of air in the crumb.
How to Make Homemade Artisan Bread in 5 Steps
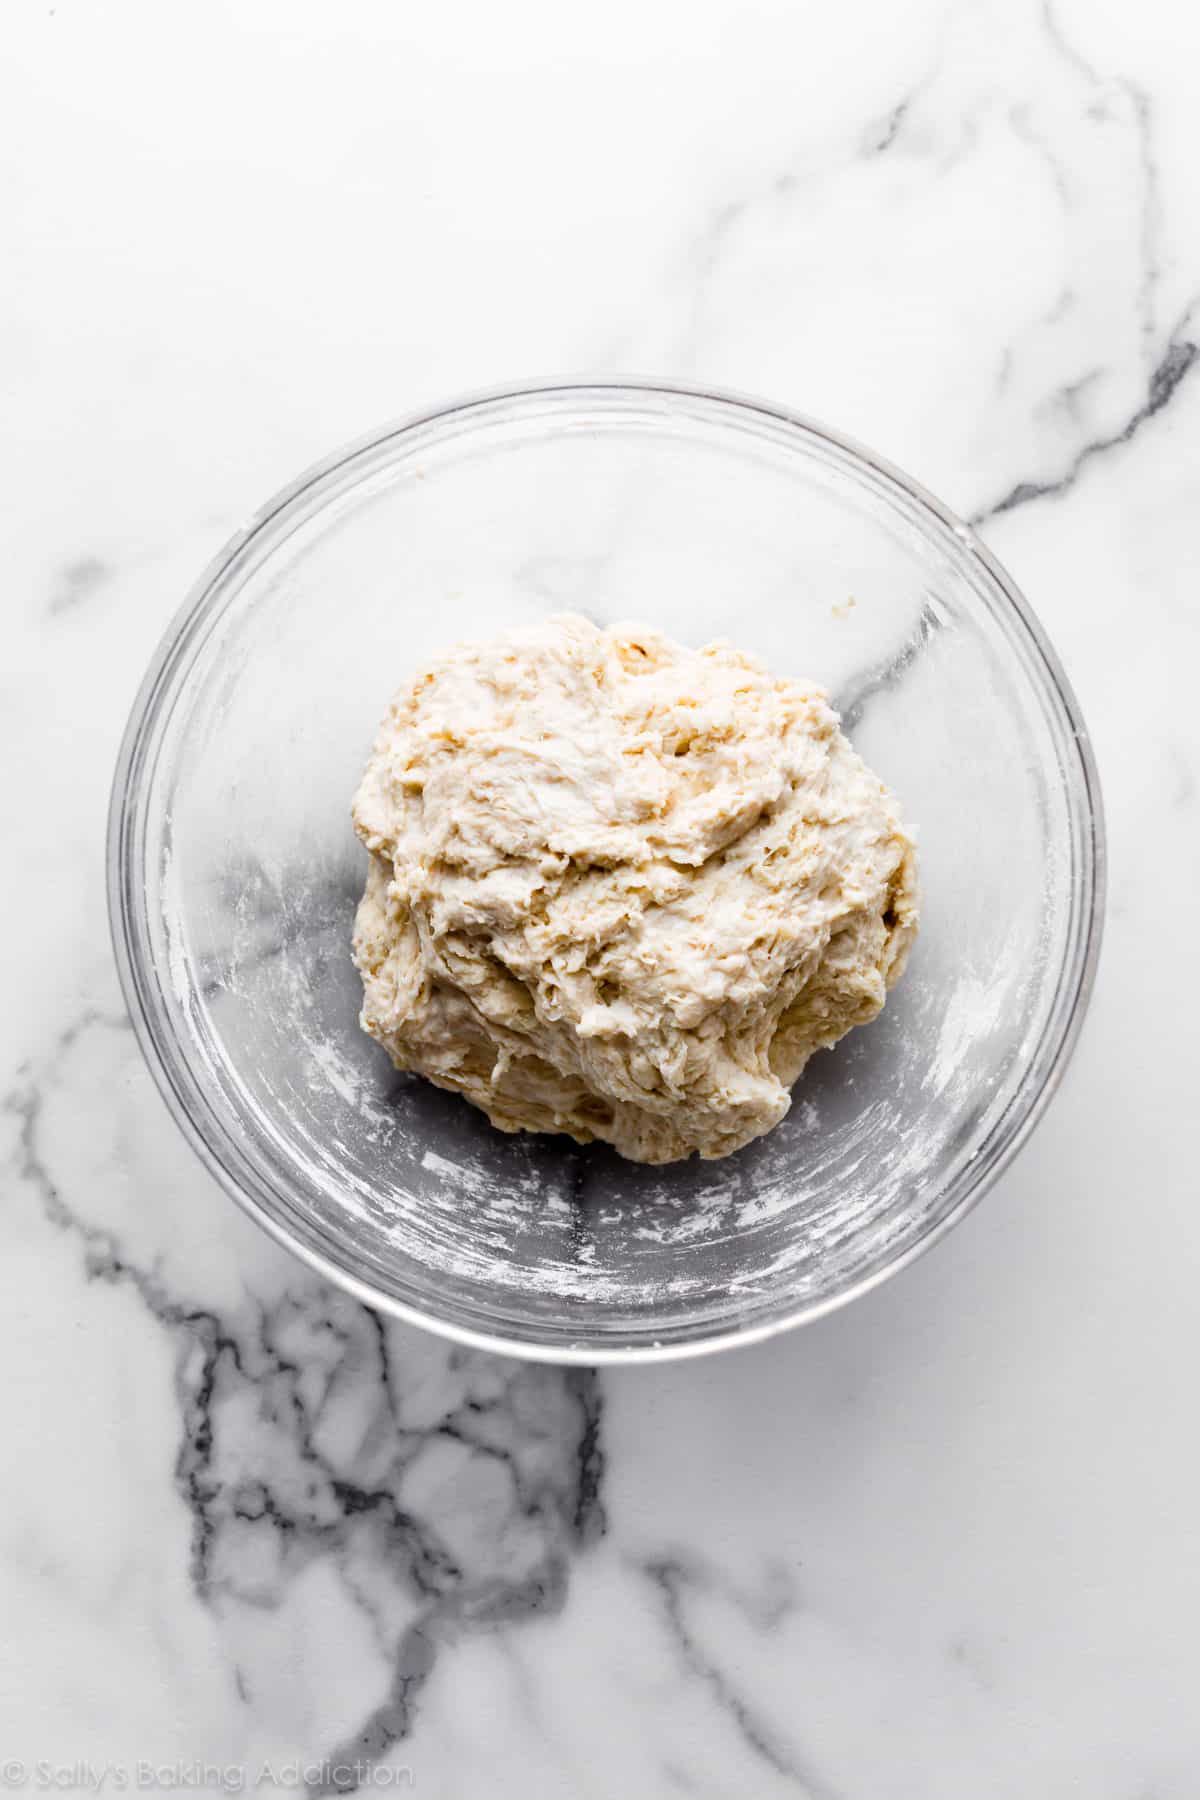
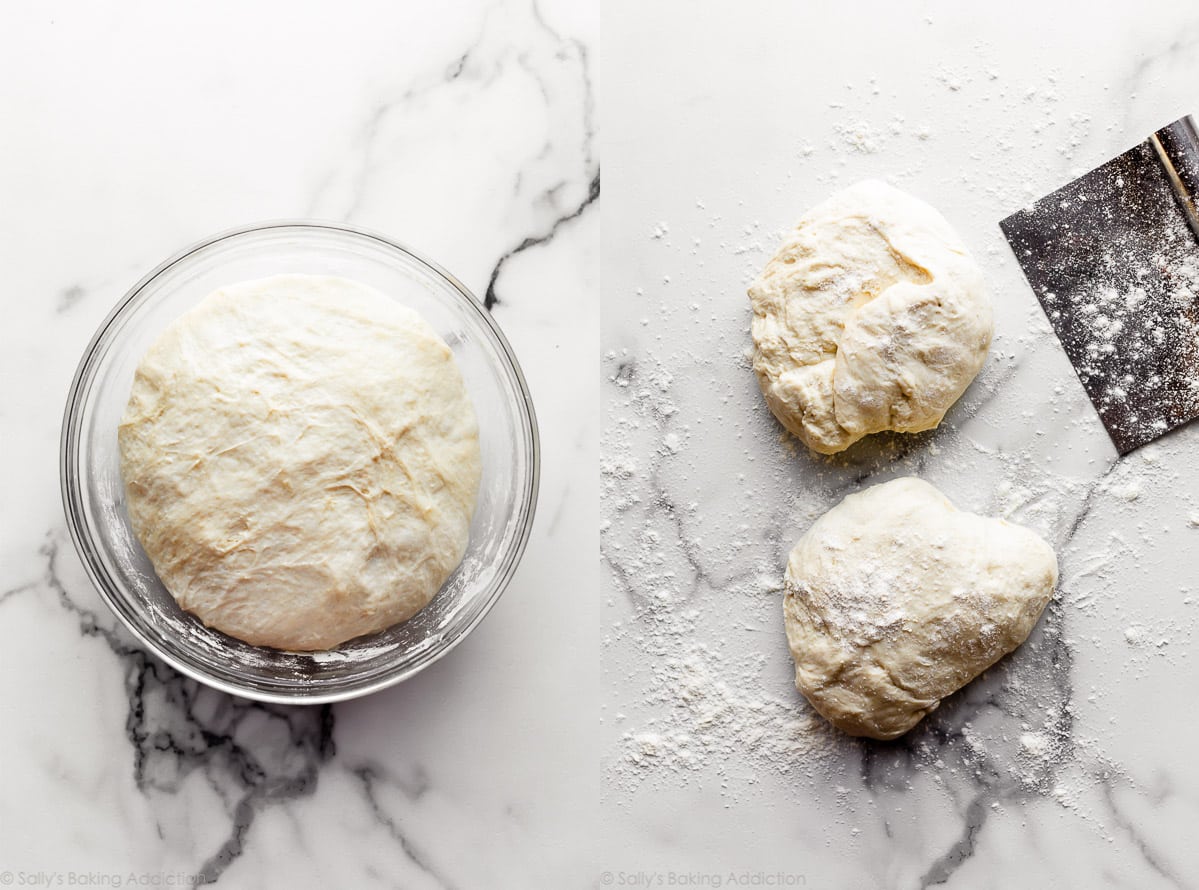
- Mix the dough ingredients together. At first the dough will seem very dry and shaggy and you’ll question if it will even come together. But it will. Use a spatula at first, then switch to your hands to ensure all of the flour is moistened. The dough is actually a little sticky after it’s thoroughly mixed.
- Let it rise at room temperature for 2-3 hours. Cover the dough and let it rise at room temperature for about 2-3 hours until doubled in size.
- Use right away or refrigerate. After 2-3 hours, you can immediately continue with the next step. However, for ideal flavor and texture, I strongly recommend letting the dough sit in the refrigerator for at least 12 hours and up to 3 days. Yes, 3 full days! I usually only let it rest for about 18 hours. During this crucial step, the cold air slows the fermentation process and adds so much flavor and texture. So, you can bake bread in 2-3 hours or in 3 days. The longer it sits, the better it tastes. 🙂
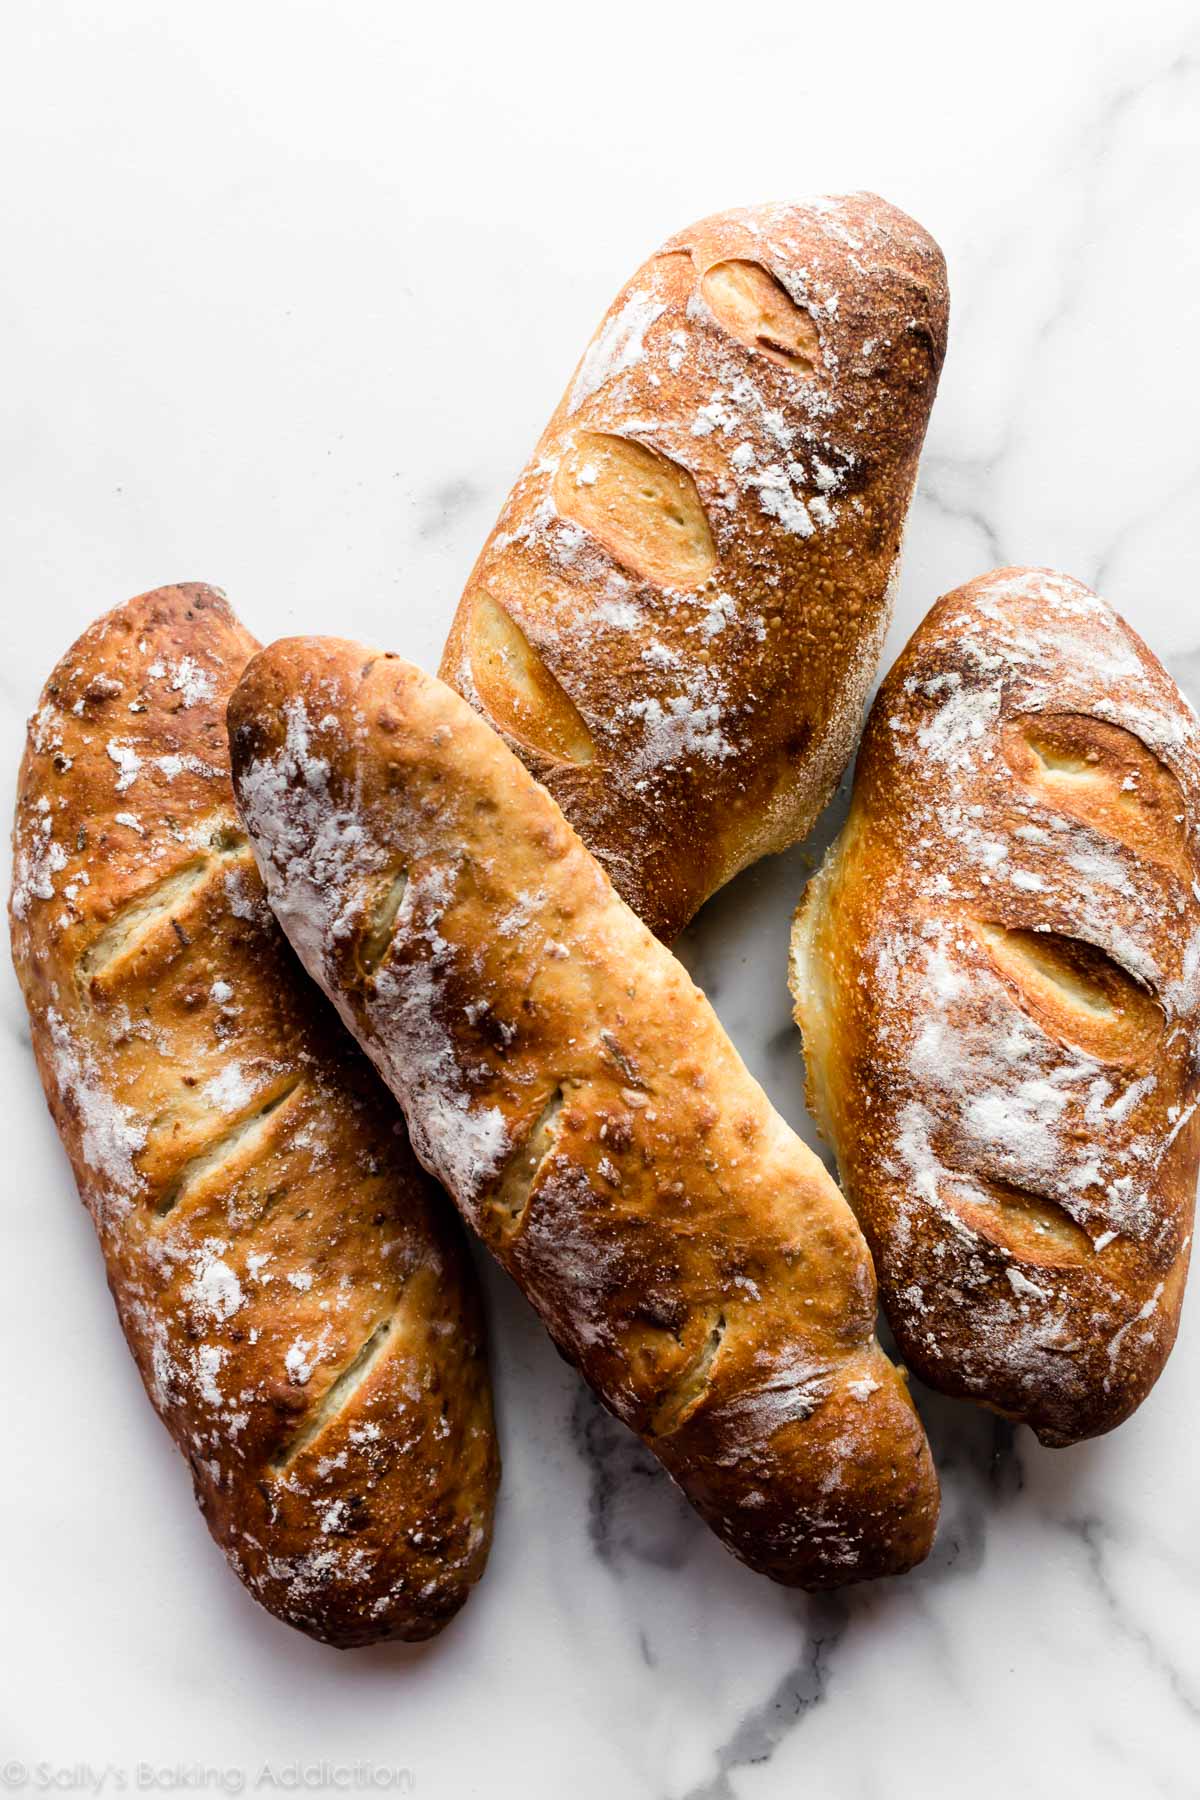
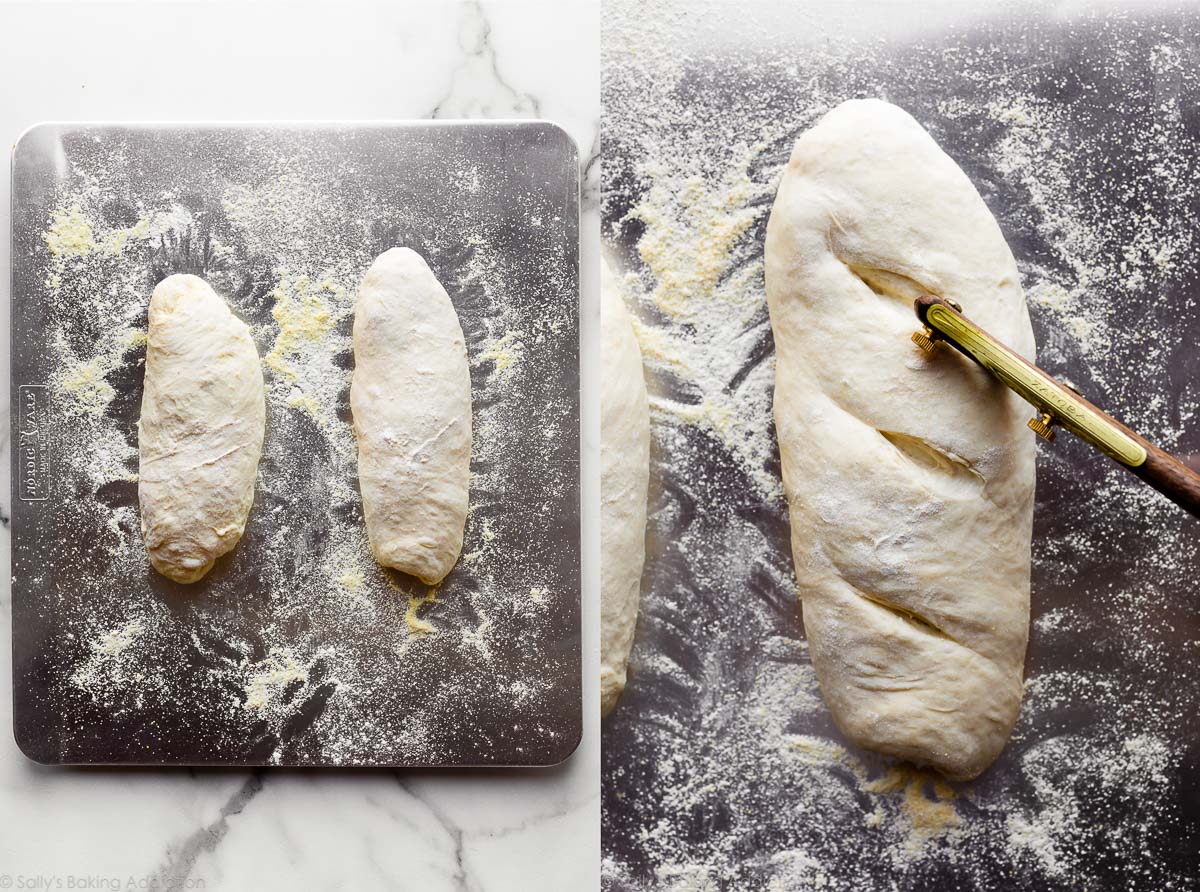
- Shape into 2 loaves or 1 boule. Rest as oven preheats. You can shape the bread into a round loaf (boule) or two longer loaves. I usually make two longer loaves side-by-side on a flat baking sheet, about 9×3 inches each. Preheat the oven to a very hot 475°F (246°C). The extremely hot air will immediately set the crust so the bread rises up instead of spreading all over. Score the loaves on top right before baking. Scoring also helps control the bread’s expansion. To help ensure a crispier crust, after the oven preheats, pour boiling water into a metal or cast iron baking pan on the bottom oven rack. Immediately place the baking sheet inside and shut the oven door to trap the steam. The steam will help create that coveted crisp crust.
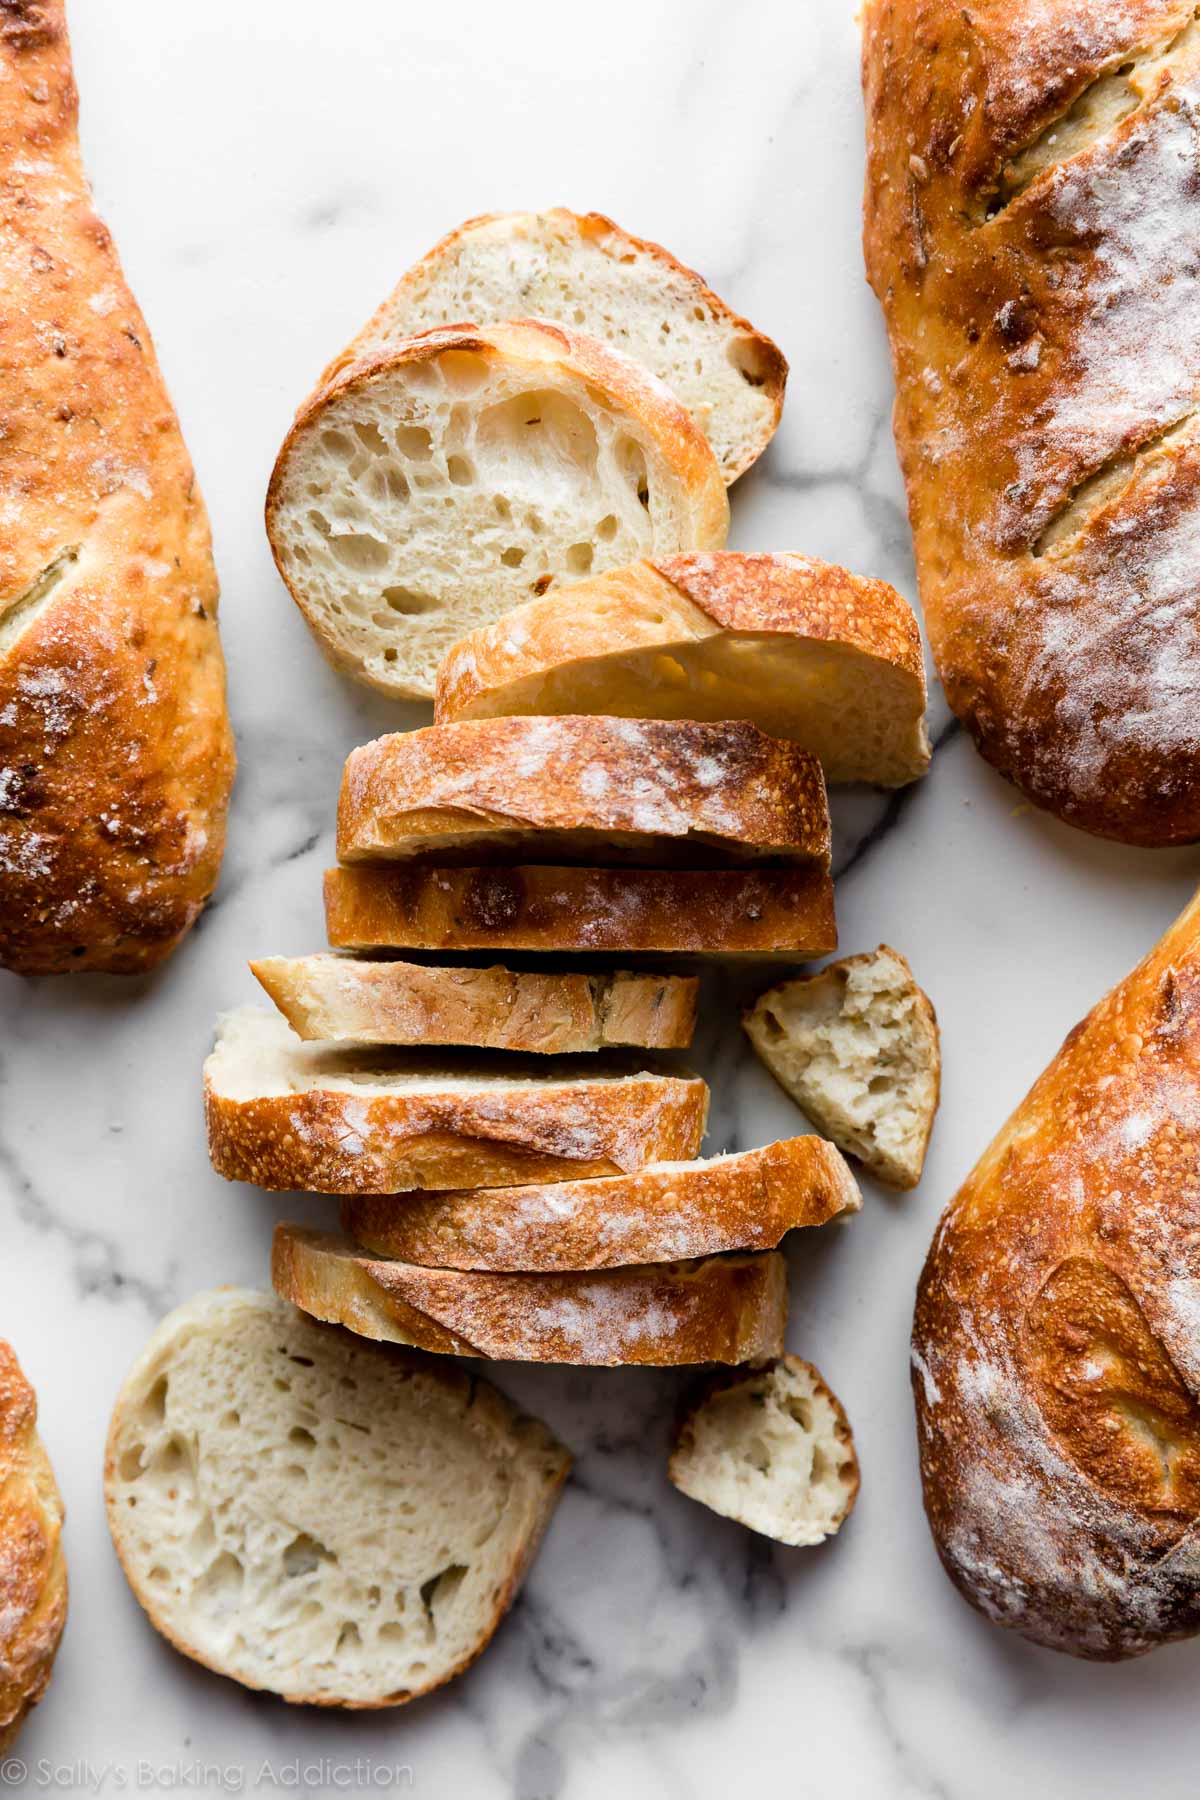
- Bake until golden brown, about 20-25 minutes. Gently tap the loaves because if they sound hollow, they’re done.
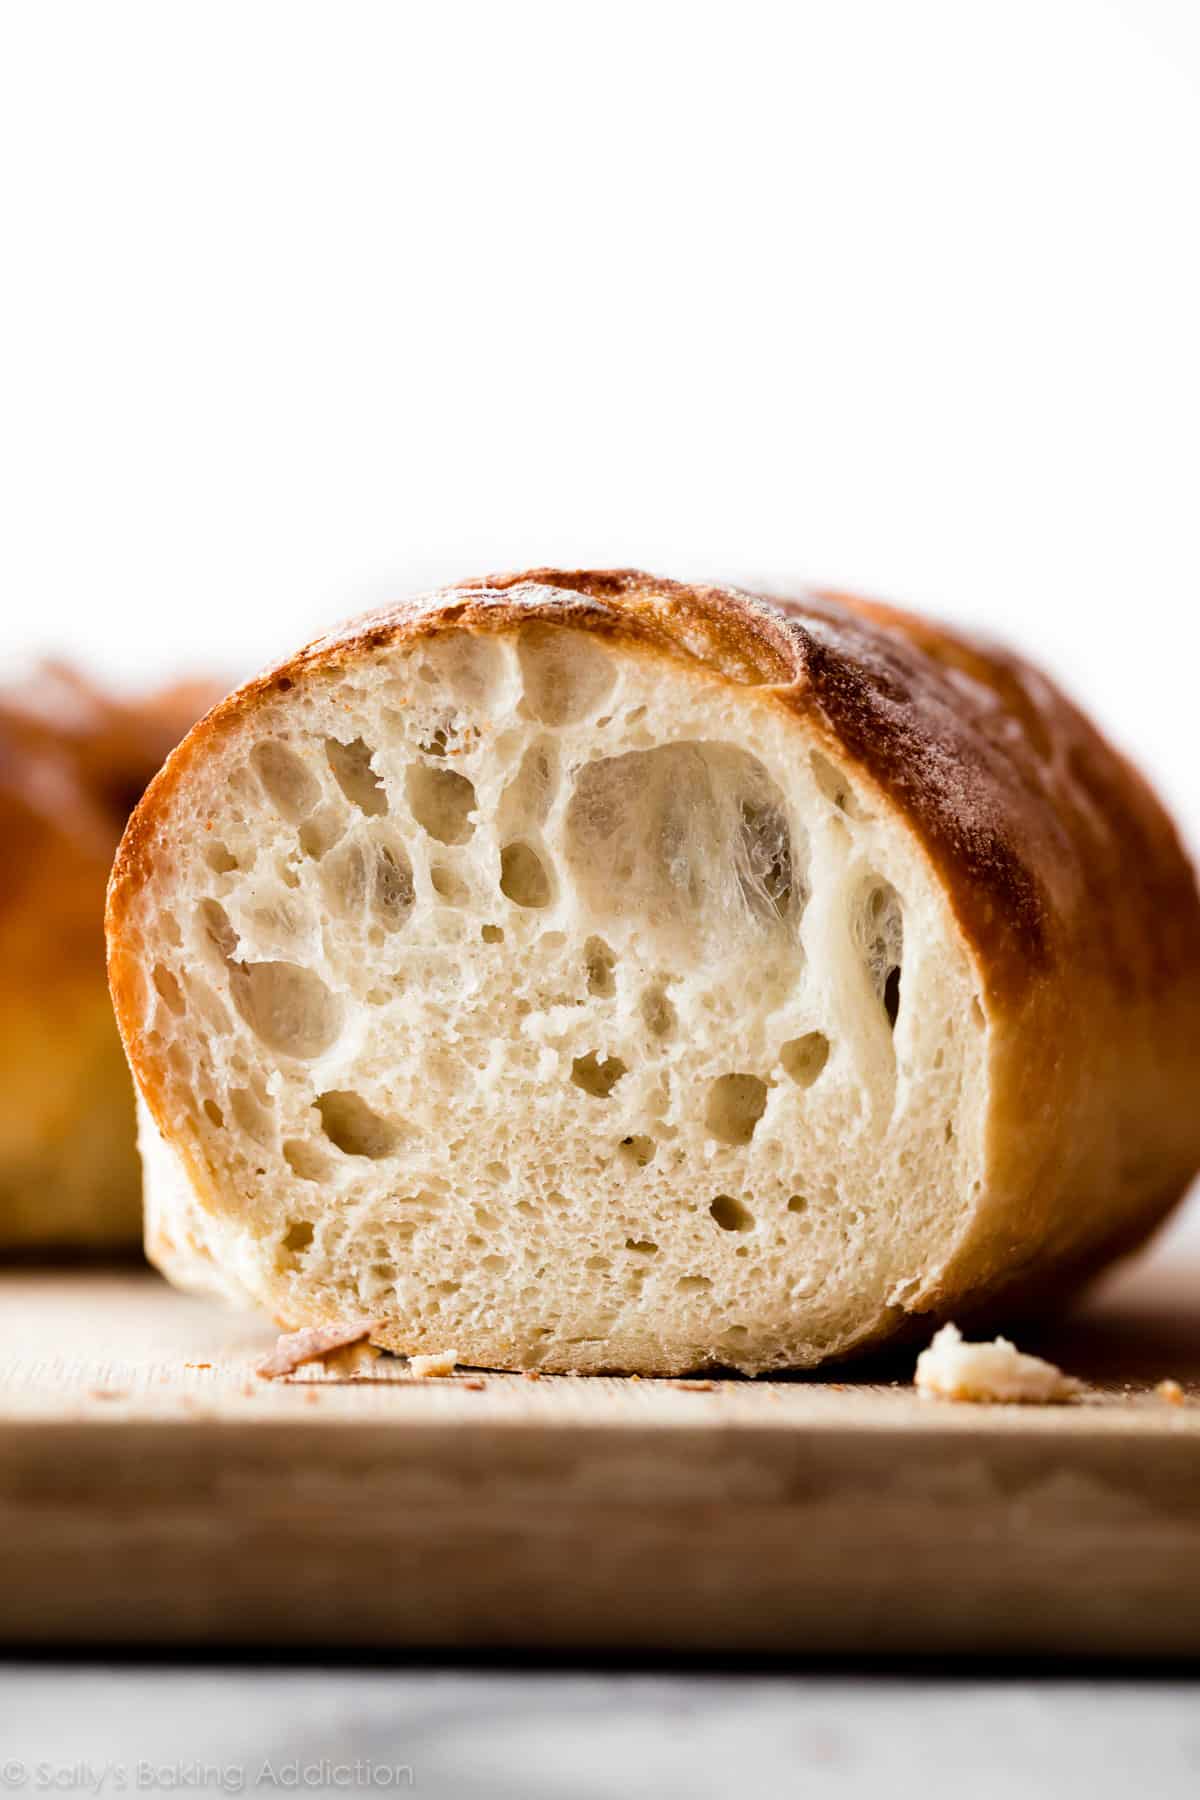
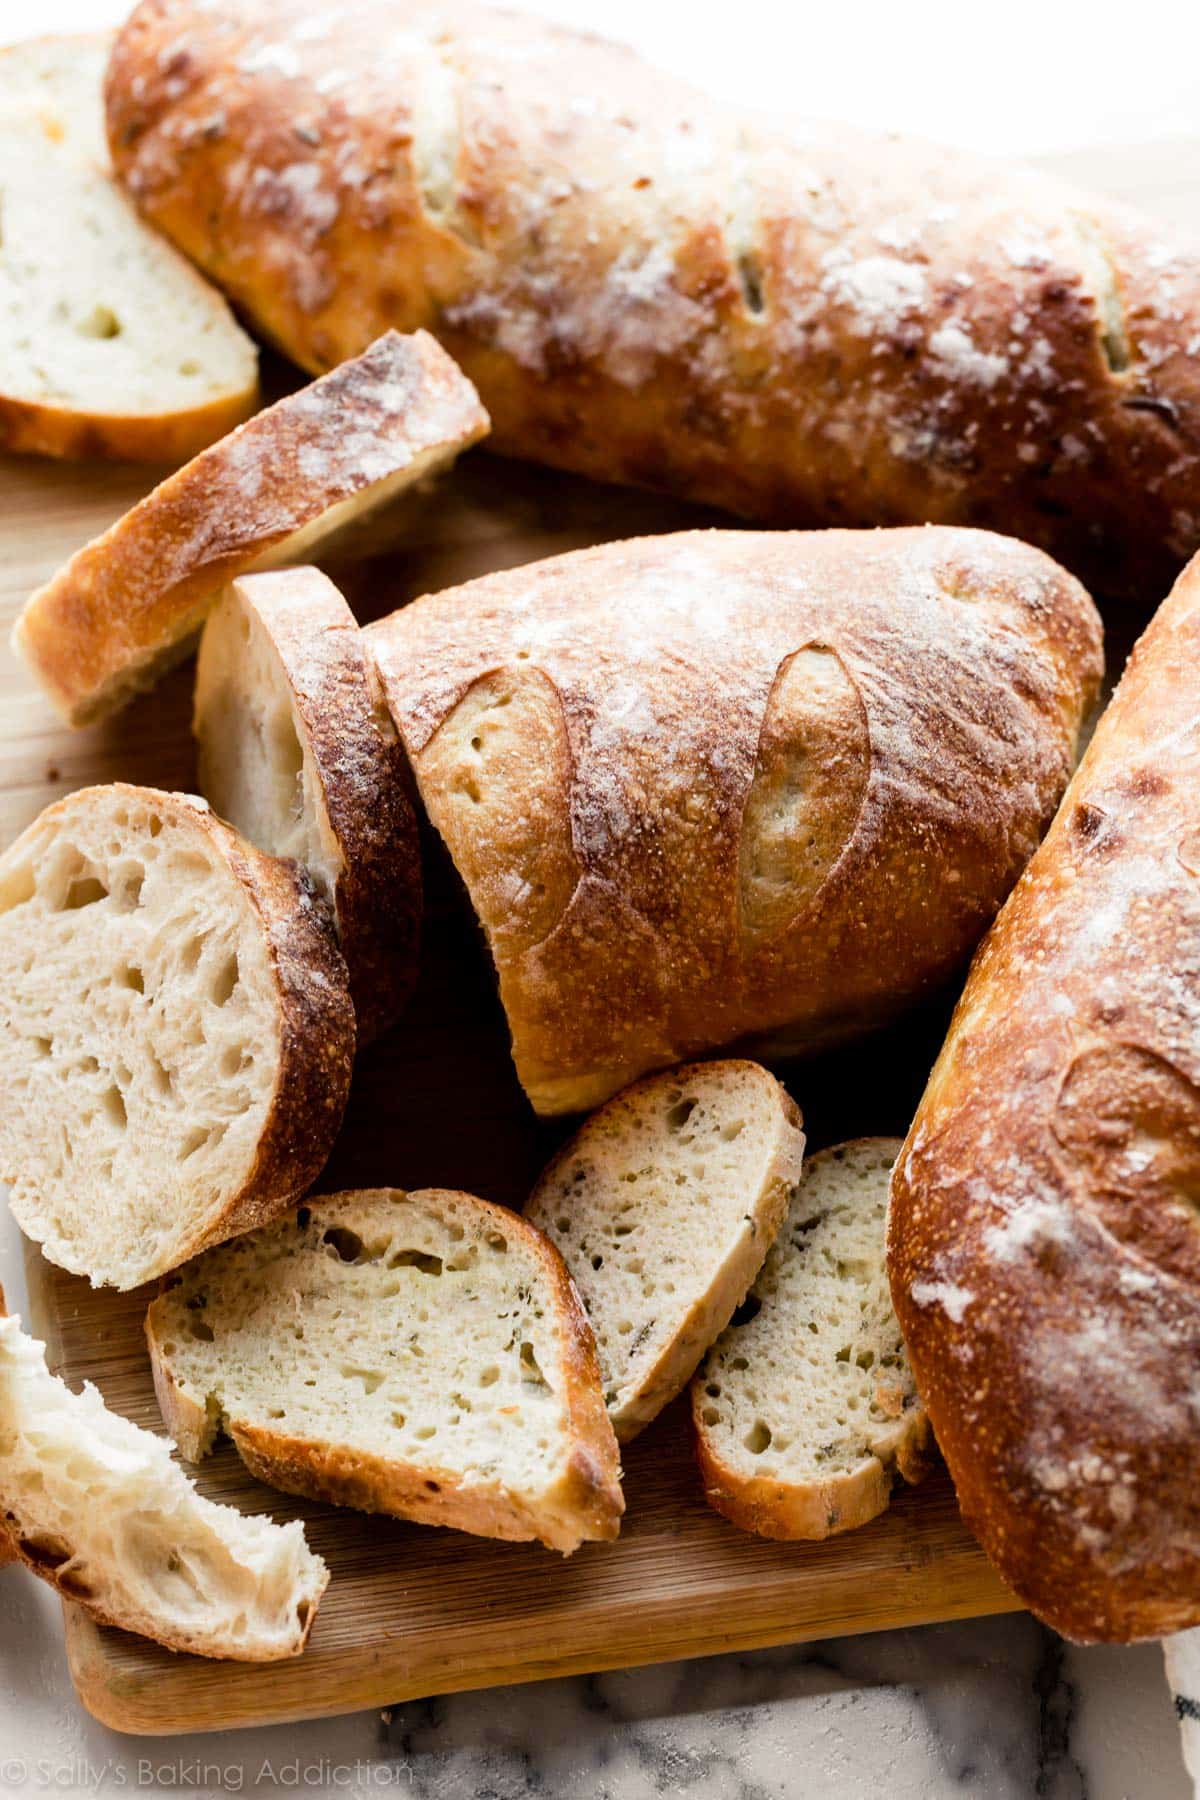
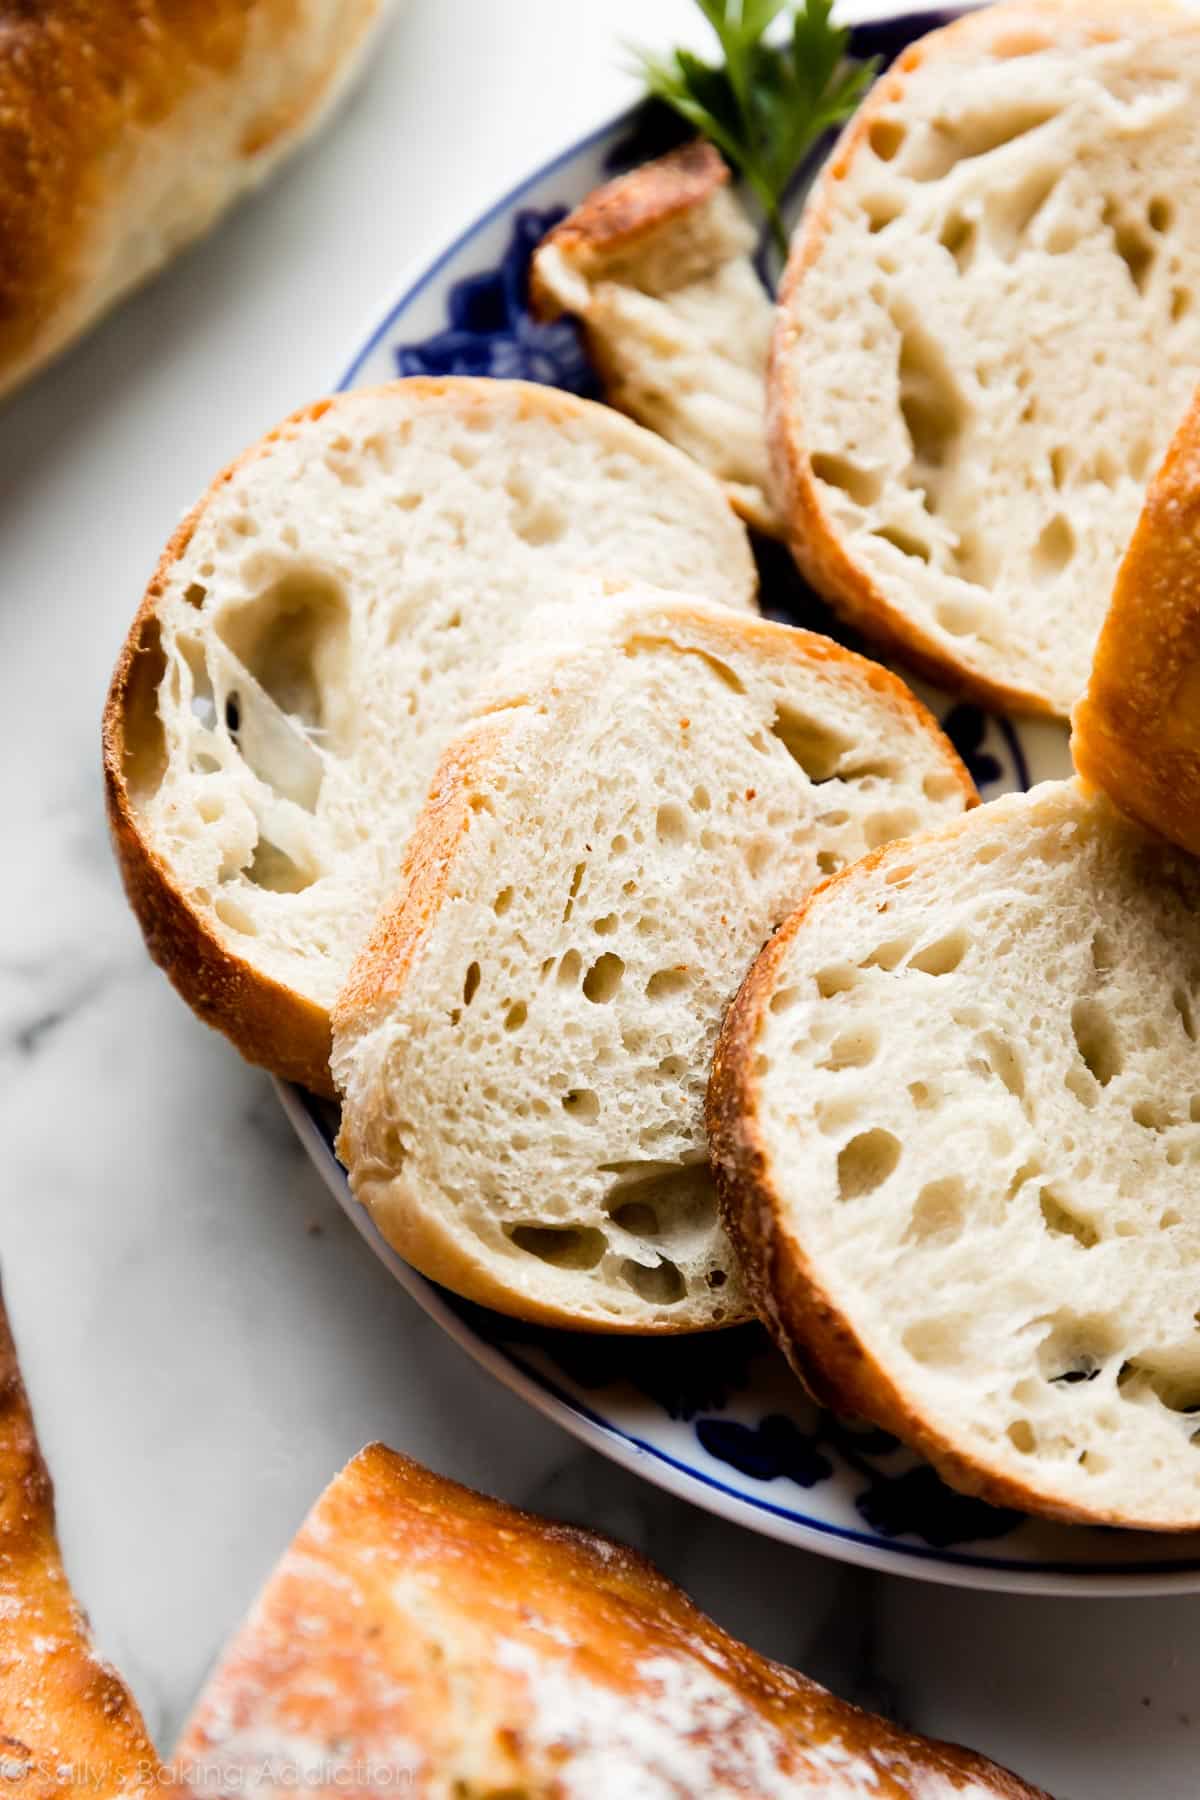
Look at those deliciously soft holes inside! Reminds me of ciabatta or a French baguette, both of which can be a little more complicated to make.
Serve Artisan Bread With
- Slather with homemade honey butter or cinnamon butter
- Slice and dunk in crab dip, beer cheese dip, garlic & bacon spinach dip, or even homemade Italian dressing
- Serve alongside slow cooker chicken chili or pumpkin chili
- As a dunker for homemade tomato soup, creamy cauliflower potato soup, minestrone soup, creamy chicken noodle soup, crab soup, or slow cooker creamy chicken & corn soup
- With a big bowl of mac & cheese or spaghetti with slow cooker turkey meatballs
- It’s the perfect starch in breakfast casserole or baked apple cider French toast
- Use it to make homemade garlic bread or homemade croutons
- With anything because homemade bread is everything’s best friend
No, this recipe works well with and is written for a standard baking sheet. If you would like to use a Dutch oven, see recipe Notes for details.
When bread fails to rise, it’s usually due to inactive yeast or insufficient rest time. See my Baking with Yeast Guide for more helpful yeast troubleshooting tips.
Artisan bread will form a crispy crust when it is baked in a steamy oven. See step 7 in the recipe instructions for details on using a pan of hot water in the oven to create a steamy baking environment.
Yes, the same amount of all-purpose flour will work in a pinch, but I strongly recommend using bread flour for a chewier texture.

Homemade Artisan Bread Recipe
- Prep Time: 4 hours
- Cook Time: 25 minutes
- Total Time: 4 hours, 25 minutes
- Yield: 2 8-inch loaves
- Category: Bread
- Method: Baking
- Cuisine: American
Description
Even if you’ve never made homemade bread or worked with yeast before, this homemade artisan bread is for you. Watch the video tutorial below and review the recipe instructions and recipe notes prior to beginning. If you’re new to working with yeast, reference my Baking with Yeast Guide for answers to common yeast FAQs.
Ingredients
- 3 and 1/4 cups (about 430g) bread flour (spooned & leveled), plus more for hands and pan
- 2 teaspoons (about 6g) instant yeast
- 2 teaspoons (about 9g) coarse salt (see note)
- 1 and 1/2 cups (360ml) water, close to room temperature at about 70°F (21°C)
- optional: cornmeal for dusting pan
Instructions
- In a large ungreased mixing bowl, whisk the flour, yeast, and salt together. Pour in the water and gently mix together with a silicone spatula or wooden spoon. The dough will seem dry and shaggy, but keep working it until all the flour is moistened. If needed, use your hands (as I do in the video tutorial below) to work the dough ingredients together. The dough will be sticky. Shape into a ball in the bowl as best you can.
- Keeping the dough in the bowl, cover the dough tightly with plastic wrap or aluminum foil and set on the counter at room temperature (honestly any normal room temperature is fine!). Allow to rise for 2-3 hours. The dough will just about double in size, stick to the sides of the bowl, and have a lot of air bubbles.
- You can continue with step 4 immediately, but for absolute best flavor and texture, I strongly recommend letting this risen dough rest in the refrigerator for at least 12 hours and up to 3 days. Place covered dough in the refrigerator for 12 hours – 3 days. I usually let it rest in the refrigerator for about 18 hours. The dough will puff up during this time, but may begin to deflate after 2 days. That’s fine and normal—nothing to worry about.
- Lightly dust a large nonstick baking sheet (with or without rims and make sure it’s nonstick) with flour and/or cornmeal. Turn the cold dough out onto a floured work surface. Using a sharp knife or bench scraper, cut dough in half. Some air bubbles will deflate as you work with it. Place dough halves on prepared baking sheet. Using floured hands, shape into 2 long loaves about 9×3 inches each (doesn’t have to be exact) about 3 inches apart. Loosely cover and allow to rest for 45 minutes. You will bake the dough on this prepared baking sheet.
- During this 45 minutes, preheat the oven to 475°F (246°C).
- When ready to bake, using a very sharp knife or bread lame (some even use kitchen shears), score the bread loaves with 3 slashes, about 1/2 inch deep. (“Score” = shallow cut.) If the shaped loaves flattened out during the 45 minutes, use floured hands to narrow them out along the sides again.
- Optional for a slightly crispier crust: After the oven is preheated and bread is scored, place a shallow metal or cast iron baking pan or skillet (I usually use a metal 9×13-inch baking pan) on the bottom oven rack. Carefully and quickly pour 3-4 cups of boiling water into it. Place the scored dough/baking pan on a higher rack and quickly shut the oven, trapping the steam inside. The steam helps create a crispier crust.
- Place the shaped and scored dough (on the flour/cornmeal dusted pan) in the preheated oven on the center rack. Bake for 20-25 minutes or until the crust is golden brown. Gently tap the loaves—if they sound hollow, the bread is done. For a more accurate test of doneness, the bread is done when an instant read thermometer inserted in the center reads 195°F (90°C).
- Remove the bread from the oven and allow to cool for at least 20 minutes before slicing and serving. Store leftovers loosely covered at room temperature for up to 5 days or in the refrigerator for up to 1 week.
Notes
- Make Ahead & Freezing Instructions: The dough can sit in the refrigerator for up to 3 days, so this is a wonderful recipe to begin ahead of time. You can also bake the bread, allow it to cool, and freeze for up to 3 months. Thaw at room temperature before serving. You can also freeze the dough. Complete the recipe through step 3. Wrap in plastic wrap and place in a freezer-friendly container. To bake, allow dough to thaw overnight in the refrigerator, or for 2-3 hours at room temperature. Continue with step 4 and the rest of the recipe instructions.
- Special Tools (affiliate links): Glass Mixing Bowls | Silicone Spatula or Wooden Spoon | Baking Sheets | 2-cup Measuring Cup | Bread Lame | Instant Read Thermometer
- Flour: For absolute best flavor and chewy texture, I strongly recommend using bread flour. You can use a 1:1 substitution of all-purpose flour in a pinch with no other changes to the recipe. I recommend avoiding whole wheat flour in this dough. If necessary, use half bread flour and half whole wheat flour. The bread will taste dense.
- Yeast: You can use instant or active dry yeast, but I highly recommend an instant (aka “rapid rise” or “quick rise” yeast). The bread will rise faster. I usually use Platinum yeast by Red Star, which is an instant yeast. 2 teaspoons is a little less than 1 standard packet. If using active dry yeast, there are no changes needed to the recipe. The rise time in step 2 may take longer.
- Salt: Use a coarse salt, such as coarse sea salt, in this bread. I find the flavor slightly lacking when using regular table fine salt. If you only have fine salt, reduce to 1 and 1/2 teaspoons.
- Water: Use cool water. 70°F (21°C) is great, but the exact temperature doesn’t matter as long as it’s not hot or warm.
- Round Loaf: If you want to shape the dough into a boule (round loaf) simply shape into a round ball instead of 2 loaves in step 4. Baking instructions are the same, but the loaf will take a few extra minutes in the oven. If you want to bake the boule in a dutch oven, see next note.
- Using a Dutch Oven: Follow this dough recipe through step 3, then follow the simple shaping/baking instructions (steps 2-5) in my Cranberry Nut No Knead Bread recipe including using the parchment paper. If your parchment paper can’t withstand heat this high, you can either lower the oven temperature and bake the bread for longer or grease the Dutch oven instead.
- Using a pizza stone: If you want to bake your bread loaves on a pizza stone, place pizza stone in the preheating oven. In step 8, place the shaped and scored dough on your preheated pizza stone. If the bottom of the shaped dough is pretty sticky, dust the hot pizza stone with some extra cornmeal. Bake as directed.
- No Nonstick Pan: If you don’t have a nonstick baking sheet, line it with parchment paper instead. Coat with a dusting of flour and/or cornmeal before placing the dough on top. Parchment paper can burn, so it’s best to check the box to see how much heat yours can tolerate. Lower your oven heat if necessary and bake the bread for longer until golden brown and when gently tapped, sound hollow.
- Flavor ideas: Before pouring in the water in step 1, add any of the following ingredients/combination of ingredients to the dry ingredients in the bowl: 4 cloves minced garlic + 3 Tablespoons chopped rosemary, 3 Tablespoons your favorite fresh herb (chopped), 1 cup your favorite shredded cheese, a diced jalapeño, 3/4 – 1 cup dried cranberries and/or chopped nuts, 2 teaspoons garlic powder, etc.
- Reference my Baking with Yeast Guide for answers to common yeast FAQs.
- Recipe adapted from King Arthur Flour & Red Star Yeast, similar method originally from Jim Lahey.
Nutrition
- Serving Size: 2 slices
- Calories: 136
- Sugar: 0.1 g
- Sodium: 389.8 mg
- Fat: 0.7 g
- Carbohydrates: 27.2 g
- Protein: 4.7 g
- Cholesterol: 0 mg


Reader Comments and Reviews
Mines was a sloppy mess after 3 days is this because I used a mixer?
Hi Gary, I don’t recommend a mixer. Just a few stirs to bring the ingredients together. You don’t want to overwork the dough. Try sprinkling flour on your wet dough to help it come together.
First time making bread. Always wanted to but was nervous. Came across this recipe and I knew I could do it. Used my pizza stone and both loaves came out beautifully and tasted delicious.
Thank you for the easy recipe. Making more tomorrow!
Let me start by saying I absolutely love this recipe. The air bubbles make me look like a pro.
I used regular salt and decreased the quantity to the required 1 and 1/2 teaspoons but it came out pretty salty.
Can I decrease the salt even further?
I honestly love that there is no fermented smell that I usually get when making bread.
Please advise
You can certainly reduce the salt even further if you’d like. 1 teaspoon of regular table salt is fine.
I love this recipe! It is so easy and a hit at my house. I sautéed an onion, chopped garlic cloves and added rosemary as per your recommendations. It was delish.
Made this bread today- the two loaves. It was so much fun. I’ve never tried baking bread before and felt so professional when my apt started to smell like a bakery lol. I wanted to try the ‘crustier’ crust so put a muffin tin with the cups half-filled with water on the bottom rack in the oven (I had to improvise as I don’t have another shallow pan). They turned out great! Not super airy and hole-y in the middle which could have been due to a number of things (not too dense though, either), but will definitely keep using this recipe. I only had all-purpose flour on hand to use so next time will try the bread flour, as recommended. Thank you for this recipe; the video is super helpful too. So cool to eat and share fresh bread you just made, yourself! <3 <3
I’ve made this dough successfully before with my sister, but I’m having trouble with making it again. The dough doesn’t seem to come together no matter how much I work it and even if I add a tiny bit more water, and then when I refrigerate it, it comes out really lumpy. Should I add even more water?
First time making any bread ever. Did everything by the book including the steam trick, and it was absolutely breathtaking how good it looked. I added about 1.5 TbS of herbs de province and maybe half a cup of Italian cheese blend to the dough and that all turned out perfect. I let it sit about 20 hours or so, baked it about 24 minutes, it was excellent. My only concern is I didn’t get the big bubbles on the inside. It was a wonderful texture and nothing wrong really, I was just hoping for the big bubbles :p maybe I handled the dough too much? I was fidgeting from nerves trying to make everything perfect.
Hi AJ, so happy to hear that you loved this bread reicpe! Yes, the big bubbles will only come from the long rise and as little handling as possible. Thank you for giving this recipe a try.
I was skeptical about the recipe because it was so easy and was pleasantly surprised with the outcome. The bread was light with good crumb and flavor. I followed the recipe exactly except I cut it exactly in half–only wanted one loaf. Added 1 garlic powder and 1 t minced onions as per the flavor ideas. My dough was a looked a little wetter than Sally’s per the video. However, it wasn’t flat and I was happy with the results. Next time I will try the overnight rise.
I have made this several times both individual loaves and a round single loaf, I was wondering if I could drop the dough when ready to put in the oven into a oblong baking tin?
Hi Ray, There is a little too much dough for a standard size (9×5 inches) loaf pan, so you could try dividing the dough in half and using 2 loaf pans. The edges should still crisp up and the bake time may vary.
Hi Sally, I just made Artisan bread last weekend using your recipe. It is my 1st time making artisan bread. I followed all your steps, 1st rise 2 hours and keep in the fridge for about 20 hours. Then bring out and let it rise 2nd time for 1 hour. I am happy to say that I’m quite happy with the outcome. My bread come out beautifully. I don’t have cast iron or dutch oven, so I used my ceramic casserole with glass lid which I heat in the oven 30 mins before I put my dough. But for temperature I put 200c. I’m afraid to use higher than that because I never use more that 200c before. I baked for about 30 mins with lid on, after that remove lid and bake another 15 mins. The moment of truth is when I cut it. The inside texture i guess if I bake 45 mins with lid on it could probably well cook. 30 mins it only just almost cook. Then I tried to put back in the oven and bake 10 mins. But silly me, it makes the bread outer crust become really hard to cut. On the taste, I am using regular salt. I missed the part that you put note that have to reduce 1 1/2 tsp instead of 2tsp. Yes, 2 tsp regular salt a slight salty. Anyway, this is my 1st experience. I will definitely redo again your recipe. Thank You so much for sharing the great recipe.
I have tried this several times now by weighing out the ingredients and always have to add significantly more flour because the “dough” that’s made with the weighed measurements is sloppy wet, not anything like the video. It tastes good, but it just never seems to work as written.
Hi Becky, A dough’s consistency relies on many variables including how you measure the flour, brand of flour, even the weather and humidity in the air. While this should be a sticky dough, it sounds like yours is a little too sticky. Don’t be afraid to add 1/4 – 1/2 cup more flour to the dough before letting it rest at room temperature.
In the process of making it, resting in the fridge for 3 days, I’m sure it’ll turn out amazing 🙂
Don’t shoot me down yet! I just wanted to review it before finishing anyway to thank and congratulate the author. This is such a thoughtful recipe, you cover all the bases, you mention all substitutes (both ingredients and cookware) and how to make it in different conditions + video and pictures to help alongside. . This is such a gem of a recipe, and you didn’t bore us with your life like so many do to fill the page
All recipes should be written like that 🙂 pure perfection. Thank you for taking the time to share that with us
This bread won’t rise in the oven no matter what I do. I have tried 3 tomes, followed the recipe EXACTLY, made it twice by refrigerating overnight & once baking it right away & the dough just spreads out & bakes flat. I’m using the rapid rise yeast. The dough doubles in size during the rising process but as soon as I take it out of the bowl it deflates, & continues to spread sideways during the 45 minute rise time before baking. Any suggestions?
Hi Jenn, it sounds like your dough could benefit from more flour. If it’s too sticky to the point that it’s unworkable, you can gently work in more 1/4-1/2 cup more flour, especially if it’s a particularly humid day. Always use floured hands and flour your work surface generously as well.
I have made this bread many times in the past six months or so…it is a foolproof, absolutely delicious bread!
Great taste! Love the crust and texture… but, my loaves look more like biscotti vs nice and round… what do I need to change? I weigh the flour and use a liquid measuring cup… but it’s still a flat, wide loaf…
Same as mine, I weigh both the flour and water and my dough never looks a stiff as hers. I’ve made it 2 times now, increasing the amount of flour, buy 10g a time, they’re slowly becoming more round. Making one today with 235g of flour (only make 1 loaf) see how it turns out.
Same here, I read through all of the comments and even added an additional 1/4C bread flour, it’s still flat and gooey. an unfortunate start to a bread journey
I’ve made this bread 5 or 6 times – mostly as round boules and once as 2 separate loaves as shown in the video. The first couple were excellent. Unfortunately the last 3 loaves have all been very doughy inside even when the crust is well cooked and dark. I’ve made it with a Dutch oven (using the recommended method) and on a baking sheet – same issue. I’ve measured the internal temp with an instant thermometer (205 – 210 each time) but it keeps coming out with a slightly underdone texture. (The baking sheet effort was especially doughy near the bottom.) Any suggestions? I hate to give up this recipe after the 1st 2 excellent efforts but doughy bread just isn’t fun.
I made this the first time and the crust is great but a little doughy on the inside….would love to get some insights as I don’t want to give up on this easy recipe
Hi Dteve, I bake it for 20 minutes on 250C with fan, then 15-20 more minutes on 200C with fan, works like a charm 🙂
Aha! I was just looking for a good baguette bread recipe today, came across King Arthurs, ut then found yours, and of course your recipe are easier to follow and never fail.
But I do have one concern, I simply hate the alcholic smell of dough after any type of dough rests for more than 3 hours. Once I was making cinnamon rolls which had been fermenting for 5 hours and I nearly fainted from the strong alcoholic smell. You can therefore see how fermenting for that long as you suggest, up to 3 days, makes me cringe.
Do you have any suggestions for me, and will the smell and taste of alchohol wear off, or will I be able smell and taste it in the final product after all? I understand it is termed as flavorful, but as I loathe any type of alchohol, even in cooking, Im quite stuck. But I do so want to try this recipe. Thanks
Alcohol is produced when the yeast a.k.a. bacteria consumes the sugar/carbohydrates in the flour. This reaction is also what causes the bubbles, carbon dioxide. Once baked, alcohol will boil out of the bread at approximately 175°F. I’m sorry that you cringe at the smell of alcohol but, think of it as creating something of sustenance. Bread has been around for thousands of years and the recipe has remained, for the most part, unchanged.
Do you have to use instant yeast? I only have traditional active yeast
Hi Amanda, You can use instant or active dry yeast. If using active yeast the rise time in step 2 may take longer. See recipe notes for details!
Hi! I love this recipe so much, its super easy to make and love the taste of the bread. But I was wondering if I wanted to make bigger batches, could I possibly double to recipe, or would that change the bread altogether? Please let me know!
Thank you!
I was skeptical of this recipe but it turned out great! I added a pinch of sugar at the beginning and put thyme and Rosemary in it. Unlike other recipes it had a good crust and the inside was light (many of mine turn out more dense). I will definitely use it again!
Came out perfect!!! I have never made bread before but I followed the directions exactly and couldn’t be happier with how it turned out. Thanks
This bread is sooo yummy! It worked perfectly the first time and tasted amazing. I’ve been using it for a couple months now and decided to comment :3 I love adding dried rosemary and other herbs for a more savory loaf!
Great beginner bread recipe! I’ve made this several times now and it’s always a hit with the family. Thanks!
Absolutely love this bread! I am relatively new to baking, only having tried a dozen or so breads. This is the easiest and best I have come across so far. My family loves it!
Recently, I attempted to make this into 1 large loaf as opposed to splitting it in two. I put it in the fridge for 24 hours and then baked it for 25 minutes. Outside was perfect but inside still doughy. Should I just bake it longer at 475 next time or turn it down? I don’t want to burn the outside trying To finish the inside.
Hi Paul, so glad you and your family enjoy this bread recipe! All ovens are different. A few extra minutes at that high temperature could work, but it may be helpful to lower the oven temperature down to 425°F (218°C). Keep an eye on it and don’t be afraid to tent it with aluminum foil if the exterior is over-browning too quickly.
Anyone by chance know how long to cook the bread at 420 on a sheet pan? My parchment paper can only handle that high of heat! Awesome recipe so far though!
Hi Tabitha, I’m unsure of the exact bake time. The top will be golden brown and the bread will sound hollow inside when done.
Sally, This recipe is excellent! Doubled the recipe and made smaller loaves for Philly cheesesteak subs! Yum!……. Do you happen to have a recipe for a softer dough that I can use as a hoagie type roll? Planning on meatball subs but the fam likes the bun a lil softer than these. Thx!
Hi Jess, thanks so much for your positive feedback! For a softer roll, I recommend our recipes for soft dinner rolls or bread bowls (that you can bake as smaller rolls- see the recipe notes). I hope one of these will work for your family!
OMG!! I’ve made 3 batches… in three days! First batch was soooooo good. Served it with homemade lasagna! Could not believe how simple this was! Major hit with hubby!
Second batch tried the crispy crust, also amazing. Both second and third batches I used my nonstick cookie sheet, and wasn’t as happy overall. Maybe because it’s a very dark one?
I’m going to go back to my old sheet and parchment paper that I used the first time, as I much preferred that result personally.
Thank you for an amazingly easy recipe that is also affordable!
This bread is so good! I wasn’t interested in making it at first since I enjoy kneading bread, but I was curious to see what it would be like. It’s nice not having to watch the clock and time separate risings. I’ve made it three times already — the best flavours came with the longer rising time. It came out with great flavour, fluffy inside, chewy, and with a crusty top — it looked like something I’d buy at a bakery! I took some to a family dinner and my Dad (who has done a lot of bread baking) couldn’t get over the crust and chewiness (I didn’t use the pan of water, but did sprinkle some water on the loaf before putting it in the oven). I’m so glad I tried this recipe — next I’m going to try adding some extras to the dough. Thanks for a new staple in my recipe box!
Just made my third batch in as many weeks and PERFECTION. Easiest recipe ever and who doesn’t love (fresh baked) bread-thank you for another sally’s baking addiction winner!
Ah the old metric vs imperial issue….
The US cup measures 236.59 mL. In comparison, the old imperial UK cup (most commonly referenced in pre-1970s recipes) measures 284.13 mL. The metric cup, referenced in Commonwealth countries and modern UK recipes, measures 250 mL.
What a brilliant recipe for a first-time bread baker! However, during the bake my bread rose a lot in the middle and only a little on the sides creating a domed loaf. Is there a secret trick to getting an even rise across the loaf?