

This homemade soft multigrain bread is prepared with multigrain hot cereal mix, such as 5 grain, 7 grain or 10 grain cereal. Whole or quick oats are an excellent option, too. It’s soft and fluffy like regular white sandwich bread, but has a hearty and satisfying flavor. Either instant or active-dry yeast work and you can even turn this dough into multigrain rolls.
Learn to bake homemade bread. I’ve noticed that’s a common baking goal at the start of each year. Today I’m sharing a new homemade bread recipe, one I’ve been perfecting for months. Using my regular white sandwich bread as the starting point for this new variation, I finally mastered a multigrain bread that’s both soft and sturdy. If you love homemade bread and crave added texture, you’ll enjoy this multigrain loaf. Bonus: You can use this dough for homemade rolls, too!
One reader, Nancy, commented: “I make this recipe all the time. It’s my go-to sandwich bread. In fact, I have a loaf proofing right now on this rare rainy day. Super easy, so it’s a perfect bread for a beginner. Also a blank canvas for whatever you want to add. I bump up the protein and fiber with flax and chia. Give it a try. You won’t regret it. ★★★★★”
Soft Multigrain Bread Details
- Flavor: Slightly nutty with an earthy, satisfying flavor similar to whole wheat bread. A little brown sugar adds mild sweetness.
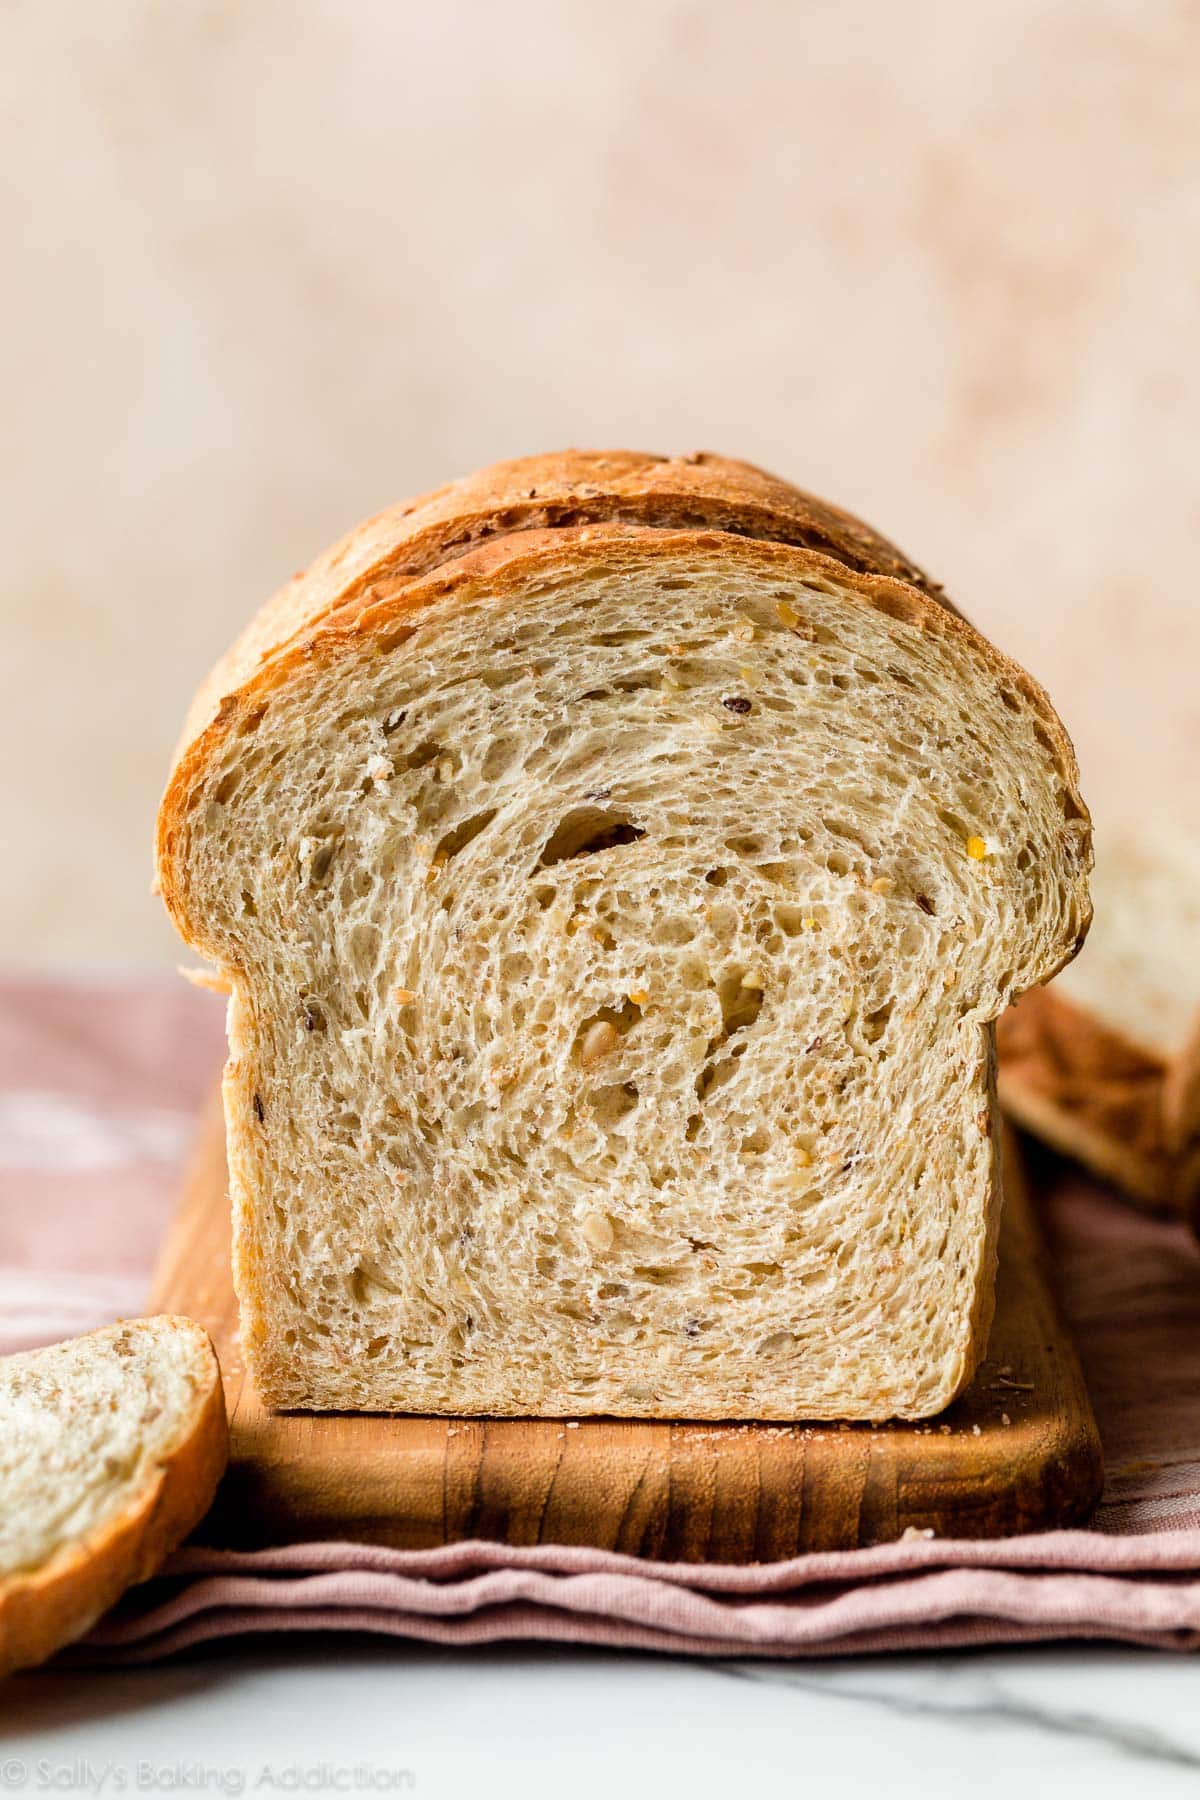
- Texture: This wholesome bread is wonderfully soft without being flimsy. It’s great for sandwiches, but perfectly satisfying plain or with a spread of butter.
- Ease: I categorize this as an intermediate baking recipe. The dough requires an extra step in the very beginning—soaking those grains in water. If you read the directions before starting, you’ll be set for success. Take your time and if you’re new to baking with yeast, review my Baking with Yeast Guide and How to Knead Dough posts first. Lots of helpful information there.
- Time: Between preparing the dough, both rises, and baking, set aside at least 4-5 hours to complete this recipe. But keep in mind that most of the time is hands off as the dough rises. You can even get started on the dough the night before.
If you love wholesome, hearty homemade bread like this, you’ll enjoy no knead honey oat bread and no knead seeded oat bread recipes too.

Video Tutorial: How to Make Soft Multigrain Bread
We need a careful blend & ratio of ingredients to produce a grain loaf that (1) rises tall, (2) maintains a soft fluffy texture, and (3) has legitimate structure for sturdy slices. The ingredients are practically the same as this sandwich bread, but we’re skipping the milk, using hot boiling water, adding grain cereal mix and seeds, slightly reducing the butter, and swapping regular sugar for brown sugar. Took lots of tweaking to perfect.
Key Ingredients You Need & Why
- Multigrain Hot Cereal Mix or Oats: If you read anything in this post, have it be this. This recipe starts with multigrain cereal, such as 5 grain, 7 grain or 10 grain cereal. You can also use whole or quick oats, but I do not recommend steel cut. There are many variations of hot cereal available in grocery stores—a multigrain version may include rye, barley, oats, whole wheat, and/or more. Honestly any grain cereal you mix with hot water works assuming there’s no flavors or sugars added (for example, don’t use brown sugar cinnamon oatmeal mix). If you can’t find any multigrain hot cereals at the store, you can purchase online—or just use plain oats. I really like this 7 grain + flax seed hot cereal. Multigrain baby cereal works too.
- Boiling Water: Just as you would make the hot cereal to eat, mix it with hot water. Use 1 and 3/4 cups (420ml) boiling water, then let the mixture cool until a digital thermometer reads about 110°F (43°C). This usually takes 20 minutes. If it’s too hot, the heat will kill the yeast.
- Brown Sugar: Sugar feeds the yeast, increases its activity, and tenderizes the dough. You can use regular white granulated sugar, but brown sugar was especially tasty in this loaf.
- Butter: To make a soft bread, you need fat in the dough. Butter promises a soft and flavorful loaf. 3 Tablespoons is plenty.
- Flour: If you have both bread flour and all-purpose flour on hand, I recommend using bread flour. All-purpose flour definitely works, but you get a sturdier and more bread-like texture from bread flour. I love using whole wheat flour when I can, but this dough is not fit for all whole wheat flour. In my recipe testing, I found that similar to homemade English muffins, replacing up to 1 cup of the bread/all-purpose flour with whole wheat flour worked just fine. The bread was a bit denser, but had great flavor. I usually make it with 3 cups of bread flour and 1/3 cup whole wheat flour. If you wish to use all whole wheat flour, follow my recipe for whole wheat bread instead.
Add-In Options
Add-ins are completely optional, but I encourage seeds and/or nuts for a little texture. I usually use sunflower seeds. Other options include chopped pecans or walnuts, pepitas, raisins, dried cranberries, or a blend of these. You could also throw in smaller seeds such as chia, flax, or sesame. See recipe note below before starting.
Step-by-Step Photos
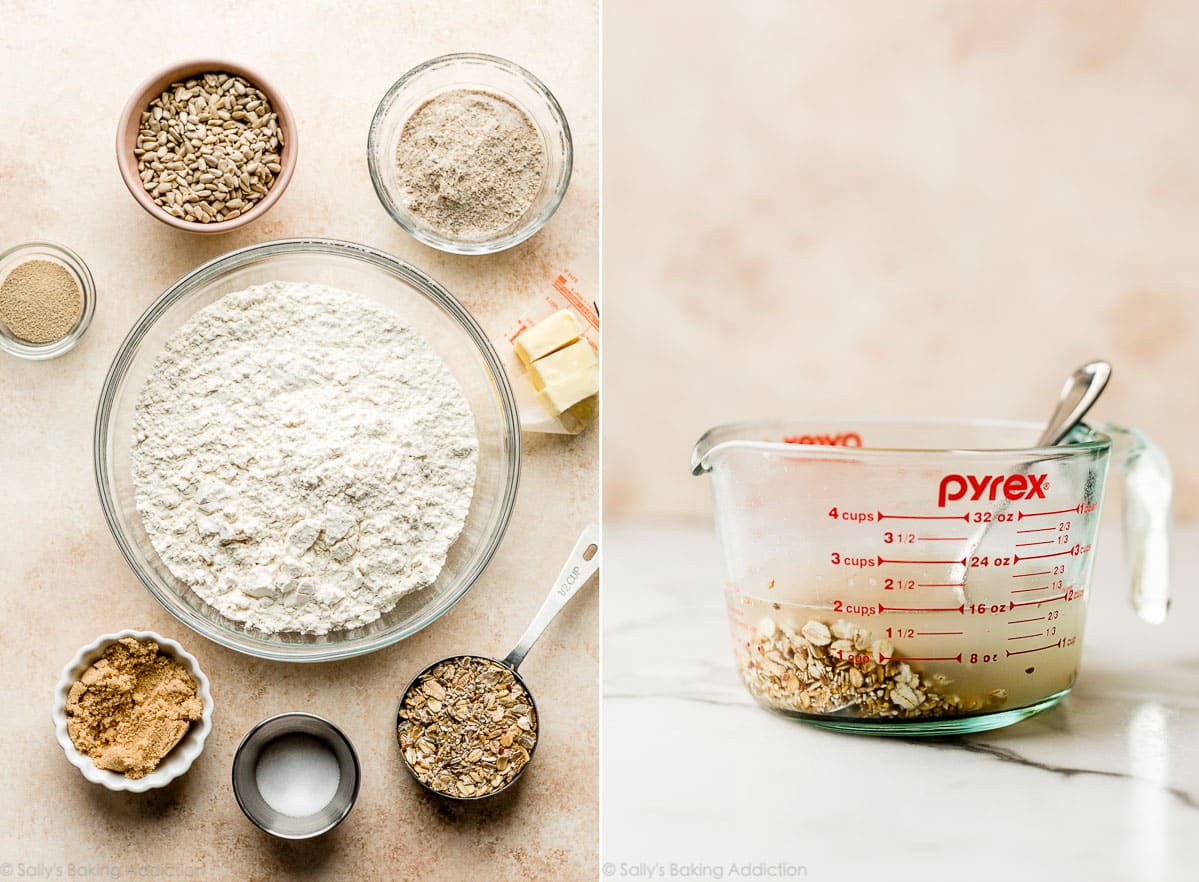
Soak the grain cereal in the boiling water, as pictured above.
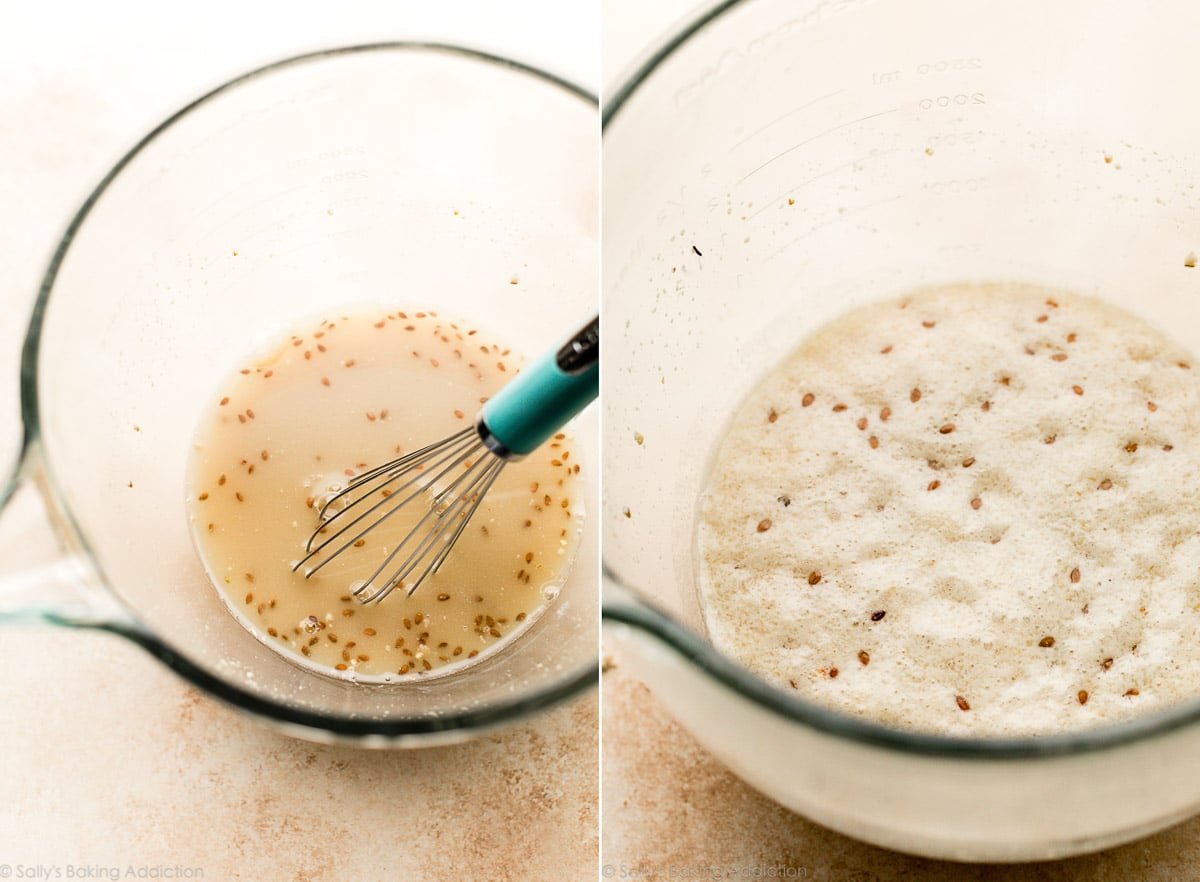
Below left: After it cools down, whisk in the yeast and brown sugar. Below right: After 5-10 minutes, you’ll notice foam or bubbles on the surface. This means the yeast is active and ready. Note that the hot cereal that I use contains flax seeds so that’s what you’re seeing floating on top!
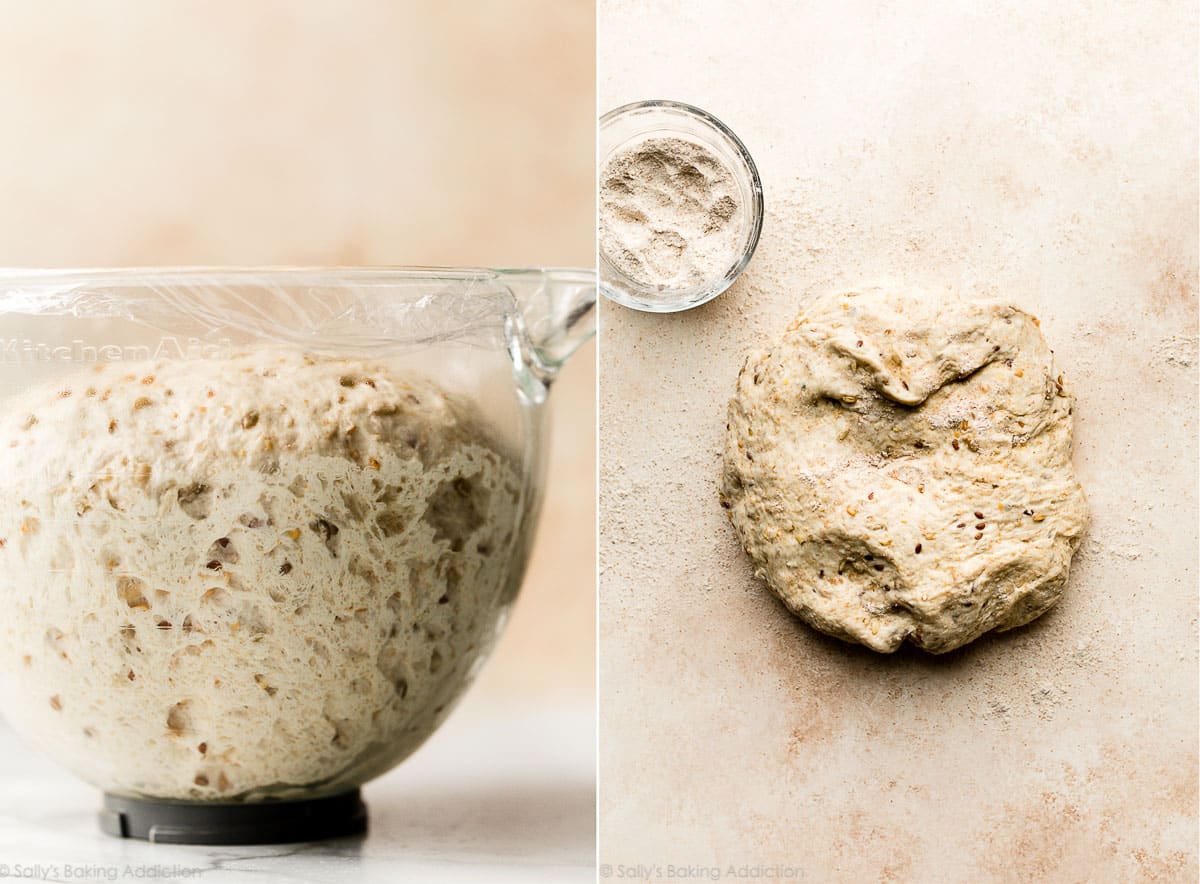
The dough will feel heavy. As instructed in the recipe below, knead it before letting it rise. If you’re new to bread-baking, my How to Knead Dough tutorial will be helpful here.

Below left: After you make and knead the dough, let it rise until doubled in size. Below right: Punch it down to release the air, then place on a lightly floured work surface.
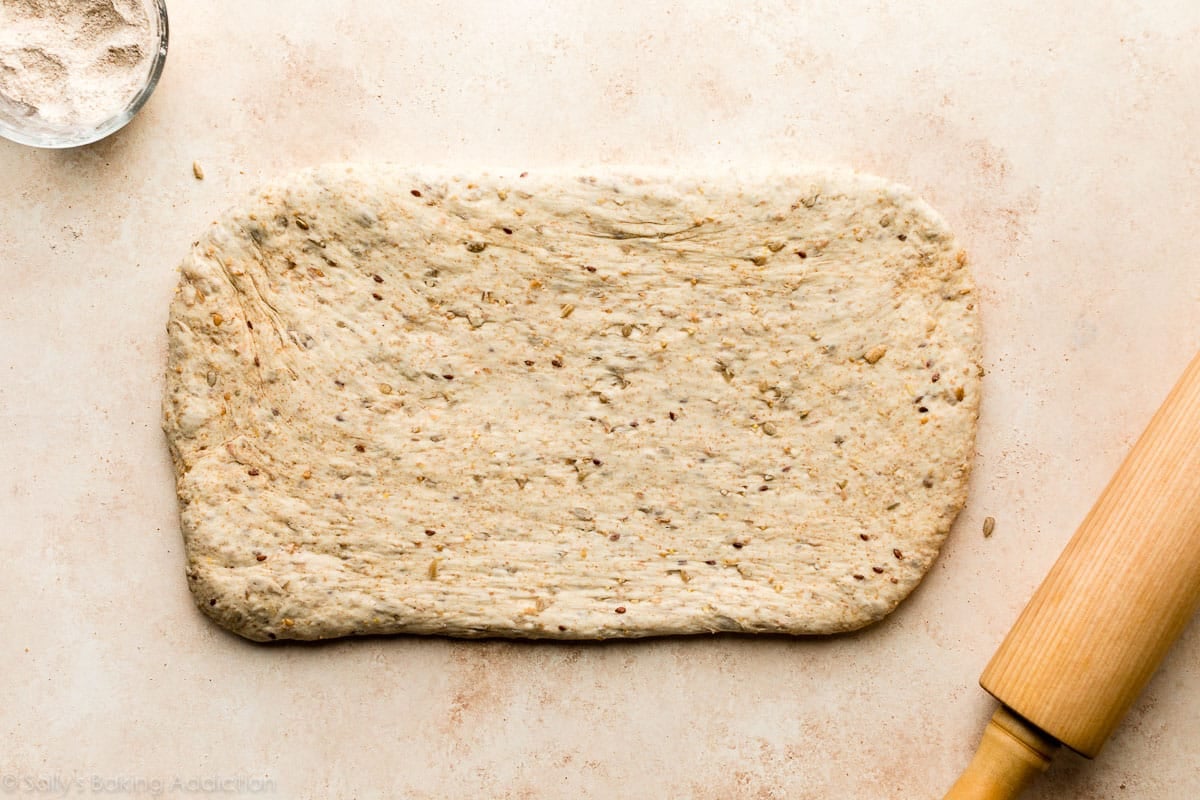
Roll it out into an 8×15-inch rectangle:
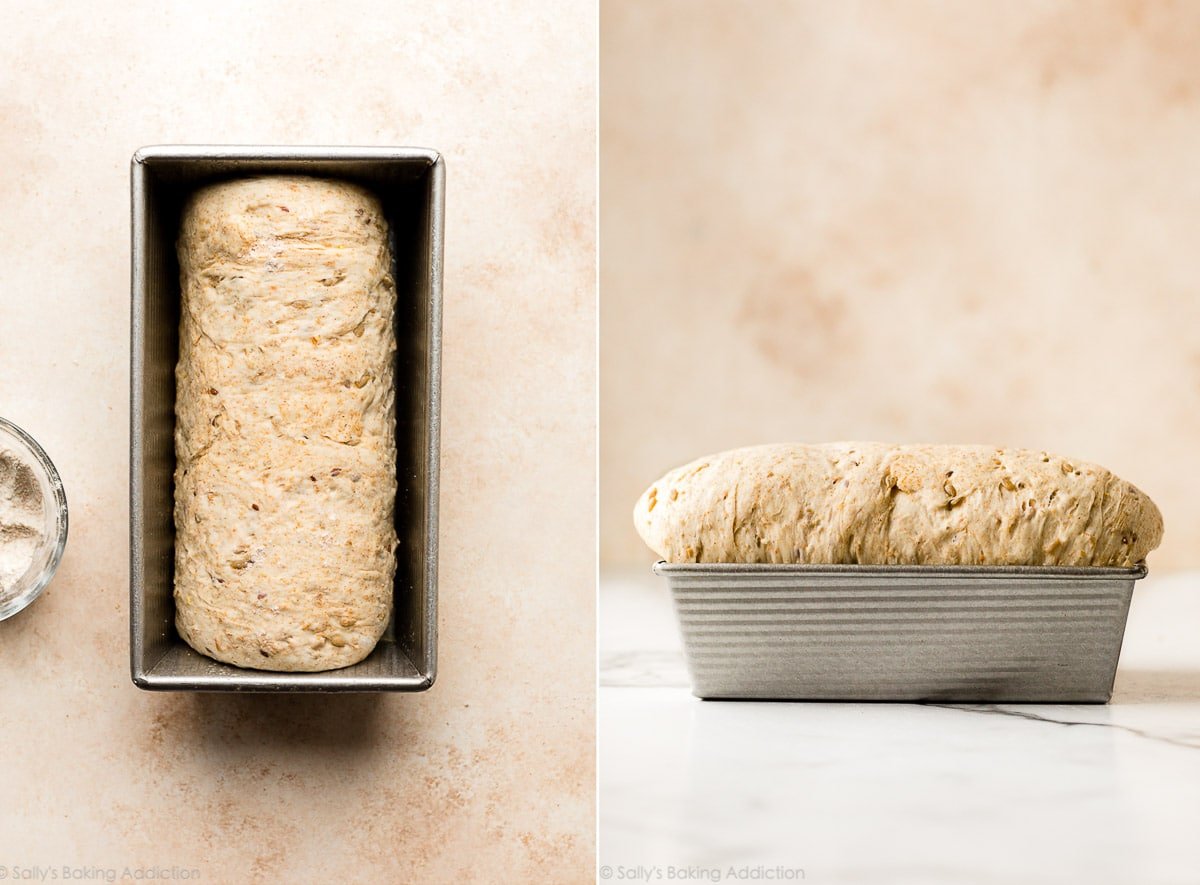
Below left: Roll it up tightly starting with the 8-inch side, so you have an 8-inch roll to fit into your 9×5 inch loaf pan. (Unlike cinnamon rolls where you roll up the dough starting with the larger side.) Below right: Let it rise until it’s 1-2 inches above the rim of the pan.
Look at this height!
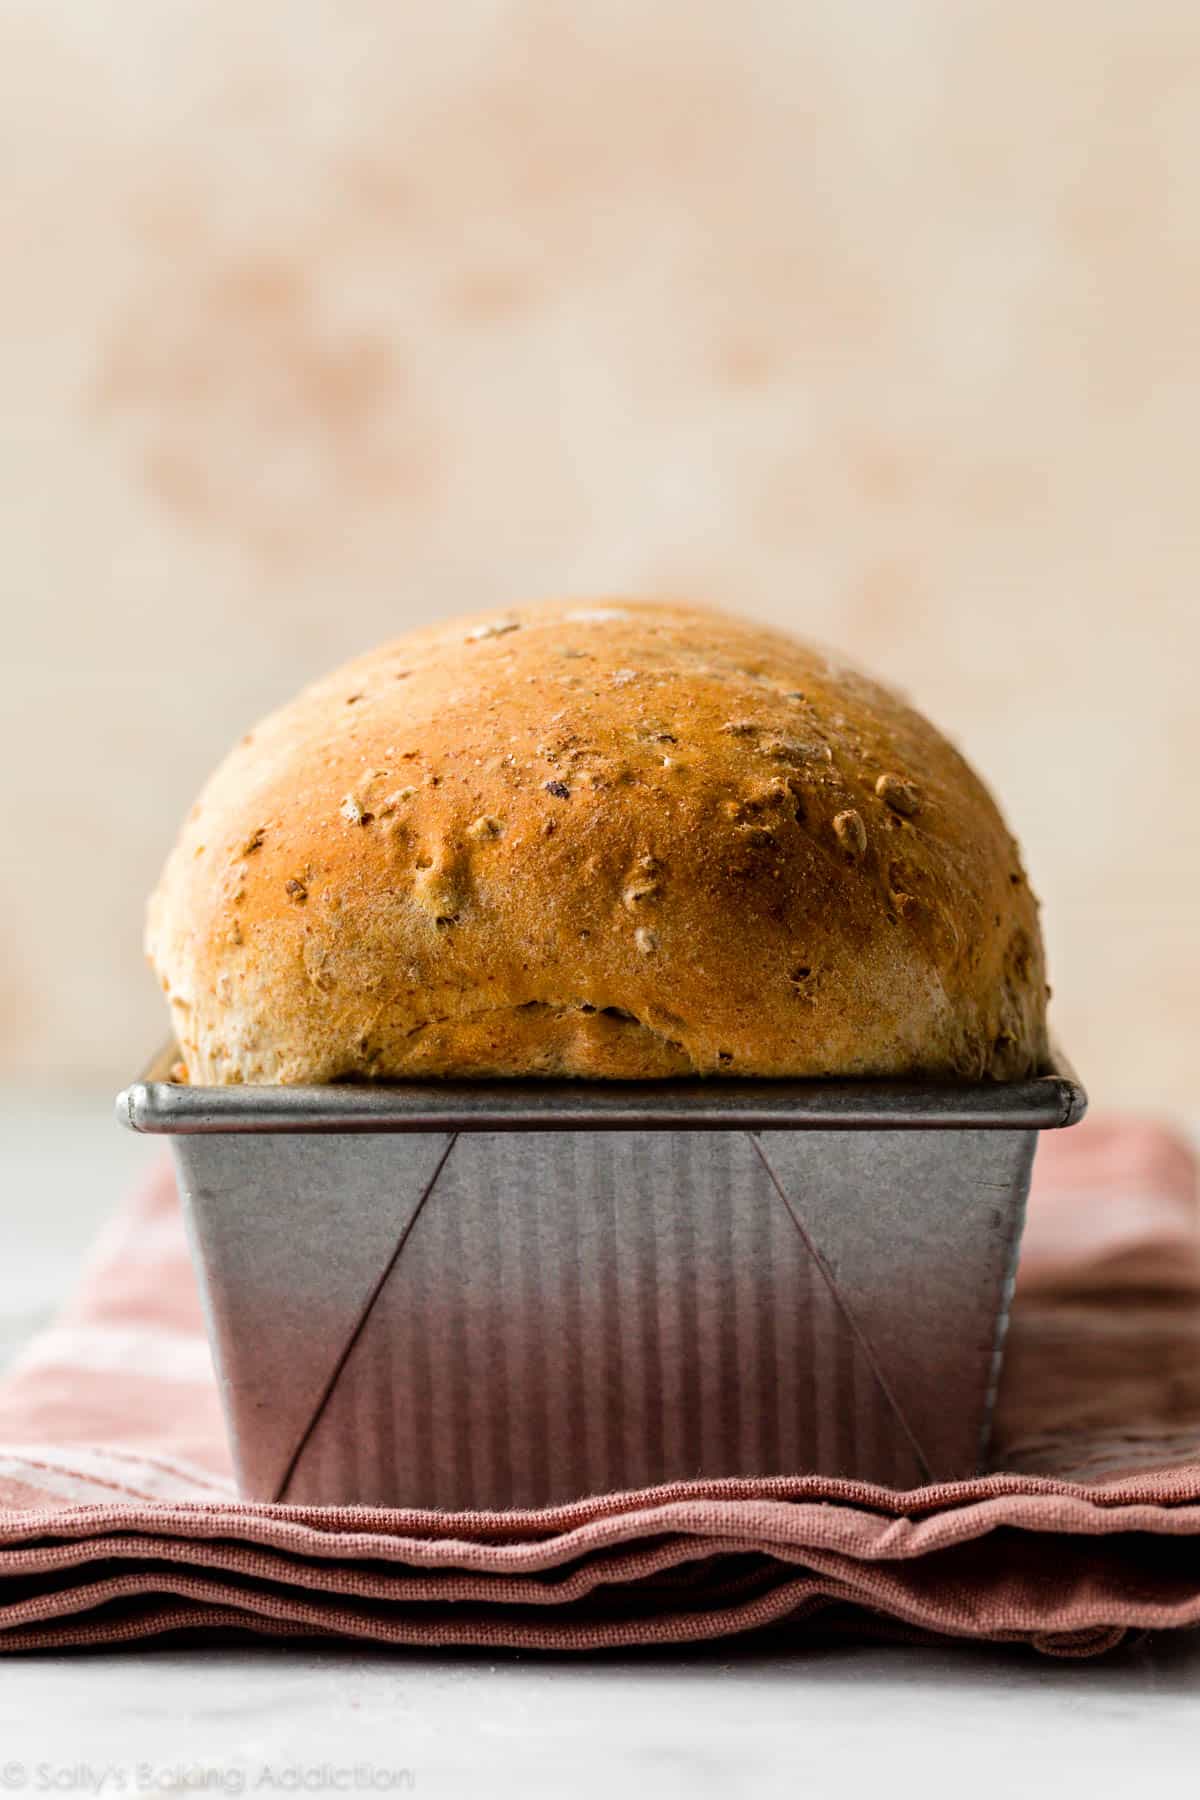
Bake until golden brown:
How do I test for doneness? Give the loaf a light tap. If it sounds hollow, it’s done. For a more accurate test, the bread is done when an instant read thermometer reads the center of the loaf as 195–200°F (90–93°C).
This multigrain bread is phenomenal when sliced and served warm. The exterior is crisp and crusty while cloaking a hearty, yet fluffy crumb inside. The whole slice is just so, so satisfying and cozy. And it’s fabulous with homemade honey butter. This is definitely a homemade bread to try!
If you happen to have any leftovers, day old bread is perfect for soaking up flavors in an easy breakfast casserole.
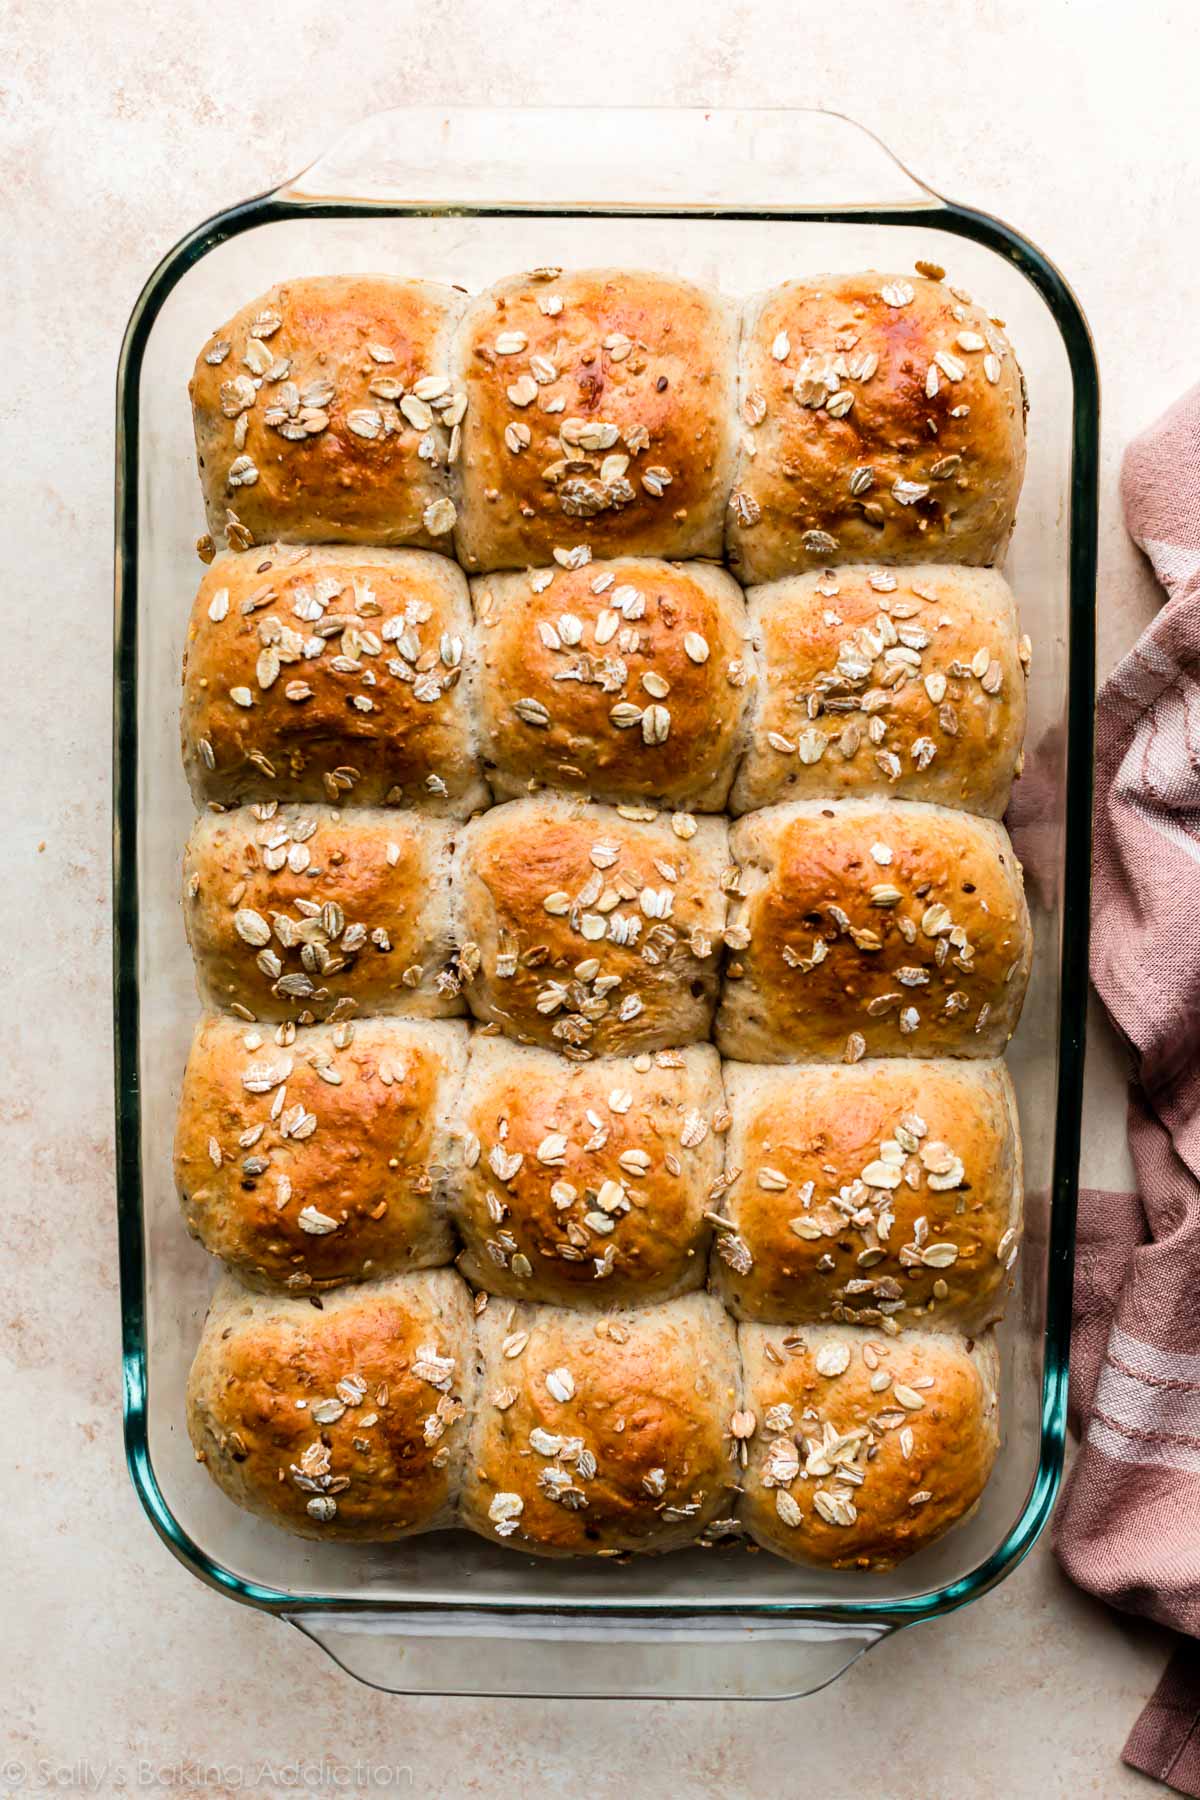
Can I Make This Into Rolls?
I thought you’d ask! I tested this dough to make multigrain rolls and it worked wonderfully. Not quite as soft as regular dinner rolls and not quite as heavy as whole wheat dinner rolls. I will say that I preferred the multigrain sandwich bread because it had a little more texture from the crust. Served warm with a pat of butter, however, the rolls were fantastic. See recipe note for instructions. Though I haven’t tested it, I imagine you could use this dough to make 3-4 bread bowls, too.
Multigrain AND multipurpose!
More Yeast Bread Recipes
Browse all of my yeast bread recipes.
Print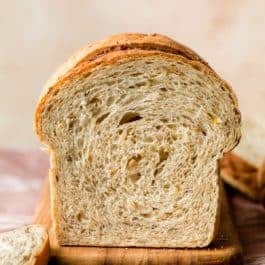
Soft Multigrain Bread
- Prep Time: 3 hours, 40 minutes
- Cook Time: 34 minutes
- Total Time: 4 hours, 15 minutes
- Yield: 1 loaf
- Category: Bread
- Method: Baking
- Cuisine: American
Description
This is wholesome multigrain bread with an irresistibly soft and fluffy interior. For best success, take the time to review the recipe notes before starting. Though not required, an instant read thermometer is helpful in a few of these steps.
Ingredients
- 1/2 cup (60g) dry multigrain cereal mix or old-fashioned whole rolled oats (see note)
- 1 and 3/4 cups (410ml) boiling water
- 2 and 1/4 teaspoons (7g) instant or active dry yeast (1 standard packet)
- 3 Tablespoons (37g) packed light or dark brown sugar
- 3 Tablespoons (43g) unsalted butter, softened to room temperature
- 1 and 1/2 teaspoons salt
- 3 and 1/3 cups (433g) bread flour (spooned and leveled), plus more as needed and for hands/work surface
- optional: 1/2 cup (60g) sunflower seeds, chopped nuts, pepitas, raisins, or dried cranberries
Instructions
- Prepare the dough: Place cereal mix in a large heatproof bowl (you can also use the bowl of your stand mixer). Pour boiling water on top. Let the mixture cool until a digital thermometer reads about 110°F (43°C). This usually takes 20 minutes. Pay attention to the temperature because if it’s too hot, it will kill the yeast. If it became too cool, however, it’s not a problem—the dough may just take a few extra minutes to rise.
- Whisk the yeast, sugar, and all of the warm water/cereal mixture in the bowl of your stand mixer fitted with a dough hook or paddle attachment. Cover and allow to sit for 5-10 minutes or until foamy and bubbly on the surface.
- Add the butter, salt, and 1 cup (about 130g) flour. Beat on low speed for 30 seconds, scrape down the sides of the bowl with a silicone spatula, then add another cup of flour. Beat on medium speed until relatively incorporated (there may still be chunks of butter). Add all of the remaining flour and the seeds/nuts (if using), then beat on medium speed until the dough comes together and pulls away from the sides of the bowl, about 2 minutes. If it seems too sticky, add more flour, 1 Tablespoon at a time until it begins to pull away from the sides of the bowl. *If you do not own a mixer, you can mix this dough with a large wooden spoon or silicone spatula. It will take a bit of arm muscle!*
- Knead the dough: Keep the dough in the mixer and beat for an additional 3-5 full minutes, or knead by hand on a lightly floured surface for 3-5 full minutes. (If you’re new to bread-baking, my How to Knead Dough video tutorial can help here.) If the dough becomes too sticky during the kneading process, sprinkle 1 teaspoon of flour at a time on the dough or on the work surface/in the bowl to make a soft, slightly tacky dough. Do not add more flour than you need because you do not want a dry dough. After kneading, the dough should still feel a little soft. Poke it with your finger—if it slowly bounces back, your dough is ready to rise. You can also do a “windowpane test” to see if your dough has been kneaded long enough: tear off a small (roughly golfball-size) piece of dough and gently stretch it out until it’s thin enough for light to pass through it. Hold it up to a window or light. Does light pass through the stretched dough without the dough tearing first? If so, your dough has been kneaded long enough and is ready to rise. If not, keep kneading until it passes the windowpane test.
- 1st Rise: Lightly grease a large bowl with olive oil or nonstick spray. Place the dough in the bowl, turning it to coat all sides in the oil. Cover the bowl with aluminum foil, plastic wrap, or a clean kitchen towel. Allow the dough to rise in a relatively warm environment for 1-2 hours or until double in size. (I always let it rise on the counter. Takes about 2 hours. For a tiny reduction in rise time, see my answer to Where Should Dough Rise? in my Baking with Yeast Guide.)
- Grease a 9×5-inch loaf pan.
- Shape the bread: When the dough is ready, punch it down to release the air. Lightly flour a work surface, your hands, and a rolling pin. Roll the dough out into a large rectangle, about 8×15 inches. It does not have to be perfect– in fact, it will probably be rounded on the edges. That’s ok! Roll it up into an 8 inch log and place in the prepared loaf pan.
- 2nd Rise: Cover shaped loaf with aluminum foil, plastic wrap, or a clean kitchen towel. Allow to rise until it’s about 1-2 inches above the top of the loaf pan, about 1 hour. (See photo above for a visual.)
- Adjust oven rack to a lower position and preheat oven to 350°F (177°C). (It’s best to bake the bread towards the bottom of the oven so the top doesn’t burn.)
- Bake the bread: Bake for 35-40 minutes– if you notice the top browning too quickly during bake time, loosely tent the pan with aluminum foil. How to test for doneness– give the loaf a light tap. If it sounds hollow, it’s done. For a more accurate test, the bread is done when an instant read thermometer reads the center of the loaf as 195°F-200°F (90°C-93°C).
- Remove from the oven and allow bread to cool for a few minutes before slicing and serving. Feel free to let it cool completely before slicing, too.
- Cover leftover bread tightly and store at room temperature for 2-3 days or in the refrigerator for up to 10 days.
Notes
- Freezing Instructions: This dough isn’t ideal for freezing. The dough has a hard time rising after thawing. Instead, try the overnight instructions (next) or freeze the baked loaf. To freeze the baked loaf, allow the bread to cool completely, then freeze for up to 3 months. Thaw in the refrigerator or at room temperature, then reheat as desired.
- Overnight Instructions: Prepare the recipe through step 7. Lightly cover the shaped bread and refrigerate for up to about 15 hours. At least 2 hours before you need the bread the next day, remove from the refrigerator, keep covered, and allow to rise on the counter for about 1 hour before baking. Alternatively, you can let the dough have its 1st rise in the refrigerator overnight. Cover the dough tightly and place in the refrigerator for up to 12 hours. Remove from the refrigerator and allow the dough to fully rise for 2 more hours. Continue with step 6.
- Special Tools (affiliate links): Electric Stand Mixer | 9×5-inch Loaf Pan | Rolling Pin | 7 Grain Hot Cereal
- Grain Cereal: Use dry multigrain cereal that you would use to make hot cereal, such as 5 grain, 7 grain, or 10 grain cereal. You can also use quick or whole oats, but I do not recommend steel cut oats. There are many variations of hot cereal available in grocery stores– a multigrain version may include rye, barley, oats, whole wheat, and/or more. Honestly any grain cereal you mix with hot water works assuming there’s no flavors or sugars added (for example, don’t use brown sugar cinnamon oatmeal mix). If you can’t find any multigrain hot cereals at the store, you can purchase online– or just use plain oats. I really like this 7 grain + flax seed hot cereal. Multigrain baby cereal works too.
- Yeast: You can use active-dry or instant yeast. The instructions are the same no matter which you use.
- Flours: If you have both bread flour and all-purpose flour on hand, I recommend using bread flour. All-purpose flour definitely works, but you get a sturdier and more bread-like texture from bread flour. I love using whole wheat flour when I can, but this dough is not fit for all whole wheat flour. In my recipe testing, I found that replacing up to 1 cup (around 130g) of the bread/all-purpose flour with whole wheat flour worked just fine. The bread was a bit denser, but had great flavor. I usually make it with 3 cups of bread flour and 1/3 cup whole wheat flour.
- Seeds/Add-Ins: The pictured loaf was prepared with 1/2 cup (60g) of sunflower seeds. I love extra flavor and texture, so I’ve been increasing that amount to 2/3 cup (80g). Use any of the suggested add-ins like sunflower seeds, pecans, walnuts, pepitas, raisins, dried cranberries, or a blend of these. If you want to use smaller seeds, such as poppy, chia, flax, or sesame, I recommend reducing the amount to 2 or 3 Tablespoons. You could, however, blend these smaller seeds with larger seeds/nuts/dried fruit for a total of 1/2 or 2/3 cup (60 or 80g).
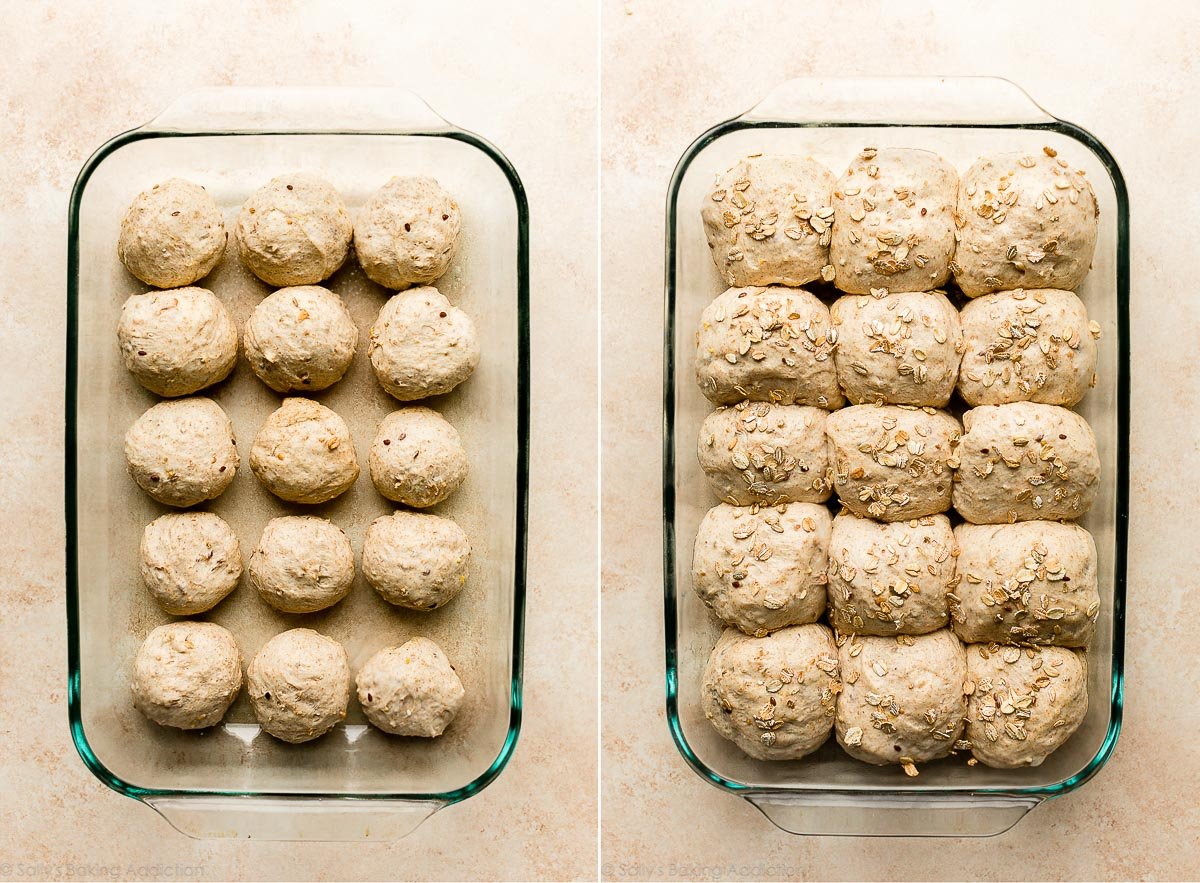
- Multigrain rolls: Make the dough as written above through the first rise (steps 1-5), then follow steps 5-10 in my dinner rolls recipe. Bake time is 25-26 minutes.
- If You Want to Top with Oats or Seeds: If you want to top the dough with oats or seeds prior to baking, carefully brush the dough after the 2nd rise (step 8) with 1 egg white beaten with 1 Tbsp water, then sprinkle 2 Tbsp of oats or seeds on top. Neither will stick without the egg white brushed on first. I did this with the pictured rolls.
- Doubling this recipe: For best results, I recommend making two separate batches of dough. However, if you want to double the recipe all in 1 mixing bowl, double all of the ingredients except for the yeast. Use 2 and 1/4 teaspoons yeast. This amount of dough may overwhelm your stand mixer, so I recommend mixing the dough with a large wooden spoon or silicone spatula instead. It will take a bit of arm muscle.


Reader Comments and Reviews
I make this recipe weekly in my bread machine, using Bob’s Red Mill 10 Grain Cereal, but have found that I must modify the amount of flour or it makes a sticky mess. The amounts I use are 3 Cups bread flour, and 1/2 Cup whole wheat flour. I also will add 1/2 C whole hazelnuts, sunflower seeds, chopped toasted pecans, raisins (or a mix of dried fruits/nuts), etc. If using fruits and nuts, I will also add in warm spices (I like 1T cinnamon or pumpkin pie spice for the holidays.) I love it. Thank you, Sally, for another great recipe.
I’d like to try using the dough setting on my bread machine for this. With the multigrain cereal and partial whole wheat flour, do I use the whole wheat setting or stick to Basic?
Hi Lynne, we haven’t tested this recipe in a bread machine, so we’re unsure of the exact directions for using one. Hope you enjoy the bread!
Should the add ins such as sunflower seeds or pepitas be roasted or raw?
Hi Carole, we typically prefer raw seeds for this recipe.
Really excellent bread recipe! It was the first sandwich bread I ever made and it came out great. I’ve made it ever week for the last few months. I don’t want to get store-bought bread anymore! But I’m trying to cut down on how often I have to make it. Hoping a 13×4″ pan would help. But how would you adjust for that? I’ve seen a couple comments asking the same thing. Looks like one person doubled the recipe and it ended up huge haha. Thanks for the help!
Hi
For the overnight instructions am I supposed to cover the dough in the bread pan?? Just want to make sure before I try. I normally use this recipe right away and I love it!
Thanks!!
Hi Kye, yes, you’ll want to cover it.
have made this recipe numerous times–have found that it always takes more flour to get to that ‘tacky’ stage–or less water—always use KA Lancelot flour and weigh the ingredients—have a batch rising now on a snowy morning———
Hi Sally! Thank you for this recipe, we really love it! I’ve made it twice now and always comes out beautifully. Is it possible to use a poolish for this recipe or maybe sourdough starter? Our first loaf got moldy on the 4th day (there was only about 2 slices left!) and so I am trying to think of a way to get better shelf life without refrigerating or freezing since my partner does not like toasted bread. Thanks again for the wonderful recipe!
Hi Angela, we’re so glad you enjoyed this bread! We have not tested a poolish or sourdough version of this bread, but please do let us know if you give anything a try.
I also found this dough way too wet, needing to add 3/4-1 cup additional flour to get the dough to come together in a mixer. My guess is that it has something to do with the mulitgrain you use in the soaker, and how much water that absorbs. Based on pure water:flour ratio without including the multigrain this dough is 95% hydration, so it seems the key factor to bring the hydration down is the multigrain soaker. Is this right? If so, it’d be great to have some more guidance on how to adjust based on which type of multigrain you use. I used 60 g rolled oats but I’m wondering if the best adjustment is to increase the oats or decrease the water content. Thanks!
Hi Evan, the soaking step is helpful here, as you can imagine, because the grains soak up a lot of that liquid. If you try the recipe again, I recommend reducing the water so there’s less liquid leftover to use. You can try reducing to 1 and 1/4 cups (300ml), or 1 and 1/2 cups (360ml).
I absolutely love this bread. I always double the recipe so that it makes four small loaves and I normally freeze 3 of the 4 loaves so I always have bread onhand.
I would really like to make this bread with 100% whole wheat flour. Do you have any suggestions on how to adapt the recipe to accommodate the whole wheat flour? Many thanks!
Hi Derry-Lea, we find that whole wheat flour yields quite a dry/dense loaf. You could try adapting our whole wheat dinner rolls recipe into a loaf, but we haven’t tested that. Let us know if you do!
SO GOOD. This just knocked my go-to recipe to the side and is officially my new number one. Seriously, this is in the top best bread I have ever had anywhere. Added hemp hearts and chia seeds. Love that it’s versatile and you can add what you’ve got. I also love that I can pretend it’s healthy since it has higher nutritional content than my standard white loaf
I love your recipes, Sally! I tried this one yesterday looking for a light and fluffy whole grain sandwich bread to replace “Dave’s killer bread.” For me, the dough was much too sticky, I suspect the kind of flour I used? I ended up adding almost 3/4 – 1 cup more flour to get it the right consistency, and ended up kneading in the stand mixer almost 5 extra minutes at a considerable speed. Although the bread came out soft, the crumb was a little gummy. Could this be because I overworked it when adding more flour? Is it normal to need that much more flour to achieve the right feel? Hoping to troubleshoot as the bread is really lovely. Thank you!
Hi Penny, thanks so much for giving this recipe a try! We’re happy to help troubleshoot. Did you use bread flour or another type of flour? Bread flour is crucial for best taste and texture There are several factors that can contribute to a dough’s consistency, even the weather and amount of humidity in the air—there’s nothing wrong with adding a bit more flour to bring it to a workable consistency. As for the gummy texture, yes, that typically happens when the dough has been overworked in the kneading stage. Hope these tips help for next time!
Hello to All at Sally’s
I’ve tried this recipe many times and it love the taste, but cannot get the 2nd rise to hold when i cook it. I’ve noticed the 2nd rise get quite tall very fast -like 10-15 mins and its well over tin. But i’ve been reluctant to cook it that soon, so i leave it 40 -45mins then bake and it falls every time. HELP! -please & thanks
Hi Wazza, is your dough rising in an especially warm spot? It sounds like it may be a bit too warm and is causing the dough to rise quickly. You can bake it after it rises about 1-inch over the pan, even if it’s earlier than stated—allowing it to continue to rise is likely what’s causing it to collapse in the oven. Hope this helps for your next batch!
oh mate, you’re spot on!
Yes it worked this time. thank you, thanks you, thanks you! you lot are awesome.
Yes I’ve been proofing (2nd rise) it on an open door of the griller section of the electric oven, while the oven is on (not the griller of course.) So the area is quite warm. I reckon i’ve got it sorted now and can start experimenting with other variations etc.
cheers to Lexi and the good people at Sally’s
My last message should have said “swapped a cup of whole wheat flour”. Thx.
I used this recipe yesterday and had a great result. Then today I experimented, I put in a cup of whole grain muesli, 1/3 cup flax seed, and swapped a of whole wheat flour, but otherwise kept the recipe the same. Honestly, I thought it was going to fail and be too heavy. But it was even better! Thank you for the base recipe and suggest trying these changes for an alternate version.
Do you think I could make the roll version as a brown and serve? Bake about 18 minutes then cool completely, freeze on the sheet then into bags? Thanks!!
I just made this today! Absolutely use a probe thermometer. I chopped up walnuts and toasted them in a skillet before adding them to the flour. I always make bread by hand and knead it on a silicone mat, it makes such a difference in the crumb and texture of the bread. I doubled it so that our downstairs tenant can have a loaf. It smells amazing!
I love this recipe, it’s been a hit with my family……only issue I have is that the one loaf is MASSIVE and the slices won’t fit in our toaster. Do you have baking instructions for making 2 loaves instead of just 1?
Hi Amanda, you could certainly try dividing the dough into two smaller loaves. We’re unsure of the exact bake time. So glad this bread was a hit with your family!
Amanda, You can definitely split the batch into 2 loaves. Just check it for doneness 5 or so minutes early.
This is a great recipe! I tried it for the first time today and the loaf turned out so nice. I have been making bread for over 40 years and this recipe is very close to the consistency of my large batch of bread. I like that it only makes one loaf. In our house now, it is only my husband and myself and usually I freeze the bread because we don’t eat it fast enough. I used 1/2 whole wheat flour and 1/2 white flour and for the option, I used just over 1/4 c of sesame seeds and just under 1/4 c of flax seed. I also baked it at 375°F for 30 minutes. It was baked perfectly. The loaf rose so nicely and I have a very beautiful large loaf for toast or sandwiches. I will surely make this recipe again. I have now placed it in my “Tried Yummy Recipes” folder on my Pinterest page. Thank you Sally for a super recipe!
This is the best bread ever! I was looking for a multi grain bread and happened on your recipe. I love that it is soft and moist. I have been making this for over a year now and it always turns out perfectly.
Can i double this recipe without problems?
Hi Laurie, for best taste and texture, we recommend making two separate batches rather than doubling.
Not sure where I went wrong as bread came out denser although soft and there weren’t a lot of air pockets. I used bread flour. Did it rise for too long or knead too long? How do I achieve more air pockets in bread?
Hi Kally, if bread seemed dense and didn’t have any air pockets, it sounds like it was over kneaded. An easy fix for next time! You may also find our Baking with Yeast Guide helpful to review, too.
WOW. After a few attempts at making bread and failing miserably, I was contemplating and shopping for a bread machine. Then I came across this recipe and for some reason it got my attention. It is SO good and SO easy. No way I’m wasting money on a bread machine. Made the second loaf today and its even better. Thanks Sally
I have never been able to make a decent loaf of bread before…but this bread came out perfect…with some tweaks for people that aren’t bread bakers.
1. Stick with the 110 degree rule for the yeast.
2. Did you time the baking with a convection over? because it took me almost an hour to reach an internal temperature of 205 degrees and I would take it to 210 for a great crumb next time.
3. It also takes quite a while for the yeast to start foaming and it doesn’t necessarily cover the whole surface of the mixture. keep it covered .
4. For the first Prove I put the bread in a small room with a space heater to simulate a proving drawer and it doubled in the allotted time.
For the second prove I did it overnight in the refrigerator, the next morning I put it on the counter for an hour then put it in the oven..
You can’t bake this by eye, use a thermometer and it will be perfect at 210F internal probe.
AFter all of that, it turned out fantastic!!!!
Hi Susan, thanks so much for your feedback and for giving this bread a try! We’re glad you enjoyed it. All the recipes on our site are written for a conventional oven setting.
Sally, I’ve discovered many wonderful recipes on your site.
Here is my ?: Has anyone made this SOFT MULTIGRAIN BREAD recipe by using the dough cycle on their bread machine? (I often choose this method for starting my bread. I really appreciate how easy it makes the bread making process for me — but I always personally shape the bread, do any additional needed rises, etc. & then bake it in the oven.)
I can make it without my bread machine BUT I truly like having it as an option.
Thank you so much for your help.
Hi Julie, We don’t own a bread machine and haven’t tested this recipe in one, but many readers have reported success doing so. Let us know if you give it a try!
Hi! Great recipe. Can you supply nutrition info? Thank you.
Thank you
Hi Helen! We don’t usually include nutrition information as it can vary between different brands of the same ingredients. Plus, many recipes have ingredient substitutions or optional ingredients listed. However, there are many handy online calculators where you can plug in and customize your exact ingredients/brands. Readers have found this one especially helpful: https://www.verywellfit.com/recipe-nutrition-analyzer-4157076
Came out perfect! What % of whole wheat flour could I substitute? Always experimenting! Lol
Hi Sheila, We are thrilled that you enjoy this bread so much! You can replace up to 1 cup of the bread/all-purpose flour with whole wheat flour, but you can expect the bread to be on the denser side yet still have had great flavor. We usually make it with 3 cups of bread flour and 1/3 cup whole wheat flour.
What can be substituted for butter? Oil would be best, but Earth Balance could work if oil won’t.
Hi Dorron, butter gives us a soft and flavorful loaf. We haven’t tested it, but you could try substituting a vegan butter like earth balance. Or if you prefer an oil, we would recommend room temperature coconut oil (still solid at room temperature) over a liquid oil.
This is our whole family’s favorite sandwich bread! Even my picky eaters will use it for PB&J sandwiches without whining for store bought! Comes together like a dream and always turns out well – we make this on almost a weekly basis now! Planning to try the dinner roll variation next week. Thank you, thank you for such a family friendly, foolproof recipe!!
First of all, This was one of the best bread loaf Recipes I have ever tried. This might not be an issue to everyone but I found the texture too soft and fluffy like a dinner roll rather than chewy like a sandwich toast. Again it is a matter of preference. how can I get the texture more chewy? should I add vital gluten? Dry milk? Thanks!!
For a denser bread add more flour – rule of thumb softer dough= softer bread …firm dough= firm bread. You could even sub in more wholewheat for a denser bread. Fyi- most recipes that say “sandwich” bread are going to be on the softer side. Maybe try try a sourdough multigrain recipe? I bake ALOT of bread lol
Hi! If I want to prepare the bread through the 2nd rise can I wait to bake it closer to dinner time? I would love, love to eat it hot and fresh from the oven!! I love all your recipes Sally…you are my go to for anything good ☺️
Hi Vicki! We fear the dough will rise too much if extended by much more than an hour for the second rise. If you can shift the whole process by a bit so that the bread is done baking around the time of dinner, that would be best!
Wow this is delicious bread and so easy to make. I didn’t have 7 grain cereal but I did have rolled oats and some organic wheat berries to add. It is perfect for sandwiches and so much better than store bought. With bread costing $6 a loaf I’m just making my own from now on
Hi Sally,
My water, oats, sugar & yeast did not rise as expected. No foaming on top!
Measured correctly, timed & active dry yeast was fresh.
How would you recommend proofing the yeast & sugar before blending with oat solution?
This method has never failed me in the past.
Note: First rise took the max. 2 hours. 2nd rise is in process.
Keeping my fingers crossed for a delicious loaf of bread.
Thanks,
Shirley
Hi Shirley, was the cereal mixture about 110°F (43°C)? If it’s much hotter than that, it can kill the yeast and prevent it from activating correctly. Hope the bread turned out well for you!