

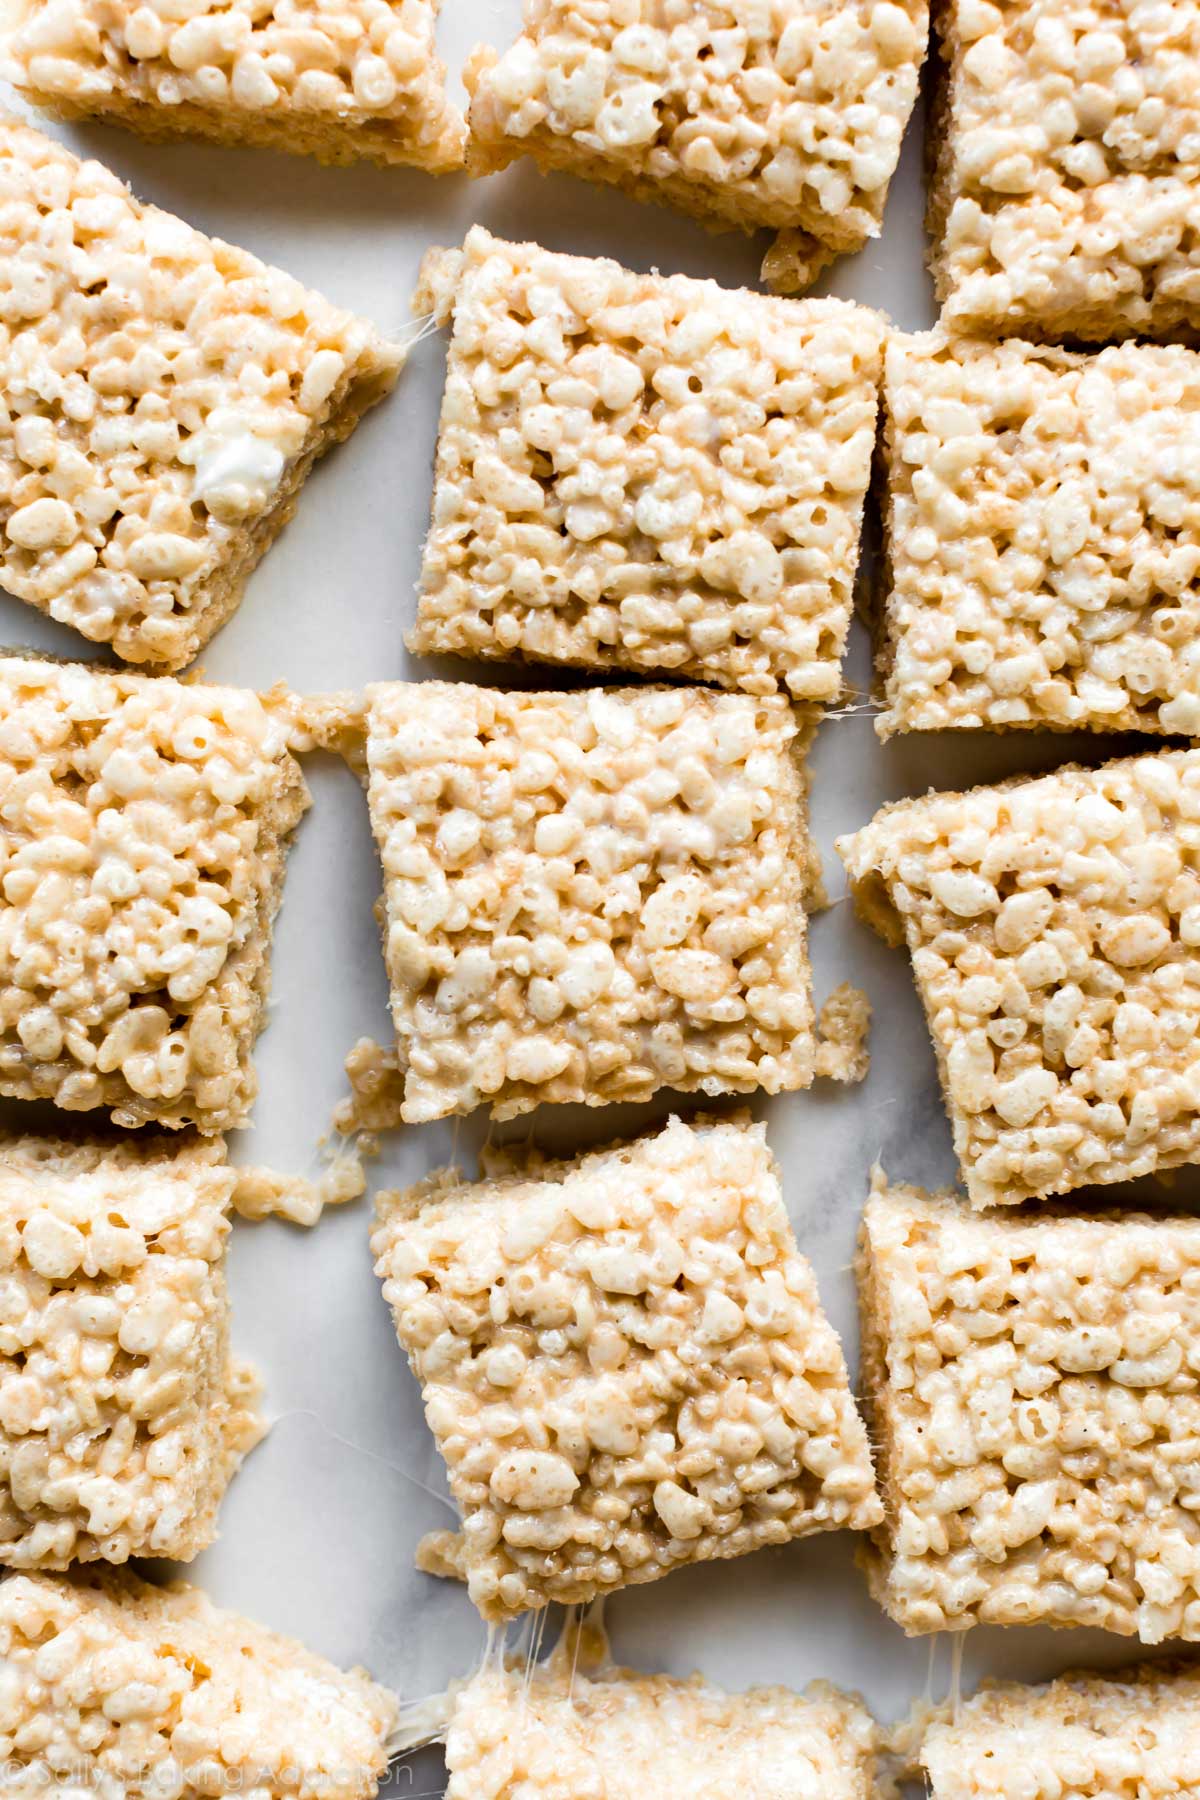
The ratio of cereal to marshmallow makes or breaks a rice krispie treat… literally! For extra gooey and buttery rice krispie treats, use this recipe. The addition of a little extra butter and marshmallow, plus a splash of vanilla extract and a pinch of salt, makes all the difference.
I originally published this recipe in 2019 and have since added new photos, a video tutorial, and helpful success tips.
I wasn’t going to publish this recipe because, really, how many ways can one make a rice krispie treat? (Hello, cake batter rice krispie treats and s’mores rice krispie treats from forever ago and welcome to the marshmallow crispy cookie version!) The internet is flooded with these classic marshmallow-cereal squares, but I figured you might like to know how I’ve been making them over the years…? Maybe? Hopefully?
This is, without question, the best way to make rice krispie treats and I have a few tricks up my sleeve to guarantee that the treats are extra marshmallow-y, extra gooey, extra buttery, extra flavorful, and extra AWESOME. I make these whenever I need a quick and guaranteed crowd-friendly dessert. In fact, I just served a double batch at a big cookout over the weekend. Not a single square left. They are also the perfect treat to include in our list of back to school recipes.
Crispy rice treats are a totally retro dessert (just like a nostalgic chocolate cake roll!) and once you take that first bite, you’re instantly reminded why they’re a staple. So good!!
One reader, Diane, commented: “The recipe has wonderful flavor. The ton of marshmallows and my homemade vanilla extract (thank you, Sally) did the trick. Gooey, tasty, and if you need a sweet fix, this is the one. ★★★★★“
Another reader, Tracy, commented: “I made these yesterday, and my husband declared them the best Rice Krispie treats ever, and I agree. This will be my go-to recipe from now on. ★★★★★“

5 Simple Ingredients in These Rice Krispie Treats
You only need 5 simple ingredients for these no-bake squares.
- Butter: Like all good desserts, the base of great rice krispie treats is butter! You need 3/4 cup, which is 170g, or 12 Tablespoons.
- Marshmallows: These krispie treats are extra marshmallow-y without falling apart. You need two 10-ounce bags (about 11 heaping cups) of mini marshmallows. Or you can use homemade marshmallows!
- Vanilla Extract: This is an easy addition that turns a good rice krispie treat into a great rice krispie treat. You only need 1/2 teaspoon, but what a difference it makes! Homemade vanilla extract is excellent here.
- Salt: Salt is another little flavor enhancer I add to my rice krispie treats. Like vanilla extract, salt is a super convenient ingredient you already have in your kitchen, and you don’t need much of it. Just a pinch adds a depth of flavor otherwise absent from crispy rice treats.
- Rice Krispies Cereal: What’s a crispy treat without rice krispies cereal? The best!
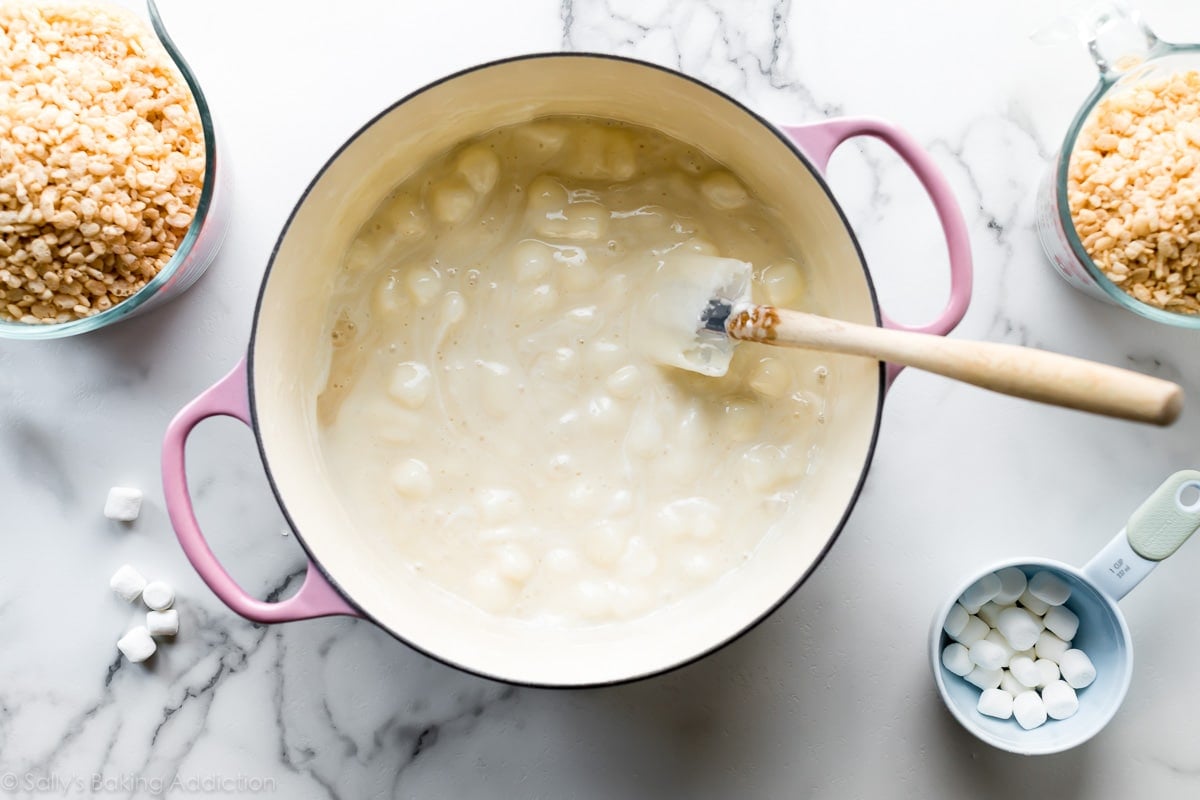
Melt the butter and marshmallows in a big pot on the stove, then remove from heat and gently stir in the remaining ingredients. I just use my handy 5.5-quart Dutch oven. Any similar size works great!
Best Ratio of Marshmallow to Cereal
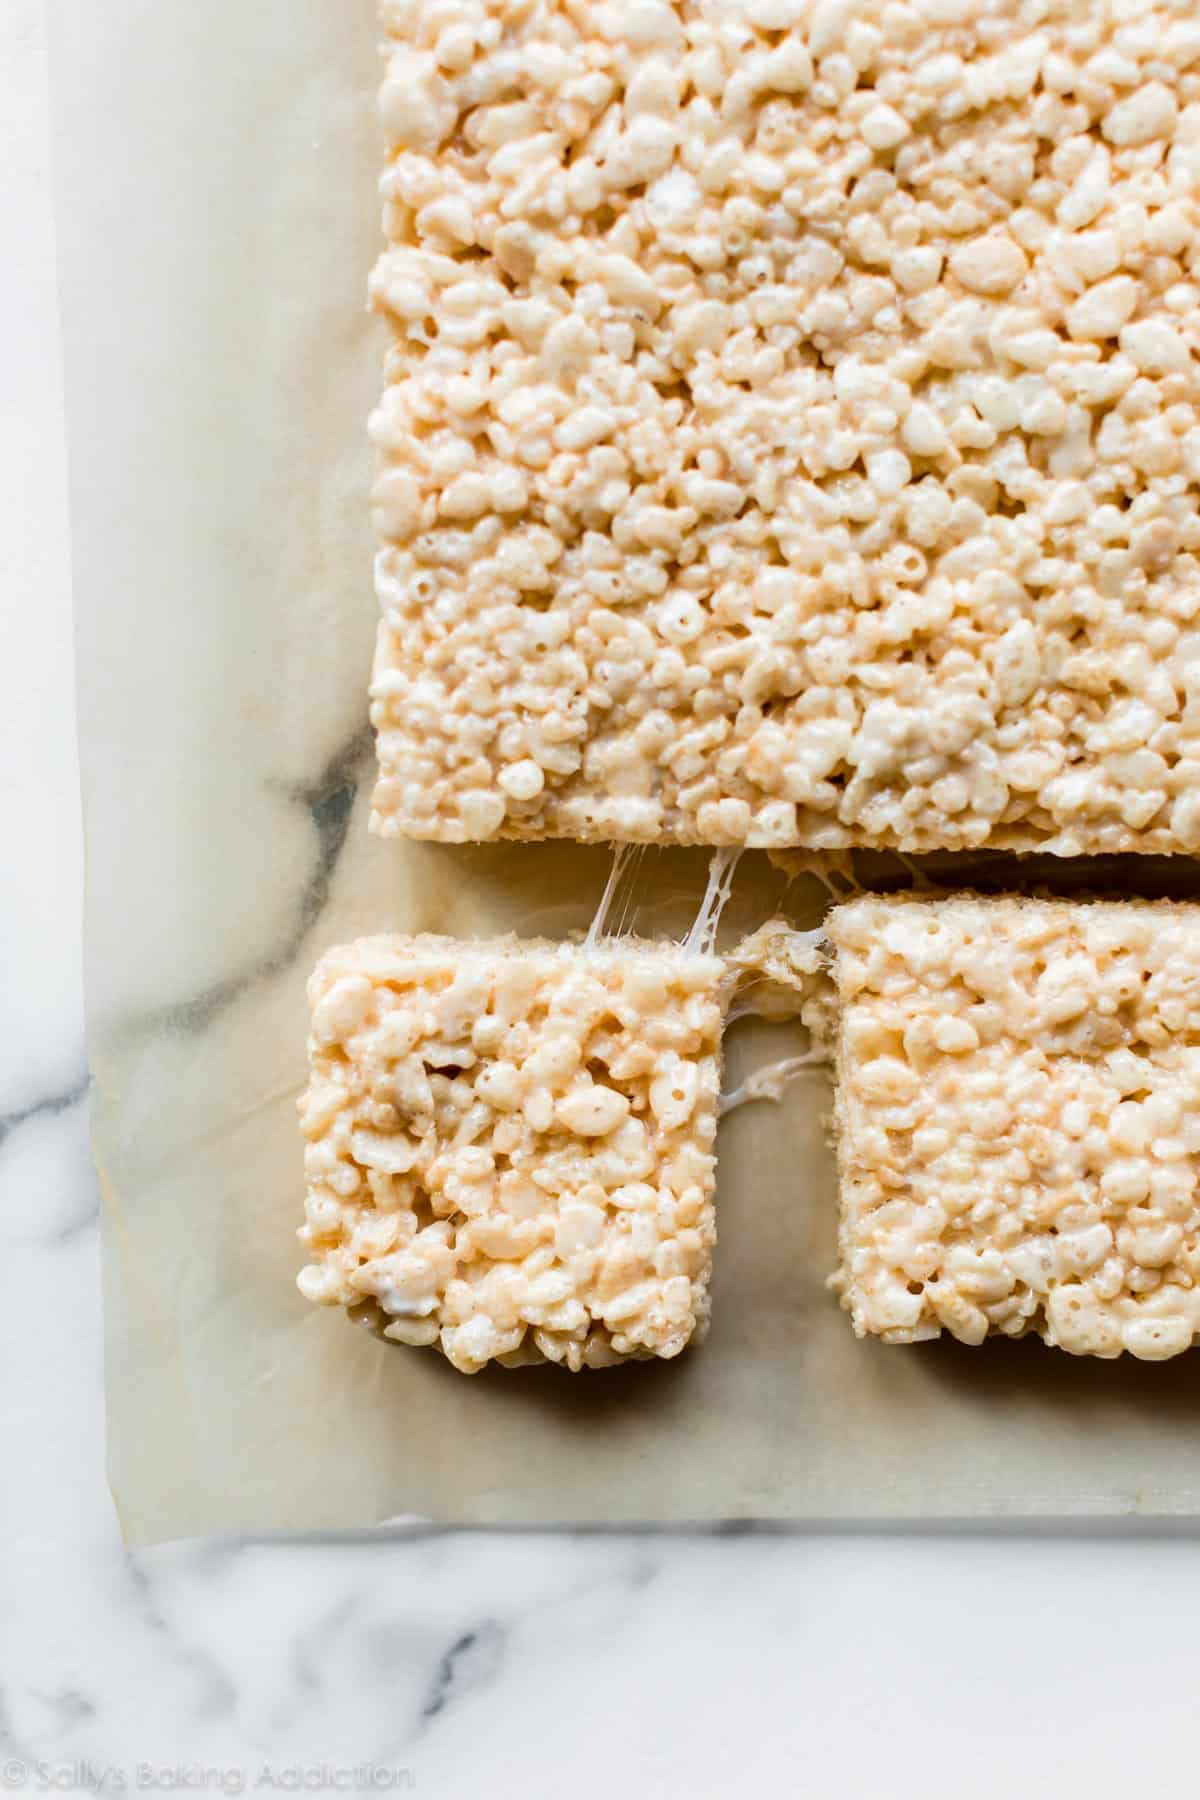
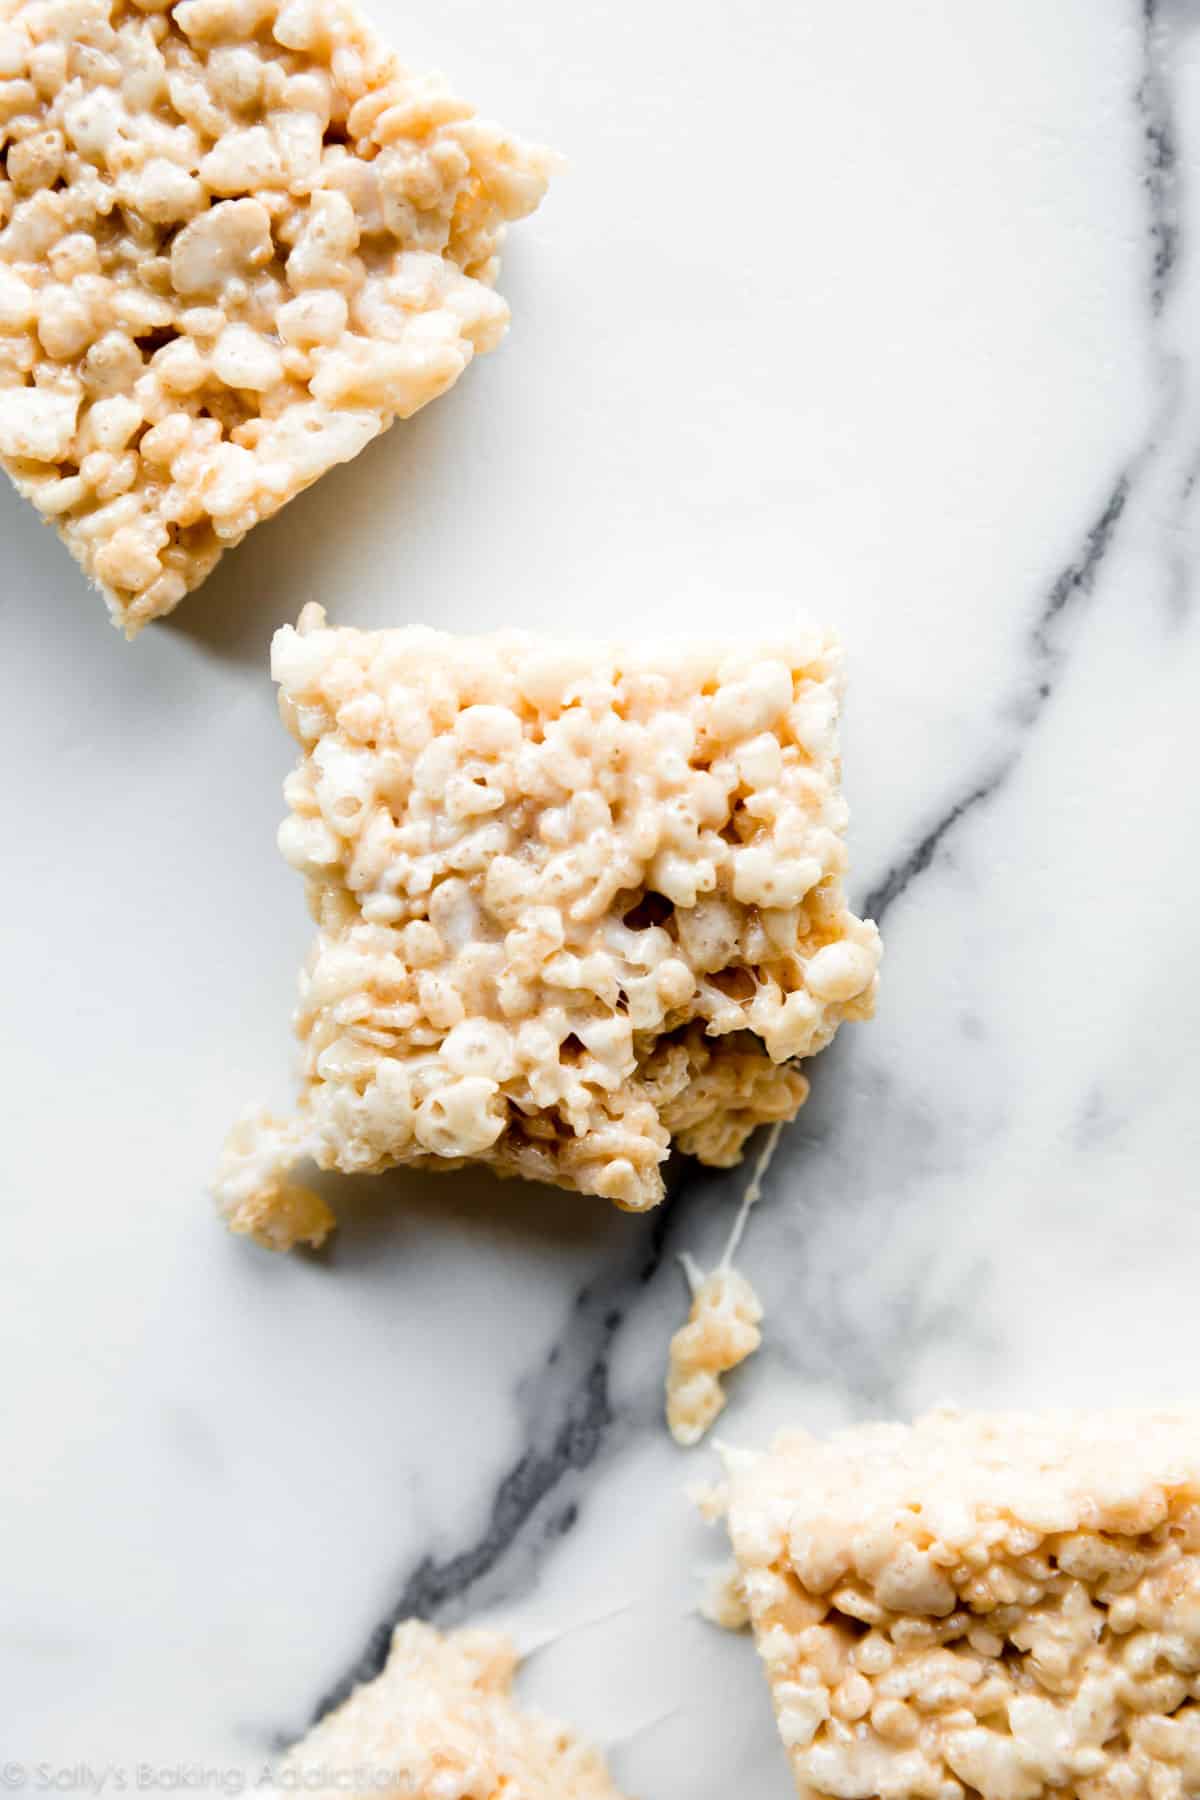
An important factor in a rice krispie treat recipe is the ratio of marshmallow to cereal. Too much cereal and the squares will taste dry, crunchy, and bland. Too much marshmallow and the squares will be too sticky and fall apart. The best ratio for a 9×13-inch baking pan is two 10-ounce bags of mini marshmallows (566g, or about 11 heaping cups) and 9 cups of cereal (270g).
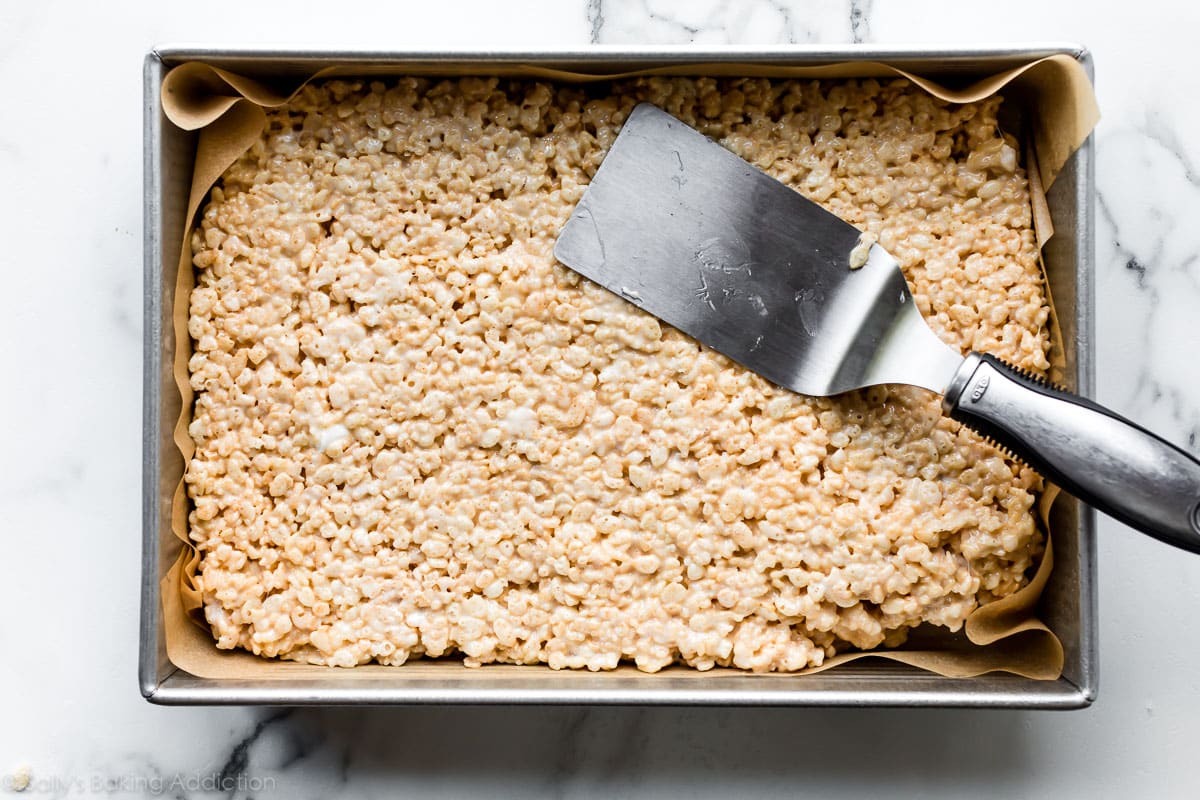
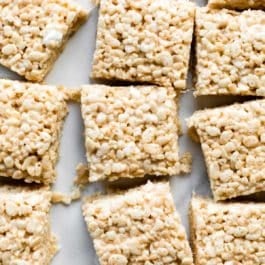
To prevent any kind of sticking, line your baking pan with greased parchment paper. I just lightly spray the parchment paper with a little nonstick spray.
I line the pan for many of my brownie and bar recipes, like homemade brownies and M&M Cookie Bars, too.
The #1 Trick for Rice Krispie Treats
Do you want an extra buttery melt-in-your-mouth marshmallow square? Of course you do. In order to achieve this, do NOT pack the rice krispie treats down into the baking pan. Use greased fingers or a greased spatula to softly spread and stretch the mixture into the pan, then use a flat spatula to very gently press the mixture down. Do not compact it with force, otherwise your treats will be thin and hard. Instead, just lightly press the treats down into the pan. Butter the back of a flat spatula or spray with a little nonstick spray to prevent sticking. Your treats will be soft yet crisp and not overly crunchy. 🙂
I recommend doing this with my scotcheroos and white chocolate Lucky Charms treats, too!
That’s basically it! I don’t need to convince you that rice krispie treats are delicious, but I hope you try these little extras (the vanilla, salt, ratio of marshmallow to cereal) the next time you need a recipe for these marshmallow squares.
More No-Bake Desserts
- No-Bake Peanut Butter Bars
- Peanut Butter Fudge
- Scotcheroos
- Ice Cream Cake
- No-Bake Cookies
- No-Bake Cheesecake Jars
- Caramel Dipped Pretzels
Favorite Rice Krispie Treats
- Prep Time: 10 minutes
- Cook Time: 5 minutes
- Total Time: 1 hour, 15 minutes
- Yield: 20 treats
- Category: Dessert
- Method: Cooking
- Cuisine: American
Description
This is our favorite recipe for classic rice krispie treats. Adding a little extra butter and marshmallow, plus a splash of vanilla extract and a pinch of salt makes all the difference! Let them set for at least 1 hour before cutting into squares.
Ingredients
- 3/4 cup (170g; 12 Tbsp) unsalted butter
- two 10-ounce bags (566g; 11 heaping cups) mini marshmallows
- 1/2 teaspoon pure vanilla extract
- pinch salt
- 9 cups (270g) crispy rice cereal
Instructions
- Line a 9×13-inch baking pan with parchment paper. Lightly grease the parchment. I always use a very light mist of nonstick spray. Set aside.
- Melt the butter over medium heat in a very large pot. Once melted, add the marshmallows. Stir the mixture until the marshmallows are completely melted.
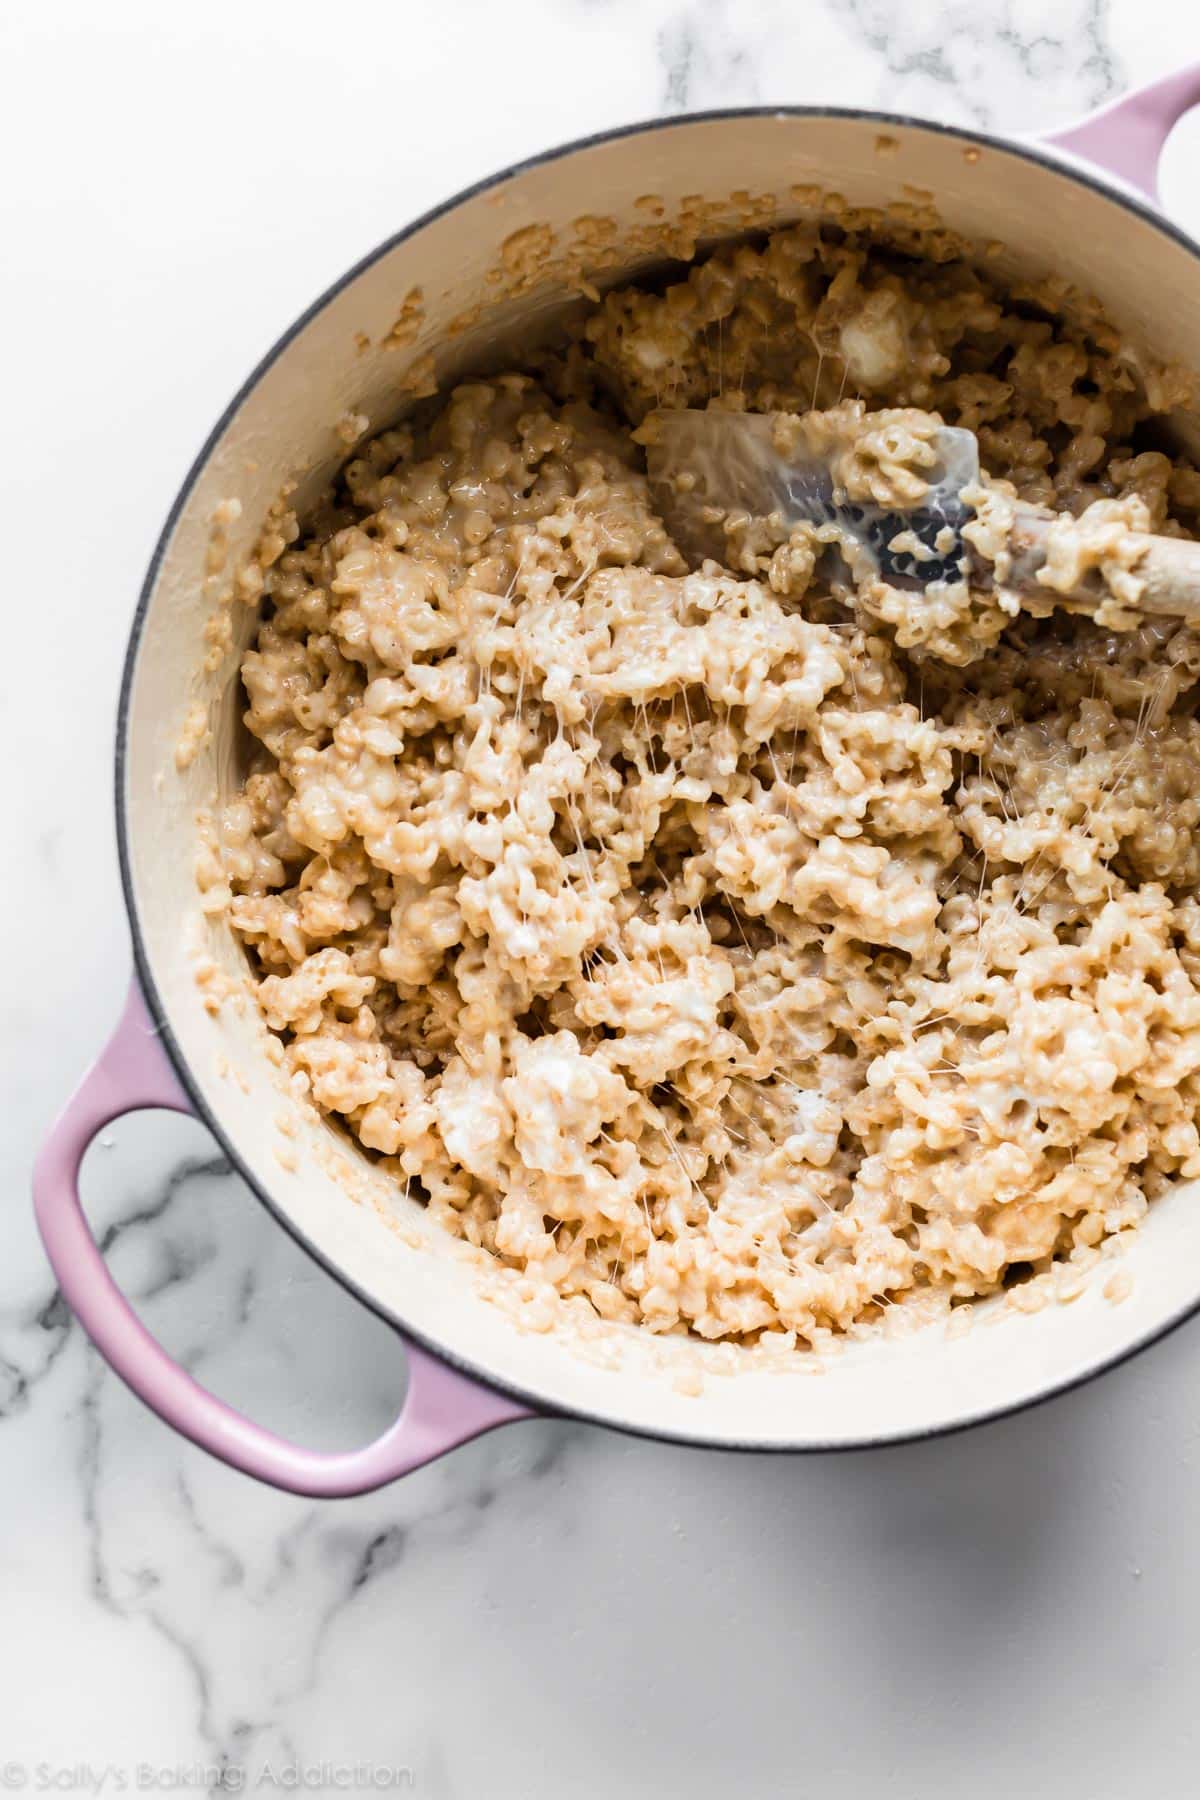
- Remove from heat, then immediately stir in the vanilla extract and salt. Finally, fold in the cereal. Make sure each piece of cereal is coated with the marshmallow mixture.
- Transfer mixture to prepared pan. Using a silicone spatula (greasing it lightly helps), gently spread mixture to fit the pan. Lightly grease the back of a flat spatula and very gently press the mixture down into the pan. Do not pack it down with force, just lightly press down until it is secure in the pan.
- Allow treats to set for at least 1 hour at room temperature, and up to 1 day. Cover tightly if leaving out for more than a few hours.
- Lift the rice krispie treats as a whole out of the pan using the edges of the parchment paper. Cut into squares.
- Cover and store leftover treats at room temperature for up to 3 days. To store, place in an airtight container, with sheets of parchment or wax paper between layers.
Notes
- Freezing Instructions: Rice krispie treats aren’t the best dessert to freeze because the texture isn’t always completely the same after thawing. That being said, you can still freeze these squares. Freeze in layers between sheets of parchment or wax paper in a freezer-friendly container for up to 2 months. Thaw at room temperature before serving.
- Special Tools (affiliate links): 9×13-inch Baking Pan | Parchment Paper | Large Pot (such as a Dutch Oven) | Silicone Spatula | Flat Spatula
- If gluten free, check labels to ensure all products are certified gluten free.
- For the pinch of salt, I always add a little less than 1/8 teaspoon.
Adapted from Kellogg’s


Reader Comments and Reviews
This is the best rice crispy treat recipe out there. I use this recipe with other cereals like Lucky Charms, Cinnamon Toast Crunch and Fruity Pebbles! Make a nice size treat!
I love these when the house is craving something sweet and simple!
Instead of using pure vanilla extract I chop up caramels (Sally’s homemade are the best!) and melt them with the butter and marshmallows.
Elevated and decadent! They don’t last long in my household.
These are so good! Way better than store bought.
Great recipe…love that ingredients are also listed by weight in grams….makes it so much easier….most perfect results…
Sally and crew…. (my question is at the end – PLEASE, correct me if I am wrong in my calculations. The several brands of Krispies (Kelloggs, Great Value, ect.) are now showing that the weight of a “measured” cup of puffed rice is only about 27.33g (41g per 1-1/2 cups) or 246g for the 9 cups of Krispies, which is almost a 30 gram difference for this 9 cup recipe. I literally measured 5 separate cups sampling on a new kitchen scale and confirmed the weight to the ingredient label on the boxes… I discovered this because lately, I have been price-checking all my groceries (for schrink-flation) and then I noticed the difference of your recipe to the weights of the different brands of the same puffed rice product. This is probably due to “puffing” of each puffed rice to hold the volume so as not to raise the cost of the product. This is resulting in a lighter cup of the measured cereal when compared to your recipe and to the manufacturer’s products a year or more ago. Many other dried processed cereals are also the same. MY QUESTION: Does this in any way change the amounts of the other ingredients in the recipe?
Hi John, great question and I really appreciate how carefully you measured everything and explained what you’re seeing. You’re absolutely right that cereal weights can vary by brand and even change over time as the size and “puffing” of the pieces shifts, which is why cup measurements can sometimes differ from what a kitchen scale shows on the box label. For this recipe, the volume measurement (cups) is still the primary guide, and you don’t need to adjust the other ingredients if you’re measuring the cereal by cups. As long as you’re using the same total volume of puffed rice, the ratios for the marshmallows, butter, and other ingredients will stay balanced. We will double check our measurements across a few brands!
Sally, made these for a work potluck. Can’t believe how many people asked for the recipe.
Also, I sprinkled cinnamon over the top of mine! WoW!
AMAZING DELICIOUS RECIPE. SO much better than the original rice krispy recipe. The salt and vanilla and extra butter and marshmallow make this the best.
I highly recommend. I have used so many other recipes from Sally and this one just adds to the list of them that I use
Excellent Recipe! I made 1/2 recipe and used vegan marshmallow.
I added 2 tablespoons of orange marmalade to the butter marshmallow mix. Then added the rice crispness. What a lovely taste addition! Loved the recipe and the extra flavor!
Just made a batch. Sorry I can’t smell or taste them. But I’m sending them up to my son and his wife in Pittsburgh at Carnegie Mellon as a surprise nostalgia from days of yore!! I’m hoping they’ll enjoy them as they certainly do look tasty. I’m going to upscale them by dipping half the batch of rice crispy in white chocolate and remaining half in dark chocolate. Thanks Sally I always do love making your recipes.
Hi! I am a fan favorite of this recipe. I want to jazz them up for Christmas… maybe some red & green sprinkles and/or red & green M&Ms. Any advice, tips/tricks for this? Thank you!
Hi Heather! You can add some with the rice cereal for sprinkles/m&ms throughout or simply sprinkle them on the top and lightly press them in to stay. No other adjustments needed!
Thank you!!
Hi Sally,
Have you ever made these with coconut oil instead of butter? I have a friend with a dairy allergy, so hoping to substitute. Thank you!
Hi Liz, Butter is key in this recipe for taste, as well as getting the right overall consistency of the finished bars–we don’t recommend swapping it. You may have more luck trying with a plant based butter, but we haven’t tested it ourselves to know how it might impact results. Let us know if you do any experimenting!
I’ve substituted coconut oil for butter in rice crispy treats, and it’s delicious! If you use unrefined coconut oil it adds a lovely coconut flavor to the treats. Use a refined coconut oil if you want a more neutral taste. Happy baking!
Kids didn’t like them they are too sticky.
Maybe coconut “butter” instead of coconut oil? You may have to add a few drops of butter flavoring too because it’s the butter that normally makes rice Krispie treats taste so good!
Ive never made rice krispie treats it was simple I added Chocolate mint stirring them in . Looks good, tastes good and easy! TY this will help my GF son, for an easy dessert!
Can I use your Marshmallow crème recipe? It’s so easy and so yummy! If I can use it, how much do I use? Thanks 🙂
Hi Sarah! Marshmallow fluff/creme stays in its “liquid”/thin consistency, where marshmallows will help solidify the treats. We don’t recommend substituting!
I would like to try cutting these into shapes for Christmas. Is that an anyway feasible?
Yes, some readers have reported cutting the set bars with cookie cutters. Let us know if you try!
I made them in a 9 x 13 pan, dyed the marshmallow butter mixture green and then cut them into triangles and decorated them to look like Christmas trees. Very popular at our high school bake sale.
I couldn’t reply directly to Jane, but I want to thank her for that excellent idea. I dyed mine green and they were adorable! Great recipe! Thanks!
I want to make this version and also make a version using the Cocoa Rice Krispies. Can I just use this recipe and sub the Cocoa rice krispies? Or do I need to alter anything for when I use the cocoa ones?
Hi Isabel, you can use Cocoa Krispies here instead—no other changes should be needed. Enjoy!
I added some nuts, chocolate chips and peanut butter to it and it was amazing. Loved this recipe.
These are awesome!
Tip for pressing them into the pan- save your butter wrapper and use that for mess free compression!
I browned the butter and added almond extract as well as vanilla and they are delicious! Highly recommend!!
WORST RECIPE i’ve ever done!!! do not do this recipe! I think my dutch oven is ruined. I was so disappointed. Every other Sally’s recipe has worked for me! Please nobody else make the same mistake I did of trying this recipe and ruin their dutch oven and waste a ton of marshmallows and cereal!
I made them with no trouble at all and they turned out great!!
Not sure what you did, but they turned out perfect for me.
Love this recipe!
For a fun twist I replaced two cups of Rice Krispies with crushed double stuffed Oreos, always a hit and so easy to make!
Hi! If I wanted to add peanut butter to them, how much should I add? Would I need to do anything different? Thank you!
Hi Maegan, We recommend adding 2/3 cup creamy peanut butter and reducing the butter to 1/2 cup (1 stick). Let us know if you try them!
I added peanut butter, they are absolutely delicious! Thank you!
Love all your recipes Sally! As for gluten free, the Walmart brand Great Value Rice Crisps cereal is gluten free and when mixed with all this deliciousness, no one would ever know. I make these all the time for my daughter as a snack, because gluten-free snacks are not always yummy. But these are always a hit! Thank you for your many great recipes!
I tride this and it’s so easy for a snack or dessert I would recommend this 9 out 10 times
It’s flavorful and a good treat for the family!
I use one bag marshmallows and one small jar of marshmallow creme for my Rice Crpispies.
Hello! I’d like to add sprinkles, do you recommend a certain amount, and would I need to adjust the other ingredients at all?
Hi Bridget, You can add some with the rice cereal for sprinkles throughout or simply sprinkle them on the top and lightly press them in to stay. No other adjustments needed!
Hi guys! Can I use regular sized marshmellos?
Hi Lucy, You can use the full size marshmallows. You will need 20 oz total.