

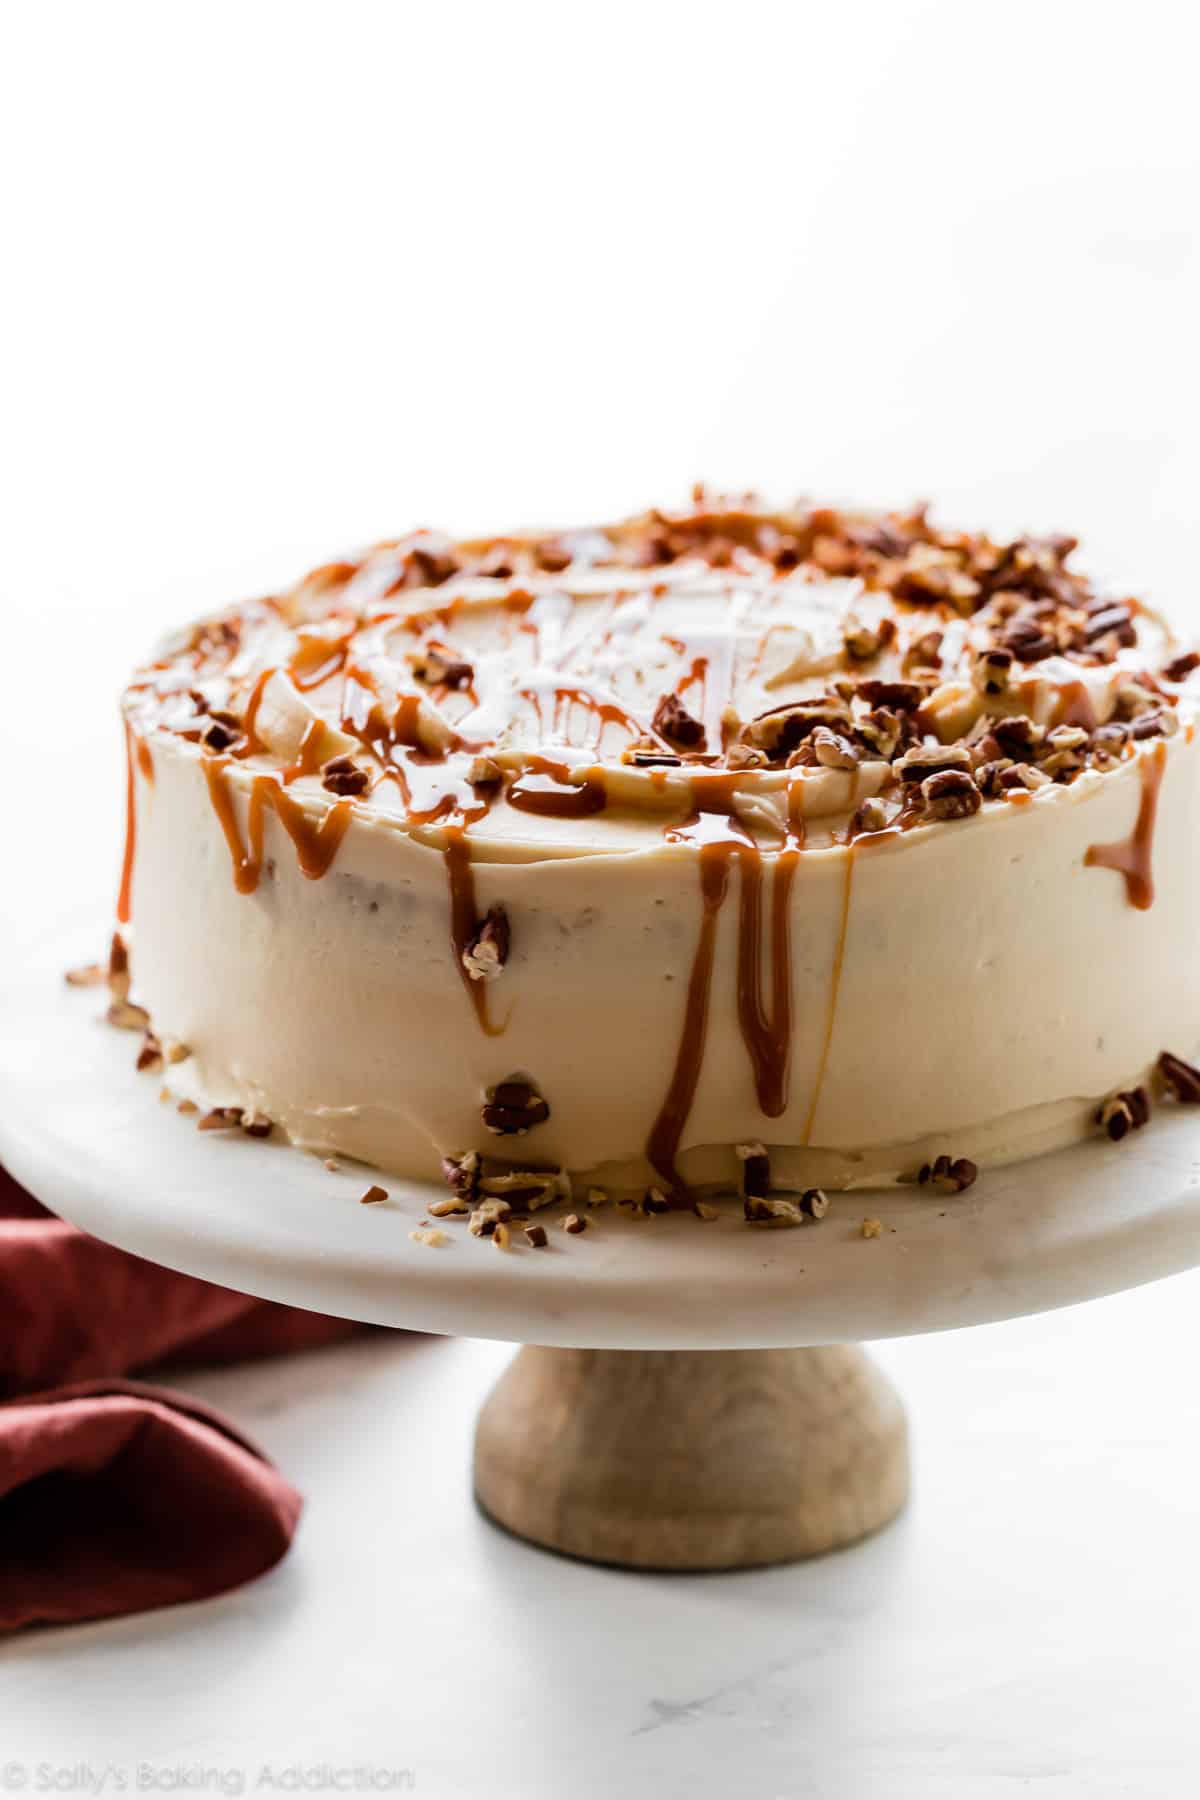
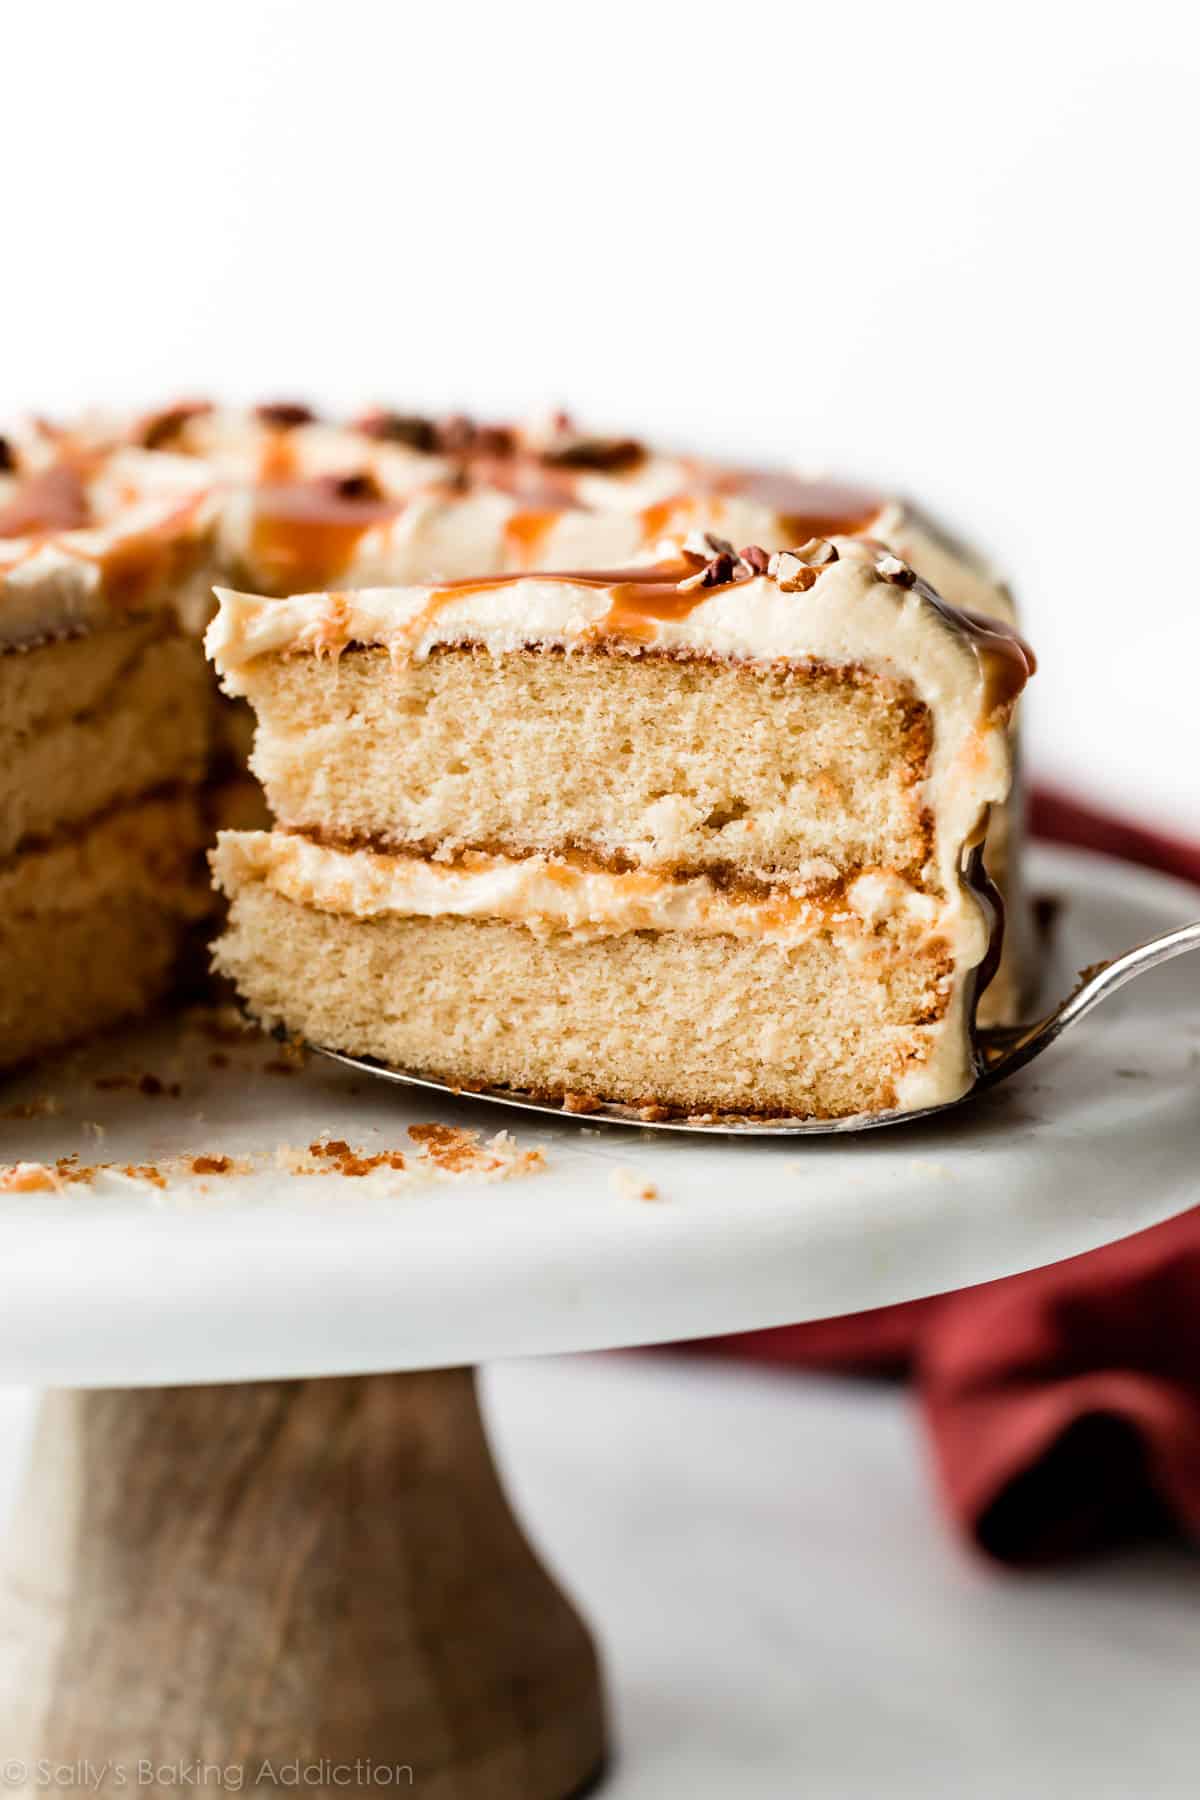
This unique and absolutely divine burnt sugar caramel cake gets its flavor from burnt sugar syrup. Cook sugar until caramelized, then add boiling water. We’ll use the syrup in both the cake and frosting. Add salted caramel for extra flavor and toasted pecans for a lovely garnish. It’s soft, buttery, and totally worth every minute of prep time.
It’s been a year in the making. I’m proud to finally share my version of caramel cake, a new cake recipe inspired by a favorite that my mother-in-law enjoyed when she was younger.
What is Burnt Sugar Caramel Cake?
This burnt sugar caramel cake is a wonderfully sweet and buttery cake flavored with homemade burnt sugar syrup. The syrup combines caramelized sugar and water, a mixture you cook on the stove until it’s dark amber in color. The cake does not taste burnt, bitter, or charred. Rather, it tastes like caramel and caramelized sugar, the same topping used for creme brûlée! We’ll flavor the frosting with burnt sugar syrup as well. Inside the cake and frosting, the syrup tastes like caramel. In my experience, this is the only from-scratch caramel flavored addition that (1) provides flavor and (2) doesn’t ruin the cake’s texture.
Behind the Recipe
This is not the exact recipe that my mother-in-law used to enjoy. Sadly, she was unable to find her original. She tried a few online recipes for burnt sugar cake, but none of them lived up to her memories. I researched a few recipes and after testing them myself, I was pretty disappointed at the dense texture and lack of flavor. I tried adding brown sugar and more vanilla for extra flavor, but nothing proved successful. So I turned to my white cake recipe, a cake that’s consistently soft and flavorful. My white cake is the starting point for strawberry cake, espresso chocolate chip cake, cookies & cream cake, pistachio cake, and coconut cake because it’s ALWAYS a winner.
My MIL said it’s the only burnt sugar cake most resembling what she enjoyed growing up!
How to Make Burnt Sugar Caramel Cake
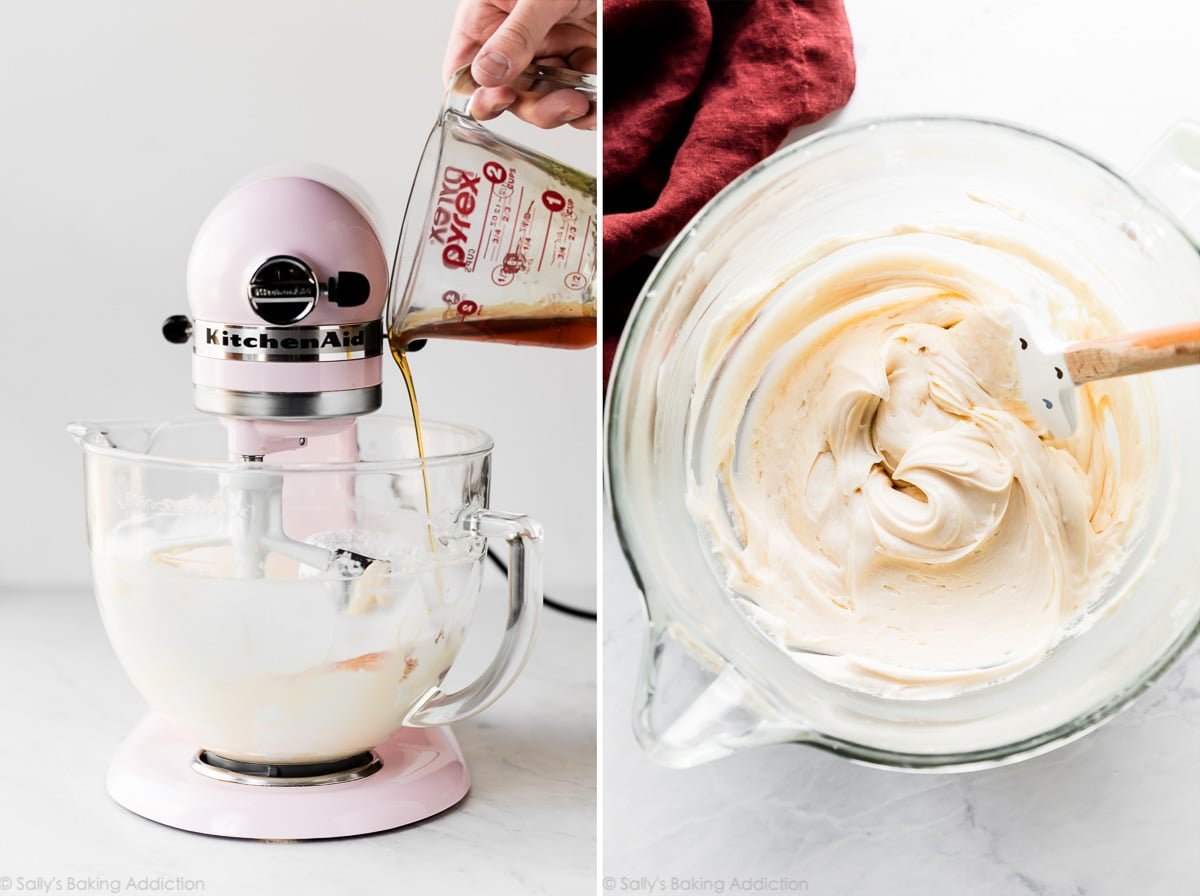
- Make Burnt Sugar Syrup: After cooking it, cool the syrup before using in the recipe. Use half in the cake batter and half in the burnt sugar frosting.
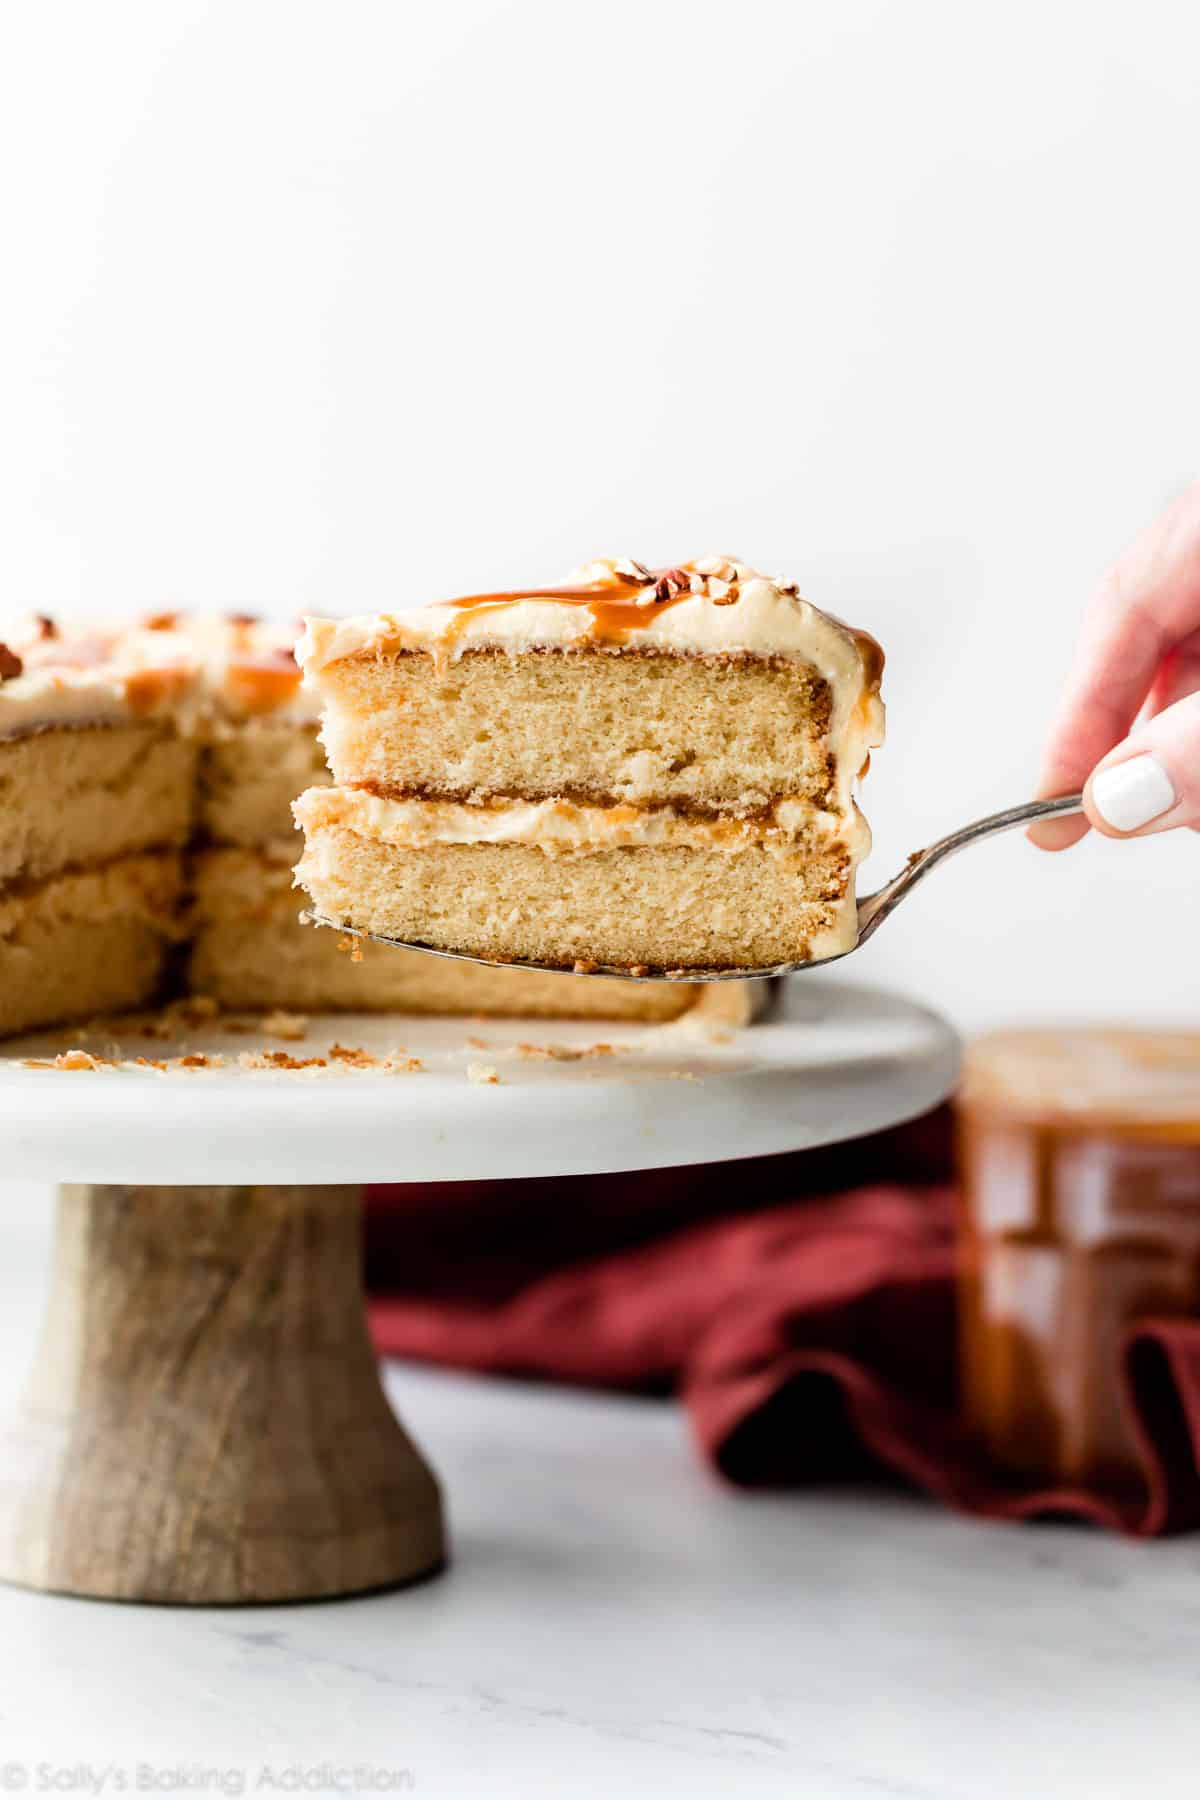
- Prepare Cake Batter: Since we’re adding a liquid (the sugar syrup), reduce the sugar and milk in my white cake recipe. We’ll also leave out 1 egg white to really ensure that this cake isn’t too wet. Cake flour promises a soft crumb, egg whites (no yolks) promise a fluffy crumb, and sour cream promises a moist crumb. For best results, do not make any ingredient substitutions.
- Bake the Cakes: As a result of the burnt sugar syrup cooking, the cakes develop a golden crust around the edges. For a 3 layer or 9×13 inch cake, see recipe notes.
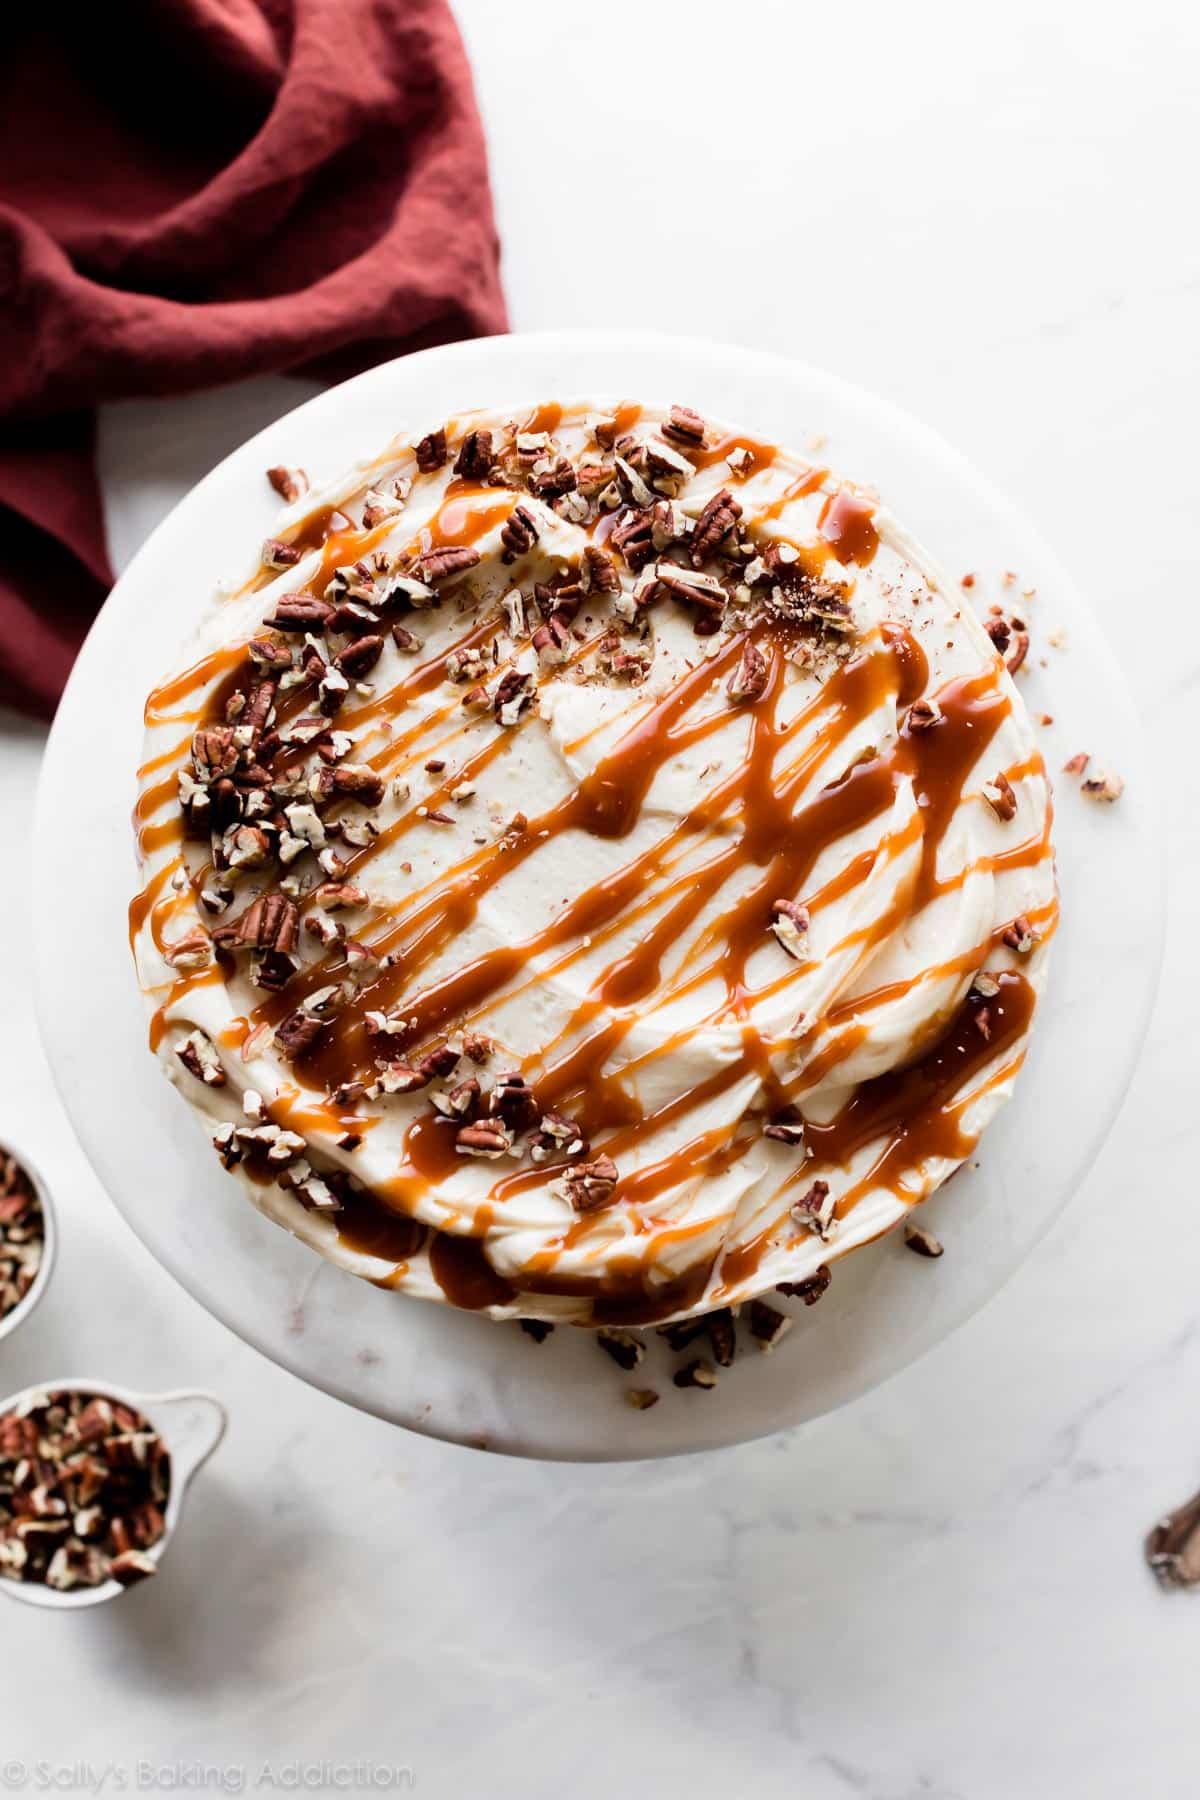
- Prepare Salted Caramel: To boost the caramel flavor in this cake, I highly recommend filling and garnishing the cake with my 4 ingredient salted caramel. You can even prepare the salted caramel a few days ahead of time.
- Make the Frosting: The burnt sugar frosting is just like my vanilla buttercream, but we’ll add burnt sugar syrup for flavor. To complement the flavor, use extra salt. If you love salty sweet, this is the frosting for you!
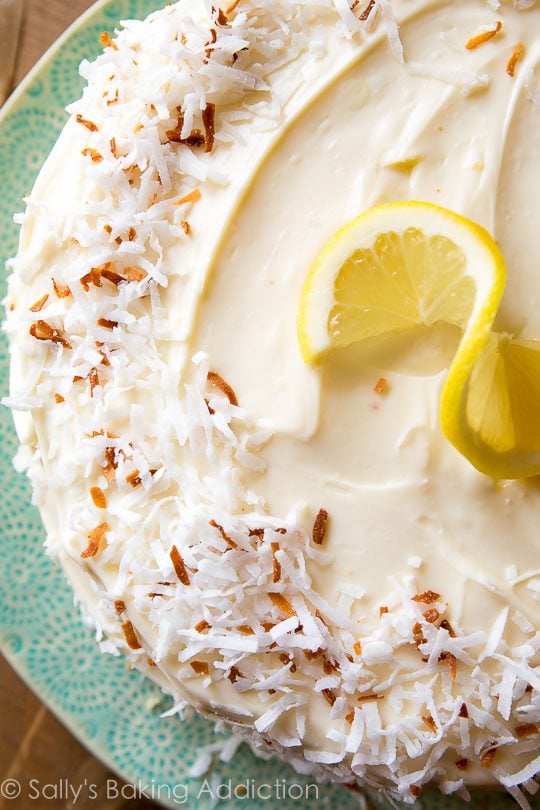
- Assemble & Frost the Cake: 2 layer cakes are pretty easy to decorate. For a little garnish, I love topping the cake with toasted pecans. See recipe note for instruction.
Video Tutorial: Burnt Sugar Caramel Cake
Prepare the Burnt Sugar Syrup First
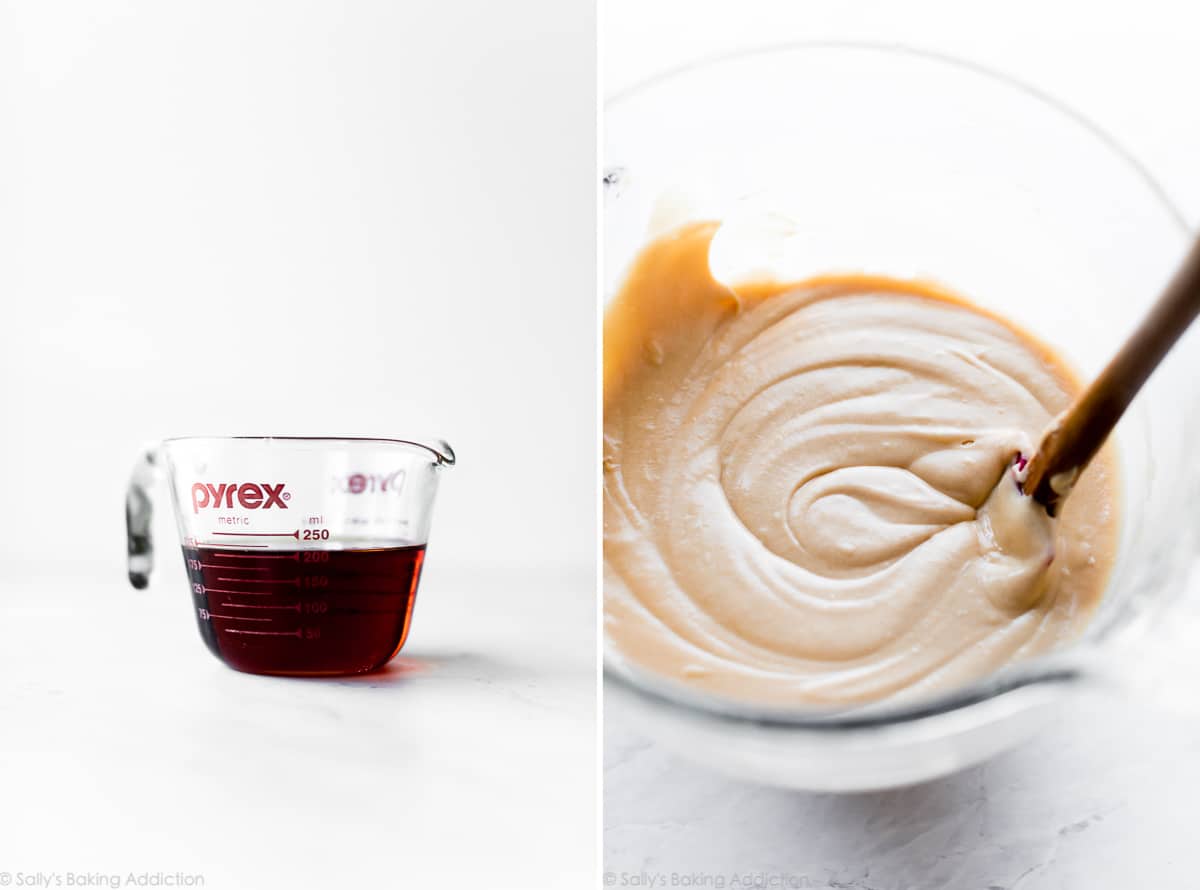
The most important step in this cake recipe is preparing the burnt sugar syrup. You need a sturdy 3 quart pan to ensure the cooking sugar doesn’t crystalize. (This pan is great quality for its price.) Cook 1 cup granulated sugar over medium heat, stirring constantly with a wooden spoon. Wooden spoons do not conduct heat and are ideal for candy-making. After chipping a few of my old wooden spoons, I just bought this set and LOVE them!
After about 5 minutes, the sugar begins to melt. If you notice any clumps, try to break them up with your spoon. So far in the process, this is the same exact way we start salted caramel. Once there are no lumps and the sugar is golden brown, about 8-10 minutes total, very slowly drizzle in 3/4 cup of boiling water. Have boiling water at the ready for this step because in the world of candy-making, timing and temperature are key. Wear an oven mitt because the water will rapidly sizzle and steam.
You don’t need a candy thermometer for this, but you can use it if you have one.
After you add all of the water, cook the syrup for an extra 3 minutes over low heat then cool the syrup completely. It will thicken as it cools. Once cool, you can use it in the cake batter and frosting. The cake batter is light beige and smells incredible. Steal a taste!
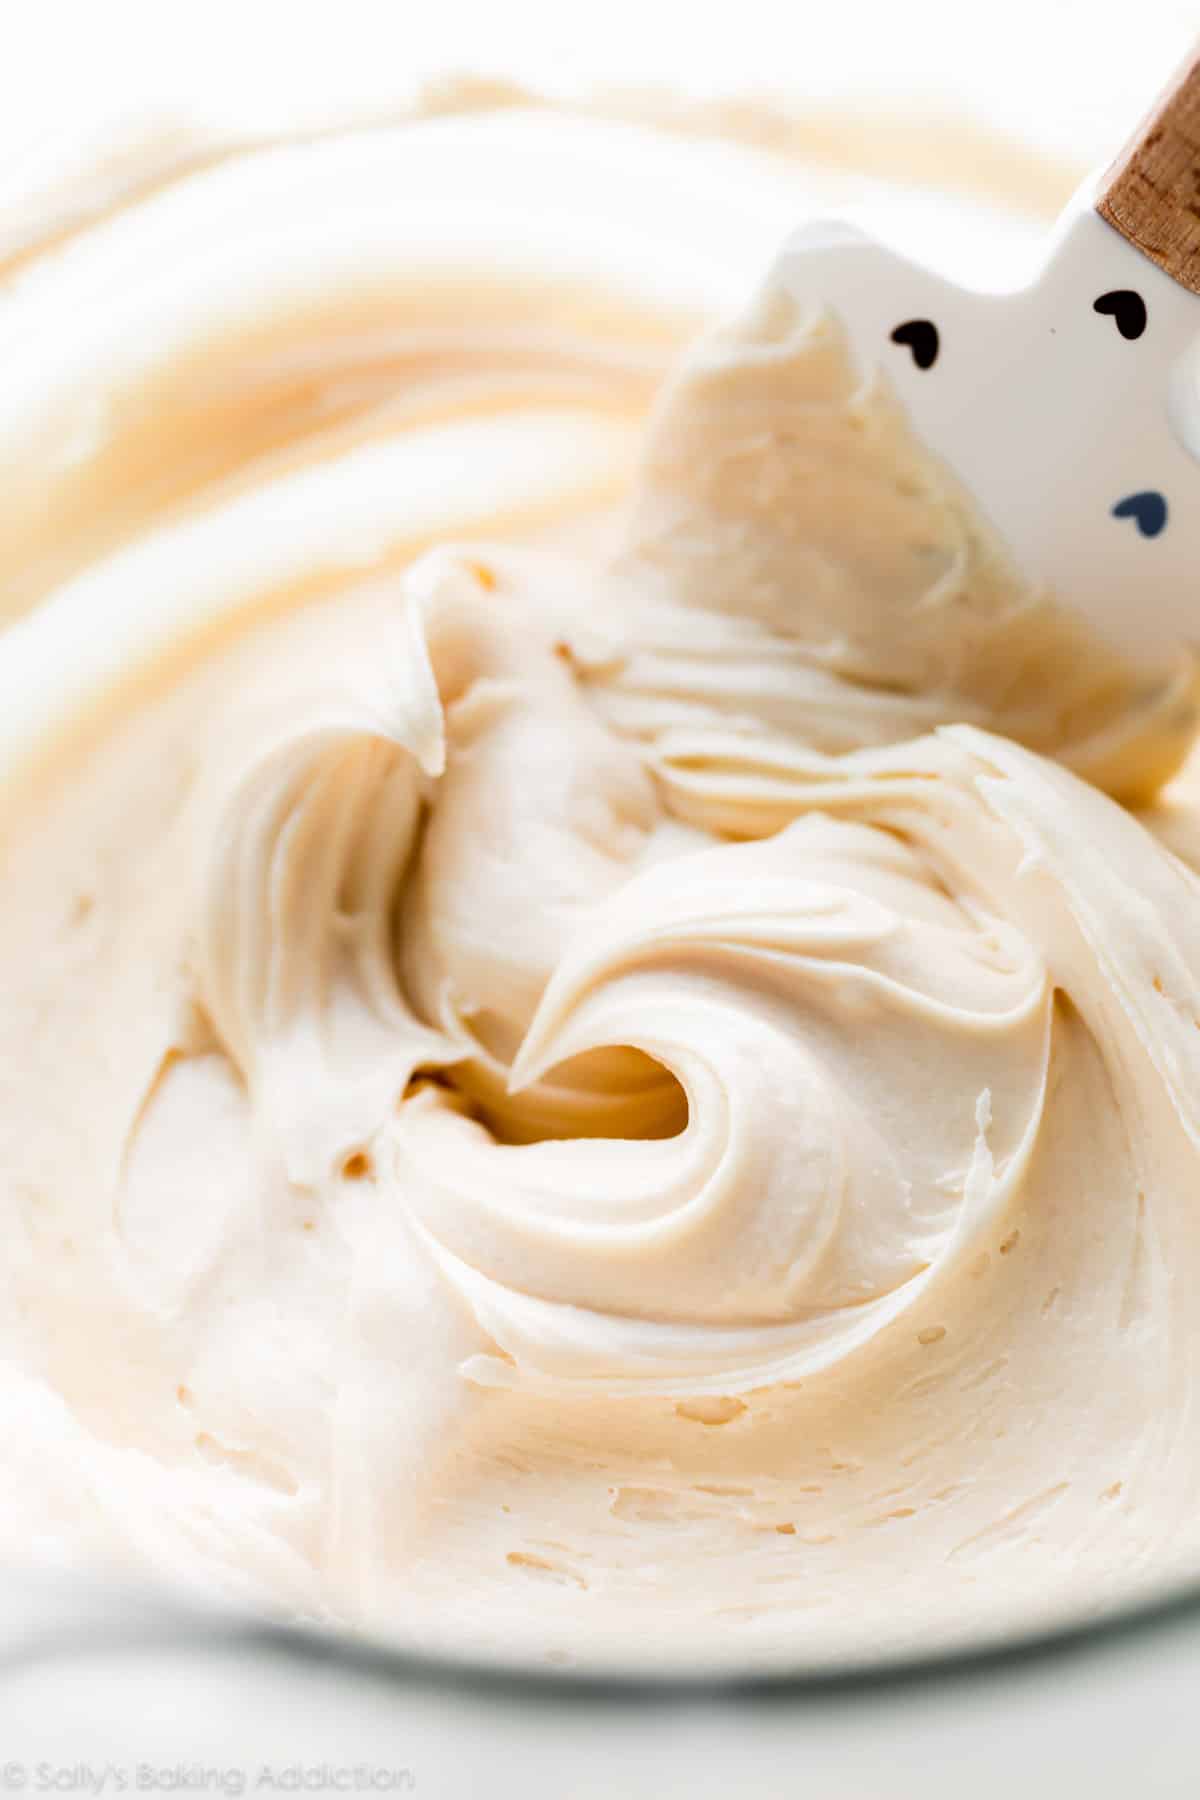
Buttercream
Same goes for the burnt sugar frosting—make sure you steal a few tastes! You need:
- Unsalted Butter: Make sure you’re using room temperature butter.
- Confectioners’ Sugar
- Burnt Sugar Syrup
- Milk
- Vanilla Extract
- Salt
I love this salty sweet frosting. It’s similar to my salted caramel frosting, but has a much creamier consistency. The burnt sugar cake and burnt sugar frosting are definitely worthwhile on their own, but this entire cake is greater than the sum of its parts. Together, they’re the perfect match.
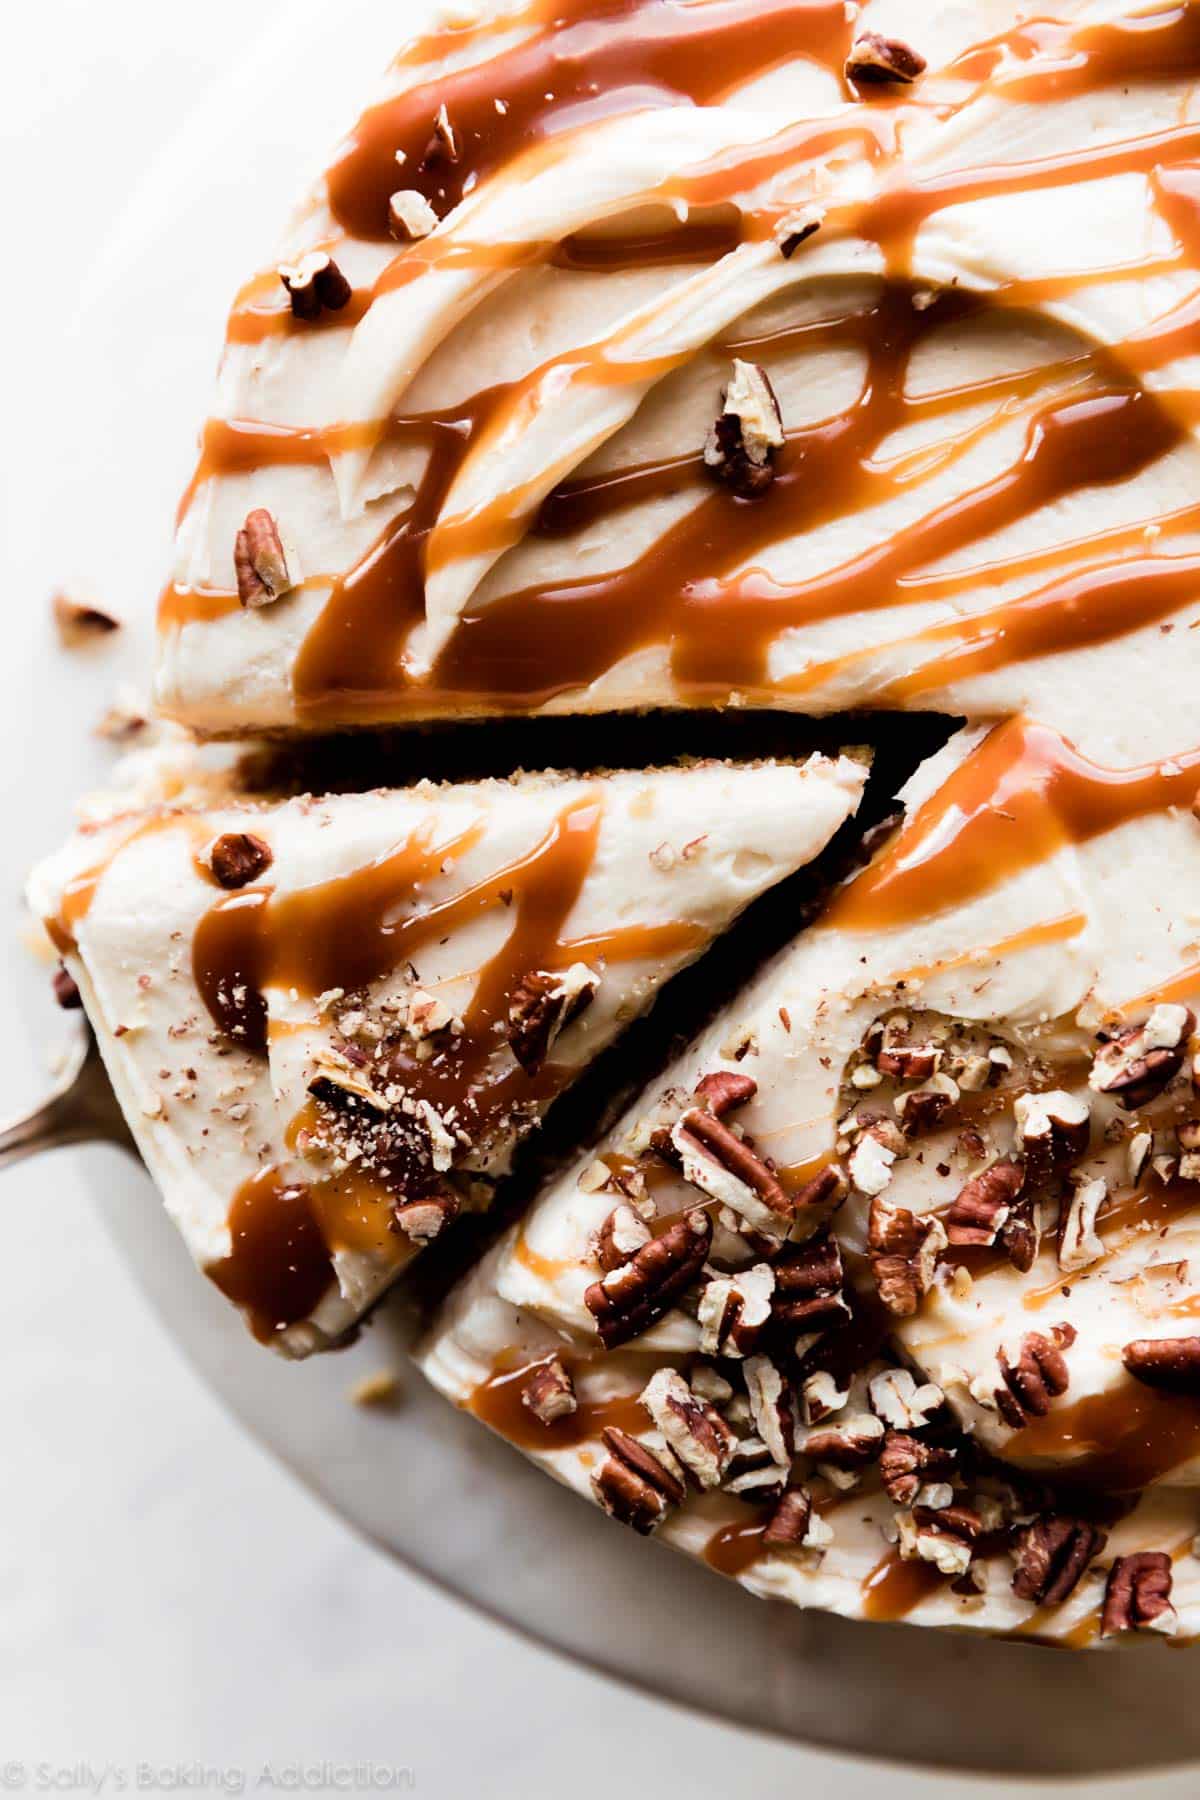
Don’t Forget the Salted Caramel!
This burnt sugar caramel cake wouldn’t be as impressive without salted caramel. Drizzle salted caramel in between the cakes and on top. If the salted caramel is too warm, however, it will melt the frosting. See my recipe instructions below.
Toasted nuts add a flavorful and textural flair!
3 Success Tips
Leaving you with 3 success tips so you can enjoy this old-fashioned favorite:
- Watch the video tutorial and read the recipe in full before beginning. Follow the recipe closely and make no ingredient substitutions. I tested several different options and nothing lived up to the careful recipe below.
- Since it must be cool, I recommend preparing the burnt sugar syrup 1 day ahead of time.
- Don’t leave out the salted caramel.
Beginner Baker? Let Me Help:
- How to Prevent a Dry or Dense Cake
- Top 10 Cake Baking Tips
- How to Freeze Cake
- Homemade Cake Flour Substitute
- Here’s What Room Temperature Butter Means
And if you are looking for more cozy fall flavors, here is a list of 30+ fall cake ideas.
Print
Burnt Sugar Cake
- Prep Time: 1 hour
- Cook Time: 24 minutes
- Total Time: 4 hours, 30 minutes
- Yield: serves 10-12
- Category: Dessert
- Method: Baking
- Cuisine: American
Description
The trick to burnt sugar cake is to use burnt sugar syrup as its main flavor. Make sure you prepare the burnt sugar syrup ahead of time so that it can properly cool and thicken. While you’re at it, prepare the salted caramel ahead of time too.
Ingredients
Burnt Sugar Syrup
- 1 cup (200g) granulated sugar
- 3/4 cup (180ml) boiling water
Cake
- 2 and 1/2 cups (285g) cake flour (spooned & leveled)
- 2 teaspoons baking powder
- 1/2 teaspoon baking soda
- 1 teaspoon salt
- 3/4 cup (12 Tbsp; 170g) unsalted butter, softened to room temperature
- 1 cup (200g) granulated sugar
- 1/2 cup (120ml) cooled burnt sugar syrup
- 4 egg whites, at room temperature
- 1/2 cup (120g) sour cream, at room temperature
- 2 teaspoons pure vanilla extract
- 1/2 cup (120ml) whole milk, at room temperature
Burnt Sugar Frosting
- 1 cup (16 Tbsp; 226g) unsalted butter, softened to room temperature
- 4 cups (480g) confectioners’ sugar
- 1/2 cup (120ml) cooled burnt sugar syrup
- 1 teaspoon pure vanilla extract
- 2 Tablespoons (30ml) whole milk or heavy cream
- 1/4 teaspoon salt
For Assembly
- Homemade Salted Caramel, cooled
- 1/2 cup (50g) chopped pecans*
Instructions
- For best success, read the recipe in full and watch the video tutorial in the post above before starting.
- Prepare the burnt sugar syrup first so it has time to cool. Make sure you have boiling water at the ready. For the burnt sugar syrup, place sugar in a medium saucepan over medium heat. Best to use a 3 quart heavy-bottomed quality saucepan. Stirring constantly with a wooden spoon, cook until the sugar has completely melted and is amber brown, about 8-10 minutes. If the sugar is clumpy, break up the lumps with your wooden spoon. A candy thermometer is not necessary, but if you’re using one, the sugar temperature should reach about 300°F (149°C) when it’s ready. Turn the heat to low and very carefully and slowly drizzle in the boiling water, a little at a time. Stir after each addition and stand back, as the mixture will rapidly sizzle and bubble. After all of the boiling water is stirred in, stir and cook the sugar syrup for 3 more minutes on low. Turn off the heat and let it cool completely, overnight preferred. It’s imperative that the sugar syrup is completely cool. You will have about 1 cup of syrup.
- Preheat oven to 350°F (177°C). Grease two 9-inch cake pans, line with parchment paper rounds, then grease the parchment paper. Parchment paper helps the cakes seamlessly release from the pans. (If it’s helpful, see this parchment paper rounds for cakes video & post.)
- Whisk the cake flour, baking powder, baking soda, and salt together. Set aside.
- Using a handheld or stand mixer fitted with a whisk attachment, beat the butter and sugar together on high speed until creamed, about 2 minutes. Scrape down the sides and up the bottom of the bowl with a rubber spatula as needed. With the mixer running on medium speed, pour in 1/2 cup of the cooled burnt sugar syrup. Beat until combined. Scrape down the sides and up the bottom of the bowl as needed. Beat in the egg whites, sour cream, and vanilla extract. With the mixer on low speed, add the dry ingredients just until combined. With the mixer still running on low, slowly pour in the milk until combined. Do not over-mix. The batter will be slightly thick.
- Pour batter evenly into prepared cake pans. Bake for 23-25 minutes or until the cakes are baked through. As a result of the burnt sugar syrup cooking inside the cake batter, the cakes brown nicely on top and on the sides. To test for doneness, insert a toothpick into the center of the cake. If it comes out clean, it is done. Allow cakes to cool completely in the pans set on a wire rack.
- As the cakes cool, I suggest making the salted caramel. The salted caramel adds necessary flavor. We’ll use it as a filling and garnish. When ready to use in step 9, make sure the salted caramel isn’t too hot anymore. If it’s too hot, it will melt the frosting. If it’s too cool, it won’t drizzle. Let it cool for at least 30 minutes before using. If you prepared the salted caramel ahead of time and it became too cool or too thick, microwave it for 5-10 seconds or JUST until it’s drizzle-able again. (It won’t be too hot at this point.) You can also toast the pecans during this time, too. See recipe note.
- Make the frosting: In a large bowl using a handheld mixer or stand mixer fitted with a paddle attachment, beat the butter on medium speed until creamy, about 1-2 minutes. Add confectioners’ sugar, remaining 1/2 cup of cooled burnt sugar syrup, vanilla extract, milk/cream, and salt. Beat on low speed for 30 seconds, then increase to high speed and beat until completely combined, about 2 minutes. Add more confectioners’ sugar if frosting is too thin or more milk/cream if frosting is too thick. Taste. Add more salt if desired. (I usually use 1/2 teaspoon of salt total. I like this frosting salty/sweet.)
- Assemble and frost: First, using a large serrated knife or cake leveler, slice a thin layer off the tops of the cakes to create a flat surface. Discard (or crumble over ice cream!). If you have any leftover burnt sugar syrup, drizzle over leveled cakes. I usually don’t have any leftover, but this is a great place to use any last drops if you have some. Place 1 cake layer on your cake stand, cake turntable, or serving plate. Using a large icing spatula, evenly cover the top with frosting. Drizzle 1/4 cup (73g) of salted caramel on top of the frosting. Top with 2nd cake layer. Refrigerate the cake for at least 30-45 minutes before finishing the frosting and garnish. The caramel inside the cake must “set.” After chilling in the refrigerator, spread the remaining frosting all over the top and sides. Run a bench scraper around the cake to smooth out the sides, if desired. Garnish with toasted pecans and more salted caramel. Slice and serve.
- Cover leftover cake tightly and store in the refrigerator for up to 5 days.
Notes
- Make Ahead & Freezing Instructions: Prepare burnt sugar syrup up to 3 days ahead of time. Cover and store at room temperature until ready to use. Prepare the salted caramel up to 1 week ahead of time. Cover and store in the refrigerator until ready to use. You can prepare the cake layers ahead of time too. Wrap the individual baked and cooled cake layers tightly and refrigerate for up to 2 days or freeze up to 3 months. (See How to Freeze Cake for instructions.) Bring cake layers to room temperature, then continue with step 7. Frosted cake freezes well, up to 3 months. Thaw overnight in the refrigerator, then bring to room temperature before garnishing with caramel and pecans and serving.
- Special Tools (affiliate links): Heavy-Bottomed Saucepan | Wooden Spoon | Candy Thermometer (optional) | 9-inch Round Cake Pans | Glass Mixing Bowl | Whisk | Electric Mixer (Handheld or Stand) | Rubber Spatula | Cooling Rack | Cake Turntable | Large Icing Spatula | Bench Scraper | Cake Carrier (for storage)
- 3 Layer Cake or 9×13-Inch Cake: You can also prepare this cake as a 3 layer cake or 9×13-inch sheet cake, but the texture tastes best at the thickness of a 2 layer cake. I highly recommend sticking to a 2 layer cake. For a 3 layer cake, though, divide batter between three 8-inch or 9-inch cake pans in step 3 and bake for 20-22 minutes or until a toothpick inserted in the center comes out clean. For a 9×13-inch cake, pour the batter into a greased and lightly floured 9×13-inch pan and bake for 40 minutes or until a toothpick inserted in the center comes out clean. Top with a thick layer of frosting and drizzle salted caramel all over the top.
- Cupcakes: Recipe yields 30-36 cupcakes. Fill cupcake liners 2/3 full with batter. Bake for 20-22 minutes or until a toothpick inserted in the center comes out clean.
- Egg Whites: Egg whites (no yolks) are KEY to the cake’s fluffy texture. Here are recipes using leftover egg yolks.
- Why Room Temperature? All refrigerated items should be at room temperature so the batter mixes together easily and evenly. Read here for more information. Instead of sour cream, you can use plain yogurt. The cake won’t taste as rich, but it’s a fine substitute.
- Salted Caramel: No matter which size cake you make, or if you make cupcakes, you’ll have salted caramel leftover. Here are 50 ways to use salted caramel if you need inspiration for the leftovers. I don’t recommend halving the salted caramel recipe—make the whole recipe (1 cup).
- Toasted Pecans: Toasting the pecans is optional, but adds incredible flavor to the garnish. To toast, preheat the oven to 300°F (149°C). Spread chopped pecans onto a parchment paper or silicone baking mat lined baking sheet. Toast until slightly darkened, about 5-7 minutes. Cool before using as garnish.


Reader Comments and Reviews
IT’S GONE!!! I made this for my Book Club, and they wiped it out! It was absolutely fabulous.
IT’S GONE!! It was absolutely fabulous! It got rave reviews, even from my baker friends. The cake was moist, light, and full of flavor. The frosting was perfect, and not too sweet. The salted caramel brought it to a higher level I’ve never made burnt sugar or caramel before. But, the instructions were so clear, along with the video, that it was easy. There are a lot of steps, but if you spread them out over a couple of days, it’s easy.
Hello, I made this recipe today, but I baked it in a rectangular tin. The middle sank, and it tastes very sticky and as if it’s still raw.
Any tips on what caused this?
Thank you!
Hi Faadilah, did you use a 9×13-inch pan or another size? When cakes sink in the middle, it’s often due to under baking. A few additional minutes in the oven should help for next time.
Hi Lexi, that’s the correct for pan size. Really? I watched the cake as it baked every few minutes and the outer part rose well, but the sank and became dense…if I try it out again, I’ll make sure to bake it longer. It may have been the butter too, even tho I measured with a scale, as it was oily.
Thank you once again!
Hi Sally, I made this cake last year for my birthday and everyone loved it! I am trying to make it again, but when I made the burnt sugar syrup it smelled overly burnt and my family agreed that the syrup was way too burnt. Am I melting the sugar for too long, or is it a different problem?
Hi Artemis, It is possible to overcook the sugar, which may be what happened here.
We love this cake! My daughter has requested it 2 years in a row for her birthday. I know you said no substitutions. And I do try to follow that usually. But for anyone out there wondering, we used plain full fat greek yogurt no problem. That is a typical swap so I had hoped it would work. It did!
This sounds yummy! I’m trying to figure out how to make caramel cakepops. Would this work to make caramel cakepops? Anyone tried it?
Hi Katelyn, we haven’t tried it with this exact recipe, but you could certainly try crumbling up the cakes that have been brushed with the burnt sugar syrup. Or, you could use the batter from these salted caramel cupcakes instead. Let us know what you try!
Made as a gift. The recipients all loved the flavor, but the texture was not fluffy ..more dense
Great recipe! Lovely caramel flavour sponge!
Second time I’m doing this, only this time I used the cream cheese frosting posted in the velvet cake. I felt it paired better to contrast the sweetness of the caramel syrup and I was absolutely right excellent recipe, even my kids enjoyed it (although I did it for my birthday )
I made this as a bundt cake – 350 for 43 minutes. I did the frosting on it in the “nothing bundt cake” style, and used the salted caramel as a drizzle. I gave it away as an Easter gift, so I didn’t get to taste it, but when my friends got home with it, they couldn’t wait! They called and kept using the word “amazing” – woohoo!
I really hoped to see that someone else struggled with the burnt sugar syrup and had received some pointers on what they might have done wrong, with tips on success. Took me three trys.
Hi Michelle, could you tell me more about the issues or what was not working out? I can absolutely help.
Well, the problem I’m having is that even with the burner on medium low, and using the right kind of pot and the right spoon, I couldn’t keep up with the clumps as the sugar cooked. I was hoping the boiling water might smooth things out, but no, it was officially a disaster as soon as I started adding any (and I had my boyfriend handle pouring the boiling water into a measuring cup and handing it to me so I didn’t have to stop stirring the sugar for even a second). So, as soon as this cools down enough for me to throw it out, I’ll start over. Glad I’m doing the syrup the night before!
I was looking for a “burnt leather cake” recipe my Grandma made that is well over 100 years old, since we do not have it anymore. This recipe is an improved version with amazing taste! Thanks so much for sharing Sally!
Thanks for giving it a try, James!
I made this cake as a gift for my good friend two weeks before her birthday, then I froze it. After thawing the cake and frosting it with the burnt sugar buttercream and the caramel I gave it to her and OMG- she loved it so much! She told me it still tasted fresh after being frozen! I loved this recipe!!
We loved the burnt sugar cake.. If we could give you more than 5 stars. You would be higher. It was excellent. Love the ideas for the extra leftover egg yolks, caramels, etc… We follow other bakers and you will be on our list too! God Blessed you with an Amazing gift! Keep it up!
Love all of your recipes, you’re my go to for cake recipes Do you think this cake could hold up to being the bottom tier in your homemade wedding cake recipe? I’m making the cake for my parents anniversary, doing one tier lemon but want the other cake to be interesting and a little unique. I’m just not sure how the average cake holds up to having another cake on top of it.
Hi Julie, with the proper support from cake dowels (see homemade wedding cake post for more tips), this cake should hold up well as a tiered cake. Please do let us know how it goes!
My favorite cake! So yummy! I add extra burnt sugar to the frosting leaving out a little cream and adding a pinch more of salt so it’s not overly sweet. Perfection! I love the flavor the burnt sugar adds! It is definitely a family favorite. I use your website for so many desserts. They are all so good and with wonderful detailed instructions! Thank you!
Labour intensive but oh my, sooooooo worth it! Loved it and the salted caramel sauce, freaking delish!! My new favorite cake.
The cake it self came out heavy (but still tasty), not fluffy like your picture. Did I over mix the batter?
Hi Kim, we’re so glad you enjoyed the cake! Over mixing is often the culprit for heavy/dense cakes. This post on how to prevent dry & dense cakes will also be a helpful resource. Thank you again for giving this one a try!
I do not bake, the last time I made a cake from scratch was about 40 years ago. A dear friend is a Southern woman, and she doesn’t like many sweets – but a burnt sugar cake is the exception. This is a taste of the south for her. I knew that this cake would be quite special for her birthday – and I went about not being a baker to make this, and it was a rousing success. It turned out wonderfully! In addition I made the salted Carmel, which I used in the middle area as the recipe calls for and drizzled on top – I had enough for people to use this on their ice cream. As my friend’s 7 year old was leaving with the left over jar of carmel, she was licking the jar happily!!! LOL. What a joy! I got two very big hugs from this very happy 7 year old. Sally, you made this possible for a non-baker to be so successful! Thank you.
Has anyone done this with a chocolate base?
Hi Carly, we haven’t tested this burnt sugar method with our chocolate cake. We fear with all the chocolate flavor, the burnt sugar flavor won’t come through at all. You could however, make our chocolate cake with salted caramel frosting and salted caramel drizzled on top. If you test anything, let us know!
Looking forward to trying this cake! Would your salted caramel frosting work well in place of the burnt sugar frosting?
Hi Lainey, that combination should work well here! Let us know if you try it.
could you brown the butter in this recipe to give the cake more flavor?
Hi Maddie, we haven’t tested it, but you could certainly try it. Just make sure to bring the browned butter back to a solid state so that it can be creamed with the sugar, and account for moisture loss, too. Let us know what you try.
Hi, I love this cake so much! It’s pretty addictive!
I want to make a 2 layer, 12″ round cake by your recipe.
Could you tell me how many times I would need to repeat the recipe to do that? Bake time also?
Thanks so much!
Hi Kathy, Here is everything you need to know about converting recipes to different Cake Pan Sizes.
Hi, I am trying to find a recipe to make a Banoffee themed birthday cake. Do you think the burnt sugar frosting would go with your banana cake recipe? Thanks! I love all your recipes, I’ve made so many of your cakes
That sounds like a fabulous combination, Shannon! Let us know if you give it a try.
Hi there! I’d love to use this recipe for a wedding cake I’m making. Is it too fluffy to do a two tiered cake, or dense enough that it’ll hold? I’ll be using supports, but just want to make sure! Thank you so much for your input!
Hi Allie, with the proper support from cake dowels (see homemade wedding cake post for more tips), this cake should hold up well as a tiered cake. Please do let us know how it goes!
I have made this many times and it’s always a winner! However, is it possible to overcook the sugar. It happened so fast, when I added the boiling water, it smelled burnt a little more than normal. I’m wondering if it’s possible to over burn burnt sugar lol. Thanks!
Hi Sarah, how did it taste? Was it bitter and off putting? It is possible to overcook the sugar, which may be what happened here. So glad this one is a favorite for you!
Oh, it was over burnt lol. Absolutely. It was a sharply bad taste. I remade it though! I had never over cooked it before. I learned something
Hi Sally, I am wanting to make a honey-flavored cake (for a bee-themed party) and was looking into subbing some of the sugar in your white cake recipe when this version of it caught my eye. Do you think I could sub honey for the syrup? Or maybe a honey simple syrup to match the viscosity a bit more closely?
Hi DJ, what a fun idea! Trying to match the viscosity of the sugar syrup is a great idea for subbing honey. We would love to hear how it goes if you give it a try!
I made this cake .. its fabulous . I wish I could upload the photograph/video of this cake too . Make it guys , it’s a winner
Can this be done in a bundt pan?
Hi Z, this should work well in a Bundt pan, but we’re unsure of the exact bake time.
Hi, I have a few questions
1. I’m allergic to dairy. Would it be alright if I substituted the sour cream with coconut milk? Google said I should use coconut cream + lemon juice
2. If i want to make this cake four layers, would you advice me to double the frosting measurements or make it in two separate batches?
Thank you !
Hi Robyn, the best replacement for the sour cream would be a plant-based yogurt. We haven’t ever tested coconut milk + lemon juice as a replacement, so we’re unsure how that might work out. You can double the frosting, so long as your mixer can handle the added volume. Hope you enjoy the cake!
I never leave comments but I have to say I’ve made this recipe a few times… The first time was as a wedding cake and was very very grateful it turned out so beautifully. The next time was for a very special party for my sister. Now I’m making it again for another sister’s baby shower. Everyone who has tried it insists it’s the nicest cake they’ve ever had. Thank you for helping me make special moments really special!
I’m so happy to read this, and that this recipe was used for so many special occasions!
Sally,
Anytime I use cake flour my cakes cave in the center. I’m not over mixing but I do live at 7000ft elevation. Should I do something different?
Hi Devon, I wish we could help, but have no experience baking at high altitude. Some readers have found this chart helpful: https://www.kingarthurflour.com/learn/high-altitude-baking.html
Can I do this with 8- inch pans?
Hi Jovi! Yes, you can, though the bake time will be longer for thicker layers. Keep an eye on them in the oven!