

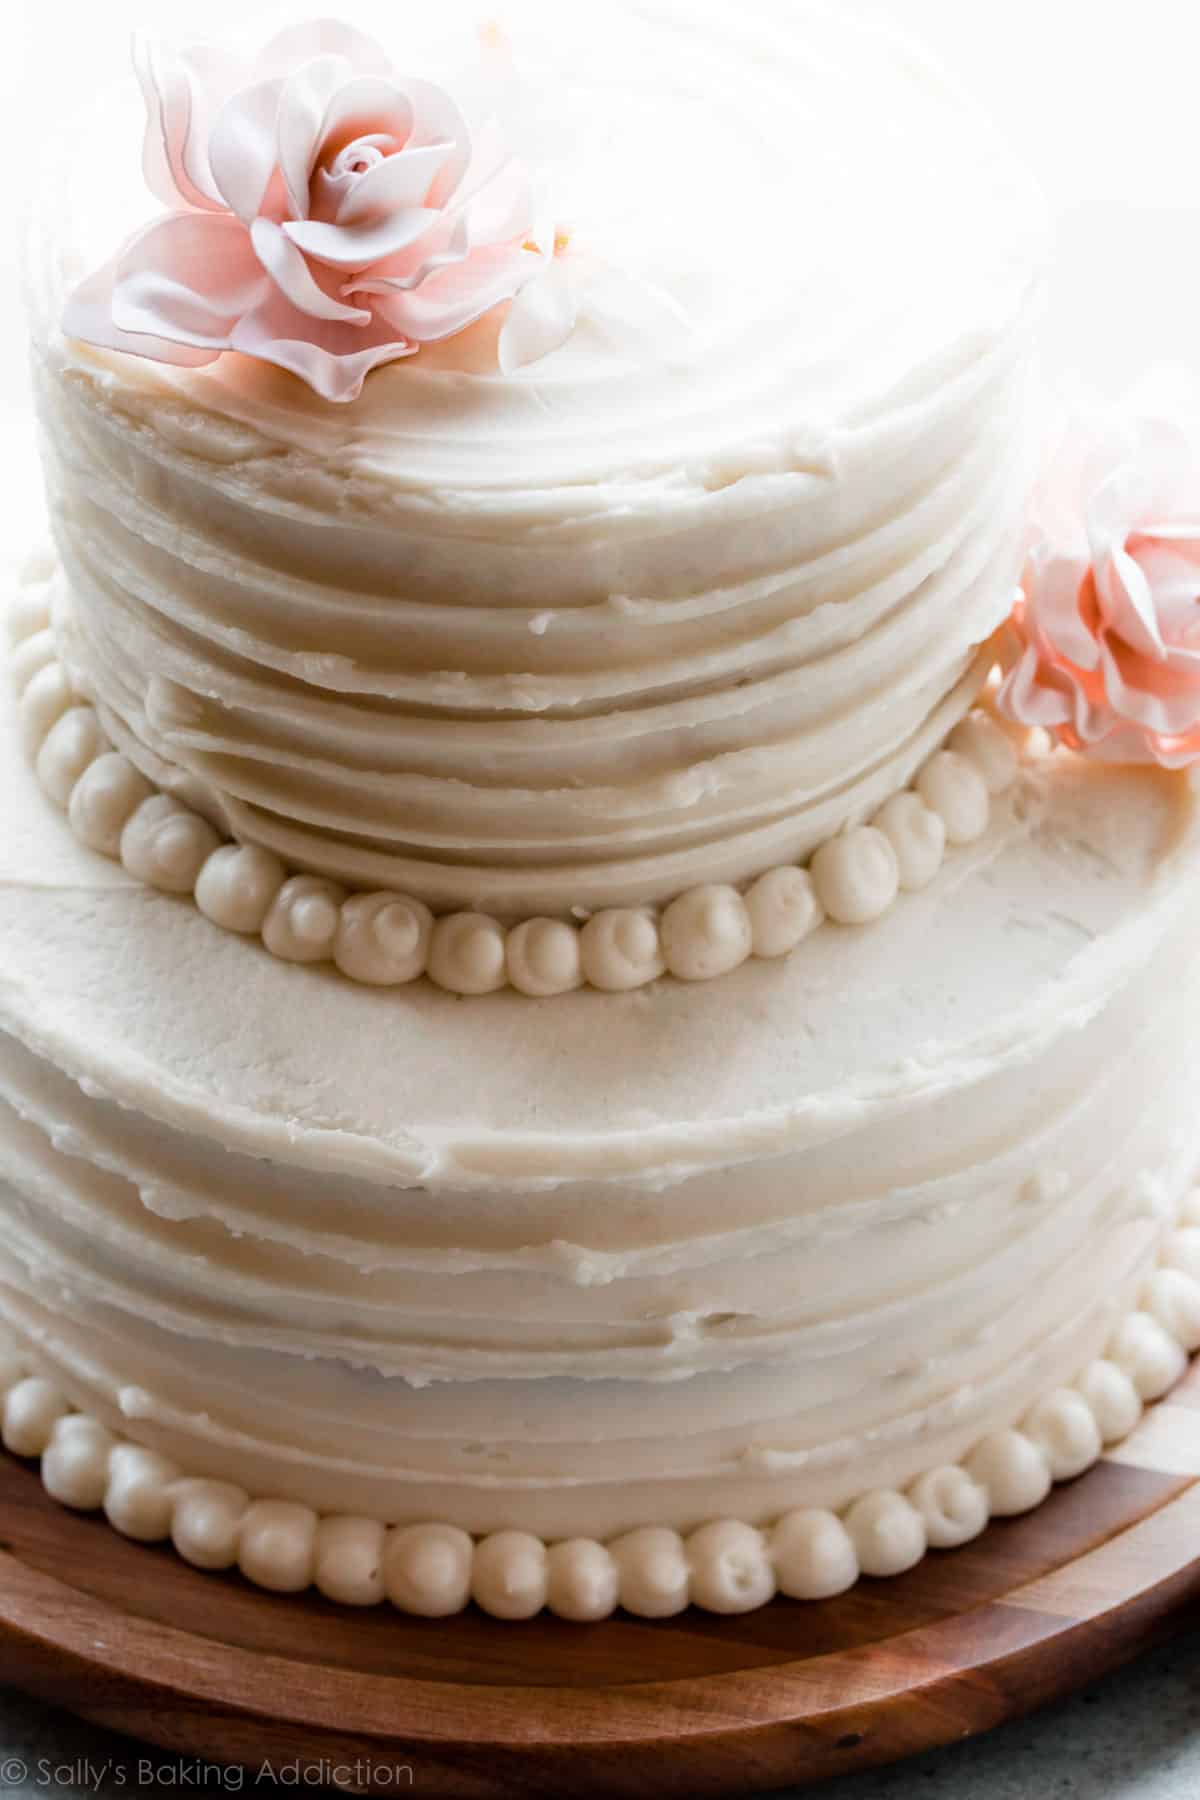
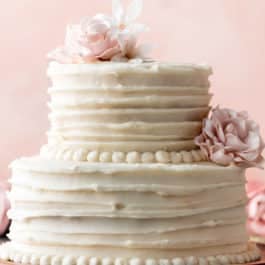
Here you’ll find a full recipe and cake decorating video tutorial for a DIY homemade wedding cake. This simply decorated and elegant vanilla wedding cake has 2 tiers and comes with full assembly instructions. With the help of this carefully detailed post, this wedding cake recipe is perfectly manageable for any home baker.
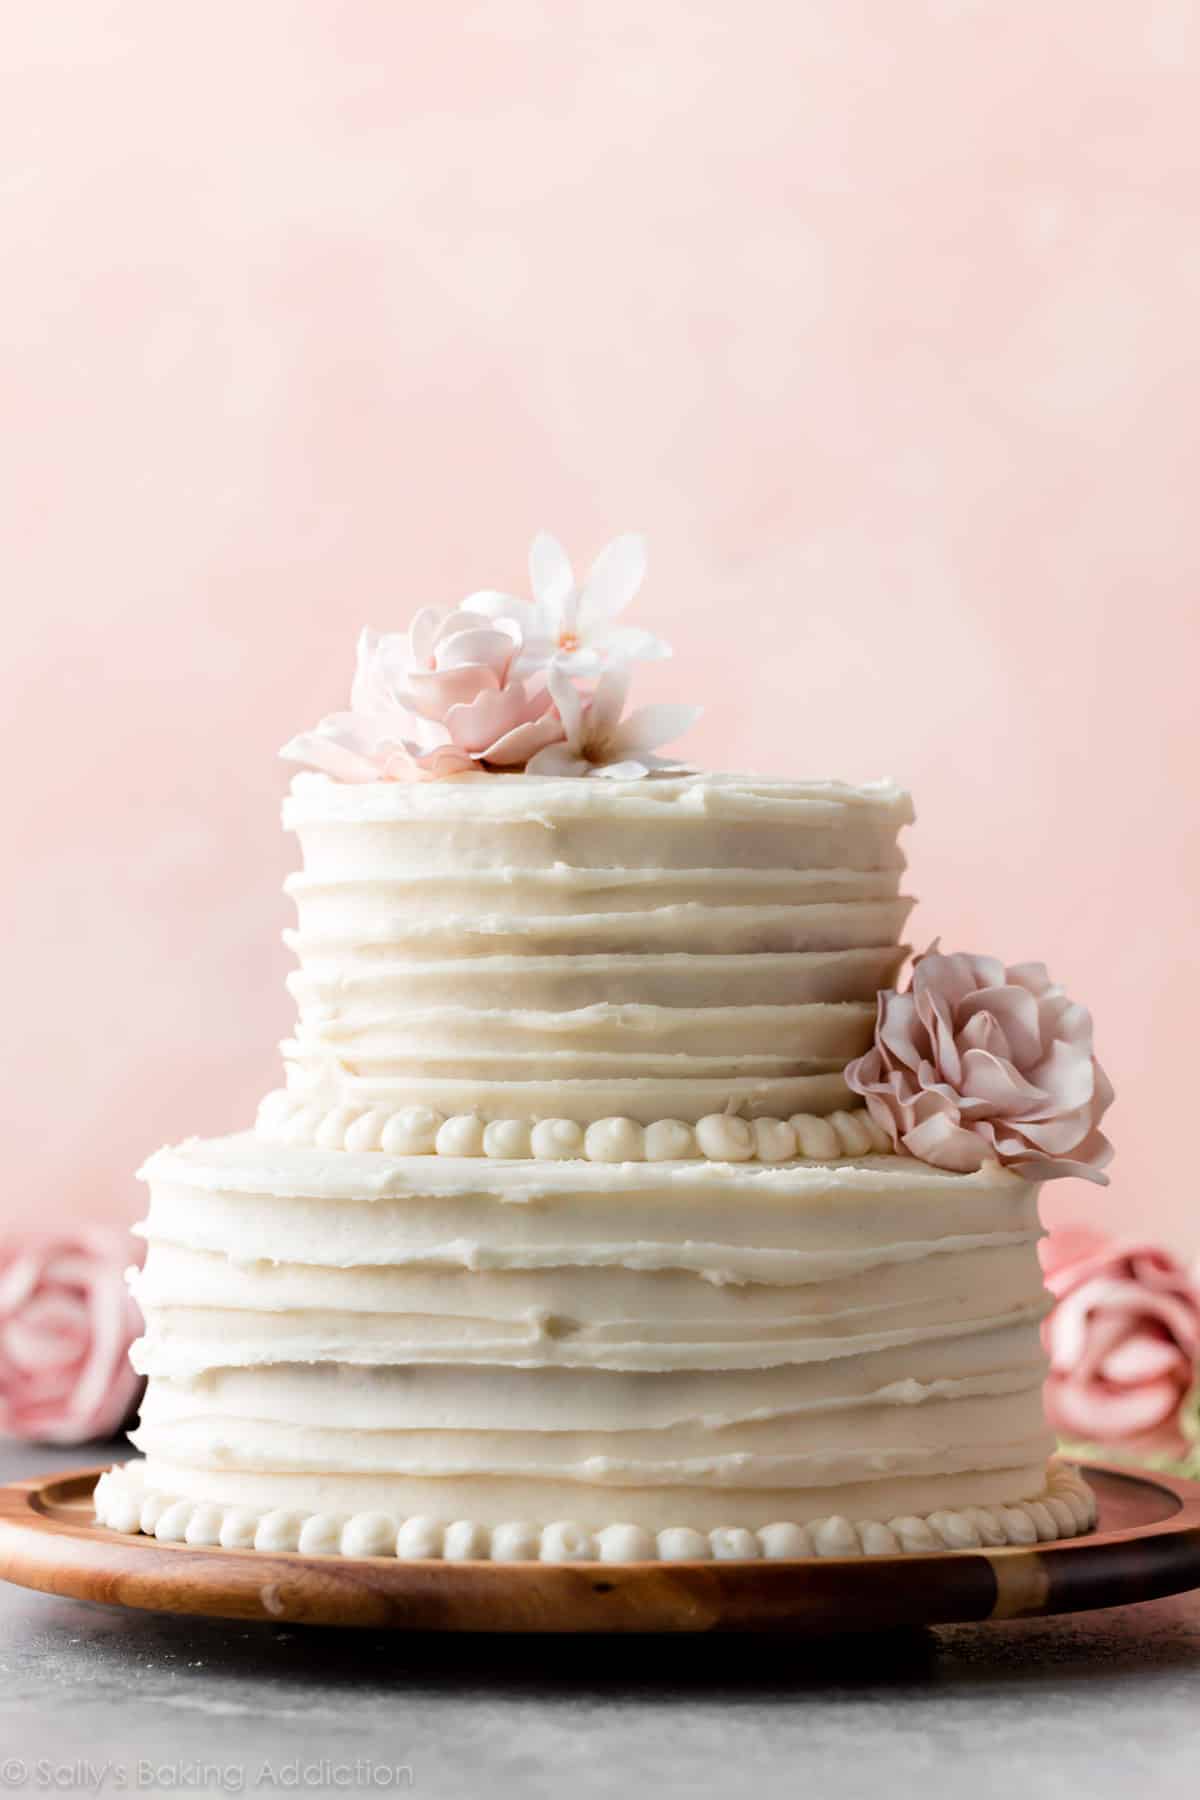
By the request of many readers, let me present you with a homemade 2 tier wedding cake recipe. Adapted from my trusted vanilla cake and 6 inch cake recipes, this from-scratch wedding dessert is not only beautiful—it tastes remarkable, too.
(Isn’t that what counts?)
Fully equipped with complete details and recipe instructions to make this one-of-a-kind dessert, you will wow the happy couple and wedding guests alike. This post has it all.
This DIY Homemade Wedding Cake Is:
- Completely from-scratch
- Manageable for any home baker
- Simple, yet elegant—rustic chic meets traditional
- Complete with a full list of helpful kitchen tools
- Perfect for a small wedding (approximately 30-35 people)
- Wonderful for a larger wedding if other dessert options are available
One reader, Carolyn, commented: “I am so grateful for this wonderful recipe. This cake was the highlight of my wedding. I enjoyed making it, cutting it, and eating it. I’ve been showing pictures to everyone because it is just so beautiful. Everyone is very impressed that I took on the project to make the cake, when it was relatively easy with your detailed instructions and video. I made the top tier pistachio and the bottom tier vanilla chocolate chip. Amazing. Thank you! ★★★★★“
Another reader, Ashley, commented: “I cannot thank you enough for this recipe and the detailed instructions. This cake came out perfectly, was absolutely delicious, and looked just like the picture. I added a bit of raspberry preserves to the internal icing layers and it worked so well. Thank you, Sally—I’m very grateful. Many people said this was the best tasting cake they ever had! ★★★★★“
Another reader, Michelle, commented: “I really appreciate the detailed instructions, the videos, and the problem solving! Absolutely love this recipe and my wedding cake turned out amazing because of you. The buttercream was simple to make and very nice to frost the cakes. ★★★★★”
How to Make a DIY Homemade Wedding Cake
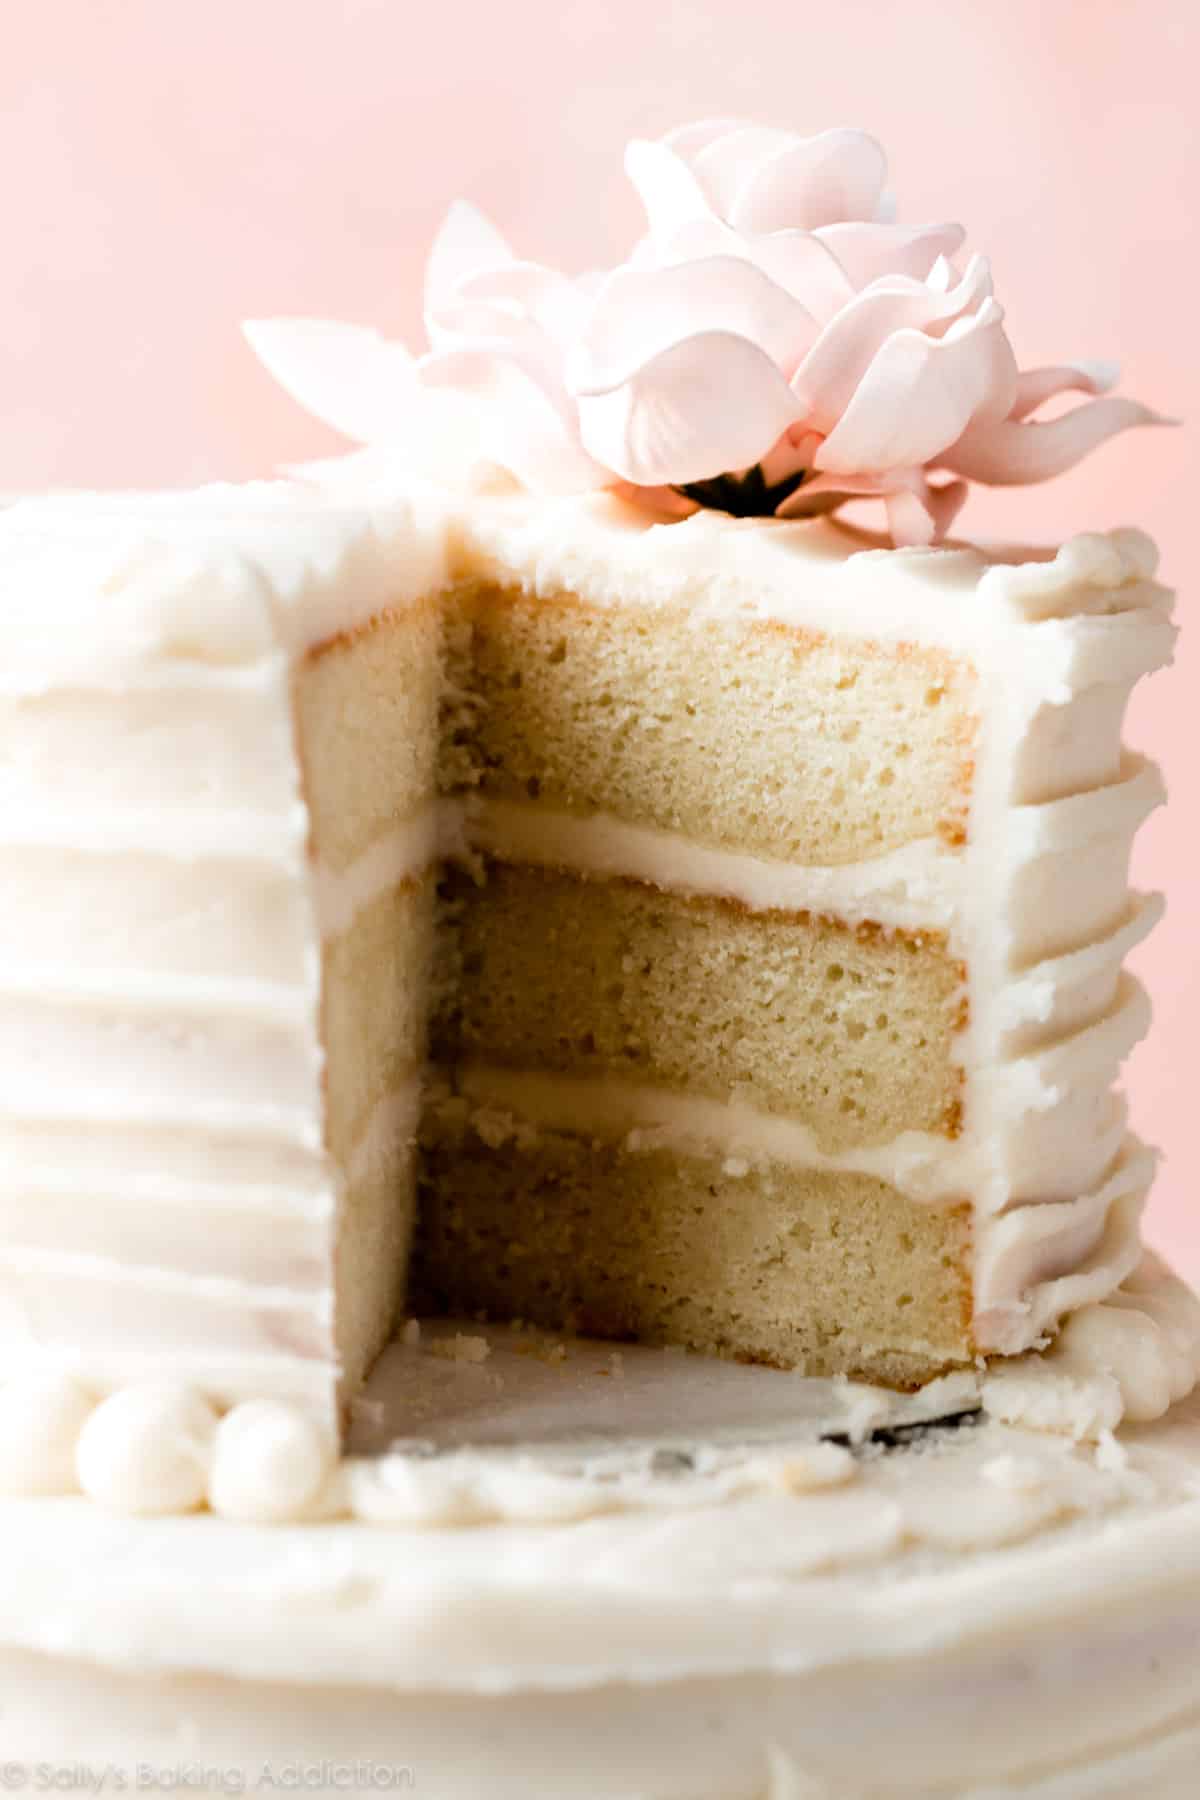
This is a 2 tier wedding cake. Both tiers are buttery, soft, and moist. In lieu of traditional fondant, this homemade wedding cake recipe uses my vanilla buttercream, but in a higher quantity. To avoid (1) overwhelming your mixer with excess cake batter and (2) over-mixing or under-mixing the batter, make each cake separately.
- Make each batch of frosting separately too.
Unless you have extra oven(s) or oven space, prepare the cake batters and bake the layer cakes one at a time. Cool the cakes completely before assembling and decorating, which I cover in a separate section below.
Same Ingredients for Both Tiers
Both cakes use the same exact ingredients and each has a special job, so I do not recommend substitutions. Use sugar, cake flour, egg(s), extra egg whites, sour cream, whole milk, and proper room temperature butter. (Among a few other ingredients.) If needed, use this cake flour substitute. Here are recipes that use leftover egg yolks.
- 2-3 batches of lemon curd, which uses egg yolks, would be fantastic as a filling between these cake layers.
The bottom cake is my vanilla cake recipe, but I swap buttermilk for whole milk and sour cream. I do this so you don’t need any varying ingredients for both tiers. (Because the top tier uses whole milk and sour cream.) Sure, you could use buttermilk to replace both the whole milk and sour cream in the 6 inch cake, but whole milk and sour cream are more readily available to most than buttermilk.
Other Flavor Options
This is vanilla flavored, which is a classic choice to please a variety of wedding guests. You can have fun with frostings, fillings, and flavorings. Here are 5 other cake flavor options:
- Carrot Cake: Use my carrot cake recipe for the bottom tier and make a half batch of the batter for the top tier. Use the same 6 inch cake baking instructions described below.
- Red Velvet Cake: Use my red velvet cake recipe for the bottom tier. You can divide between 3 9-inch cake pans as instructed in the recipe notes. Use my red velvet cupcakes batter for the 6 inch cake. Use the same 6 inch cake baking instructions described below.
- Lemon Cake: Use my lemon cake recipe for the bottom tier. Use my lemon cupcakes batter for the 6 inch cake. Use the same 6 inch cake baking instructions described below.
- Marble Cake: Use my zebra cake for the bottom tier. Use my smaller zebra cake recipe (see this 1st birthday cake) for the 6 inch cake on top.
- Chocolate Chip: After adding the milk in both batters, fold 1 and 1/2 cups (270g) mini chocolate chips into the 9-inch vanilla cake batter and 1 cup (180g) of mini chocolate chips into the 6-inch vanilla cake batter. Regular size chocolate chips would be fine, but mini chocolate chips mean more in each bite.
*These are the only flavors I’ve tested with tiers. At this time, I don’t have a sturdy enough chocolate version to use as the bottom tier.
Want to mix and match flavors? Stick with the vanilla cake on the bottom (or other flavors listed above) and use any cupcake recipes listed in my 6 inch cakes post for the top tier. As explained in that post, cupcake batter yielding between 12-15 cupcakes makes the perfect 3 layer 6 inch cake.
Filling ideas: The filling in my cake is vanilla buttercream, but feel free to use other frosting flavors if desired. You can add extracts to the frosting such as almond, lemon, orange, or coconut. (Start with 1 teaspoon, taste, then add more to taste.) You can even mix a few Tablespoons of raspberry jam into the vanilla buttercream for the filling or use raspberry cake filling.
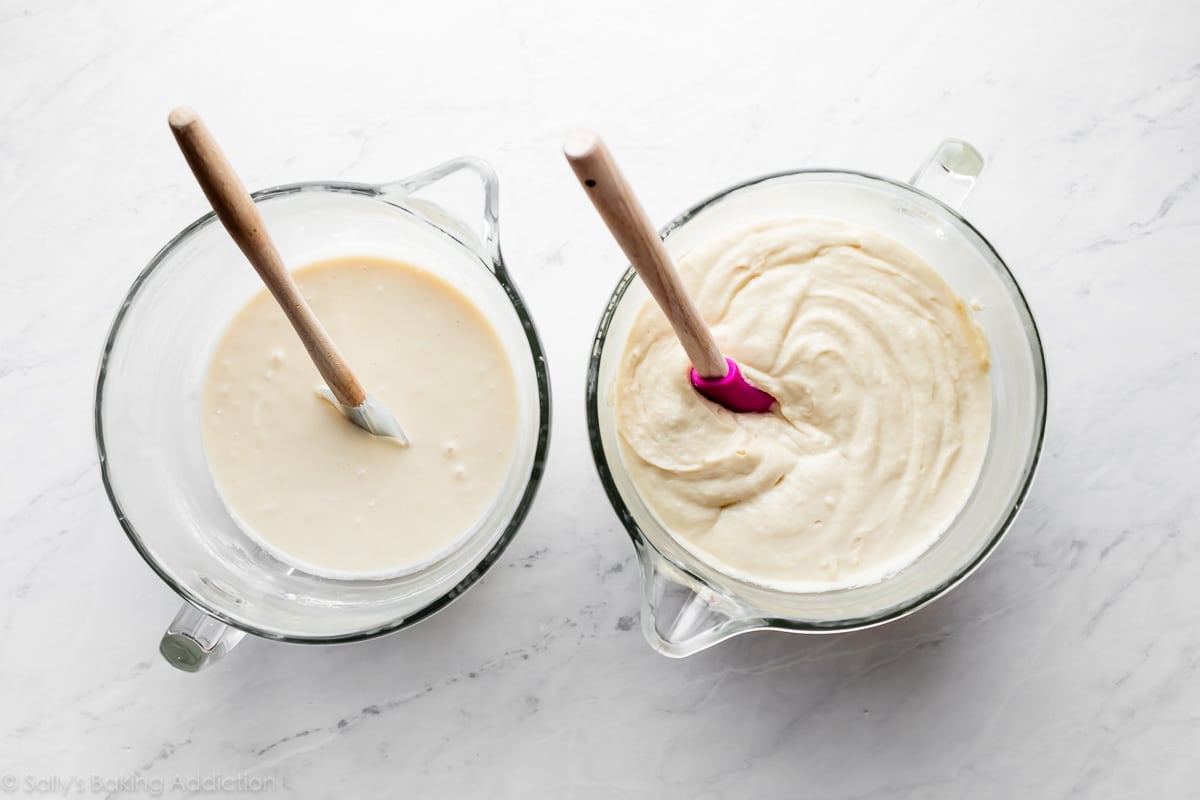
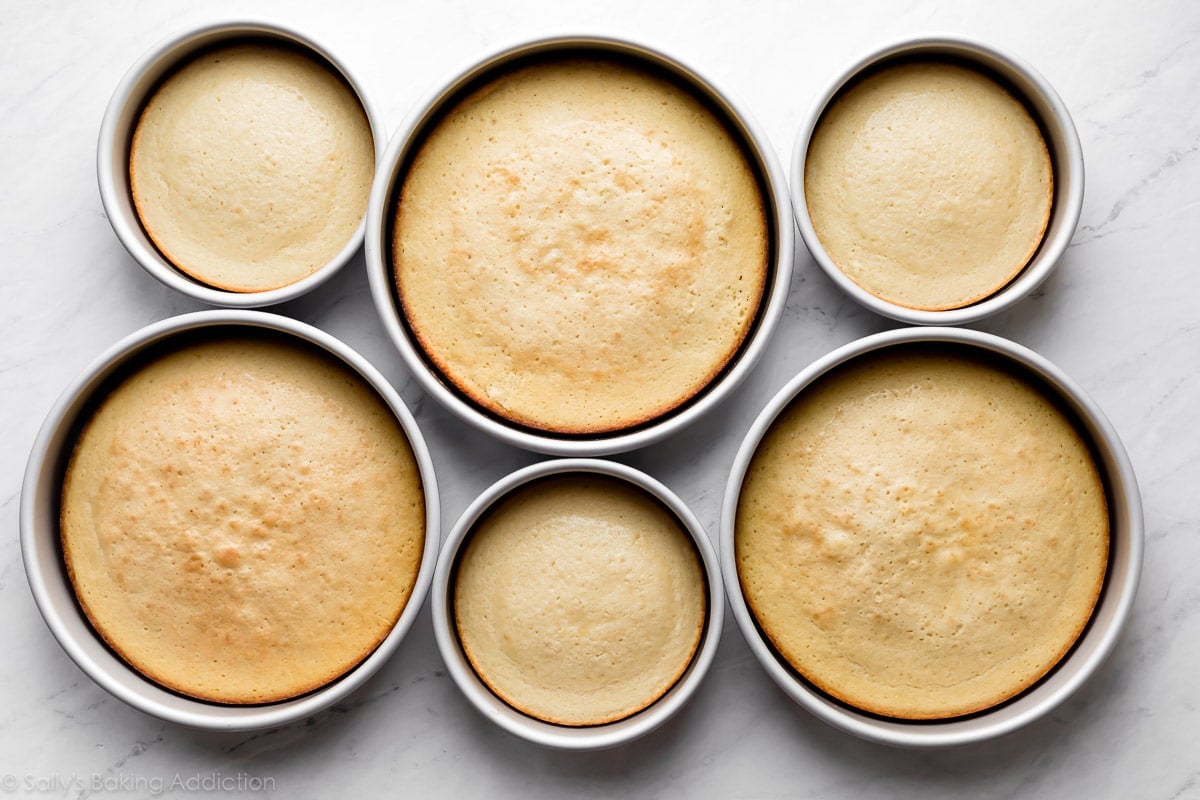
The 6-inch cake batter (left above) is light and creamy. The 9-inch cake batter (right above) is thicker because the bottom tier is a bit denser (for extra support).
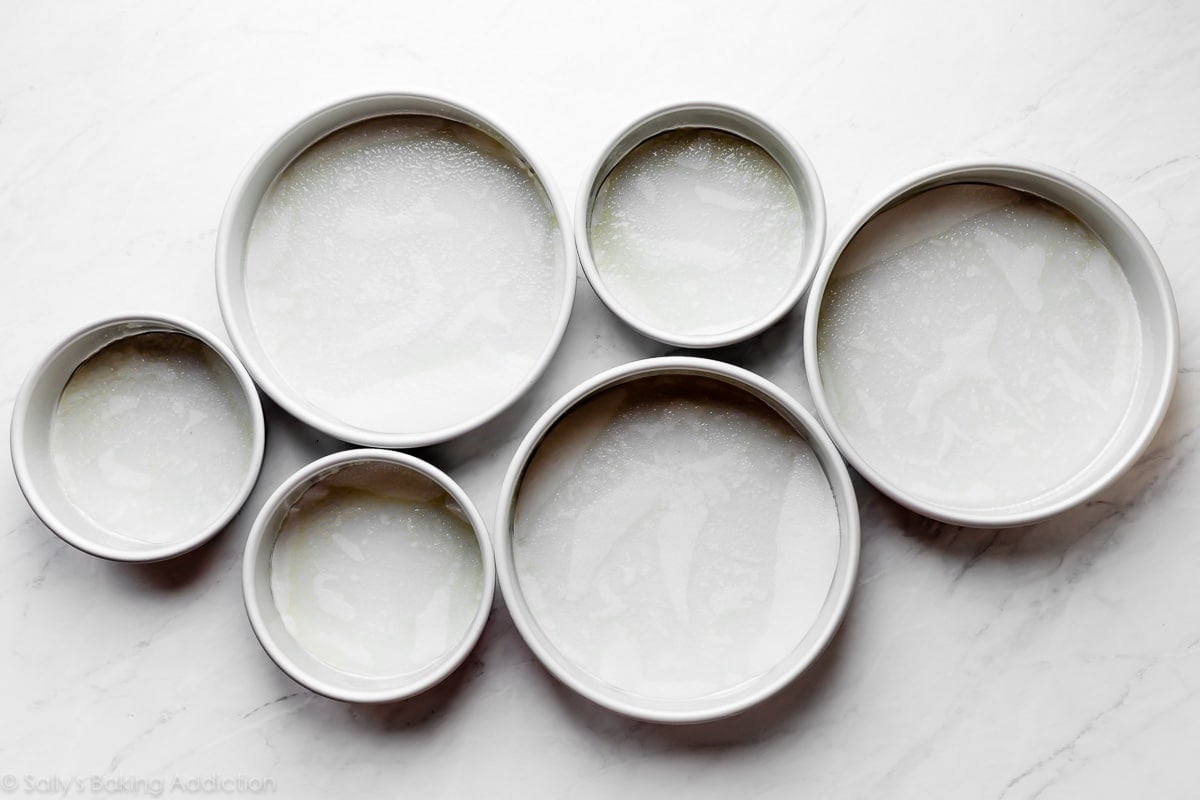
Prepare the Wedding Cake Pans
Always line your round pans with parchment paper rounds before adding the batter. Begin by lightly spraying the bottoms and sides of each with nonstick spray or greasing with butter. Add a parchment paper round, then grease the round as well. Parchment paper rounds aren’t something special you need to buy. Simply trace the bottom of your cake pan on regular parchment paper and cut into rounds. Parchment paper rounds guarantee the cooled cakes will seamlessly release from the pans.
See my 10 Cake Baking Tips post for all my advice on baking the BEST cakes.
Other Cake Pan Sizes
This recipe uses one 9-inch 3 layer cake and one 6-inch 3 layer cake. The 9-inch cake is 8-9 cups of batter and the 6-inch cake is 4 cups of batter. If you need to substitute other size cake pans, see my Cake Pan Sizes & Conversions post to determine the appropriate amount of batter you need for your desired cake pans.
Wedding Cake Video Tutorial (Decorating)
Give the video a few seconds to load right below this text. It’s a faded horizontal image of the cake. Click on the play button in the center to play it. Make sure any ad blockers are temporarily paused on your browser.
How to Assemble & Decorate a Homemade Wedding Cake
Assembling
You are literally making 2 completely separate cakes and placing one on top of the other. For guaranteed support and stability, place 4 cake dowels in the bottom tier. Cake dowels are sticks that will support the top tier. You’ll have to measure and cut the dowels so they are flush with the surface of the bottom cake. Place the small tier on top. A 6-inch cake board, which I describe next, is crucial between the tiers for added support.
*As shown in the video tutorial, crumb coat and decorate both cakes separately before layering the tiers. Decorating instructions are next.
Decorating
Decorate both tiers on cake boards. You can remove the cake board from the bottom tier, if desired, before placing the cake onto a serving platter or cake stand. (This can be tricky!) However, I usually just leave it. A piped frosting border around the bottom of the cake hides it. Do not remove the cake board from the bottom of the top tier. The cake board sits between both tiers for added support and stability and ensures that when you cut into the top tier, the whole cake doesn’t sink down.
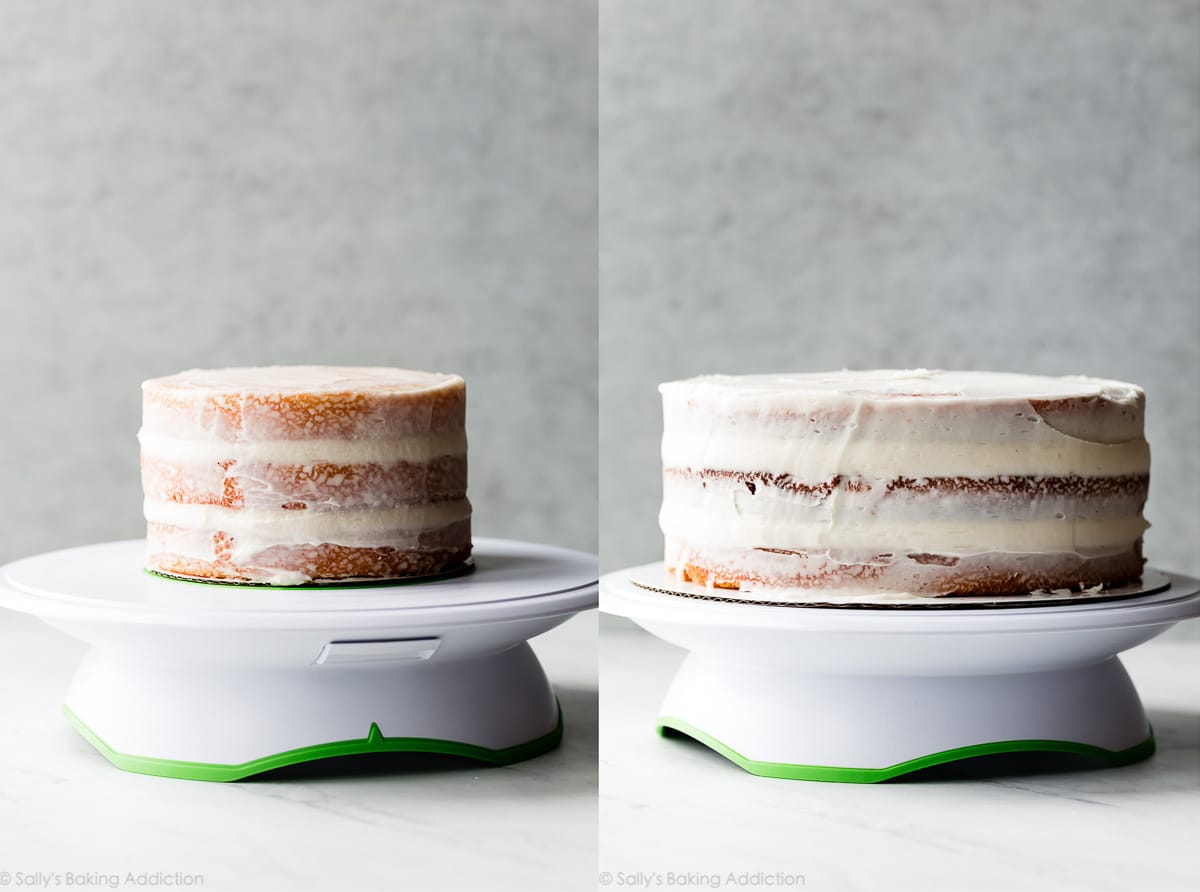
A wedding cake is literally the dessert of a lifetime, so it shouldn’t only taste great—it should look stunning, too. To reduce the possibility of flaws or mistakes, stick with simple decorating. A crumb coat on both tiers is necessary to protect the outer layer of frosting from catching any crumbs.
- What is a crumb coat? It’s basically a very thin layer of frosting around the cake before the beautiful exterior frosting is applied. You can see me crumb coating the cakes (as shown in the video tutorial, photos, and described in the recipe below), refrigerate the cakes to help “set” the crumb coat.
As you can see in the video tutorial above, it’s helpful to use a bench scraper to apply the crumb coat and exterior frosting layer. In fact, I use a bench scraper for decorating all layer cakes. I also like to use an icing spatula for the top of the cakes. (I use a small icing spatula for the small cake and a large icing spatula for the large cake.)
After crumb coating the cakes, they must be refrigerated to help “set” the crumb coat. This is another reason why cake boards are necessary—to help transfer/transport the cakes around.
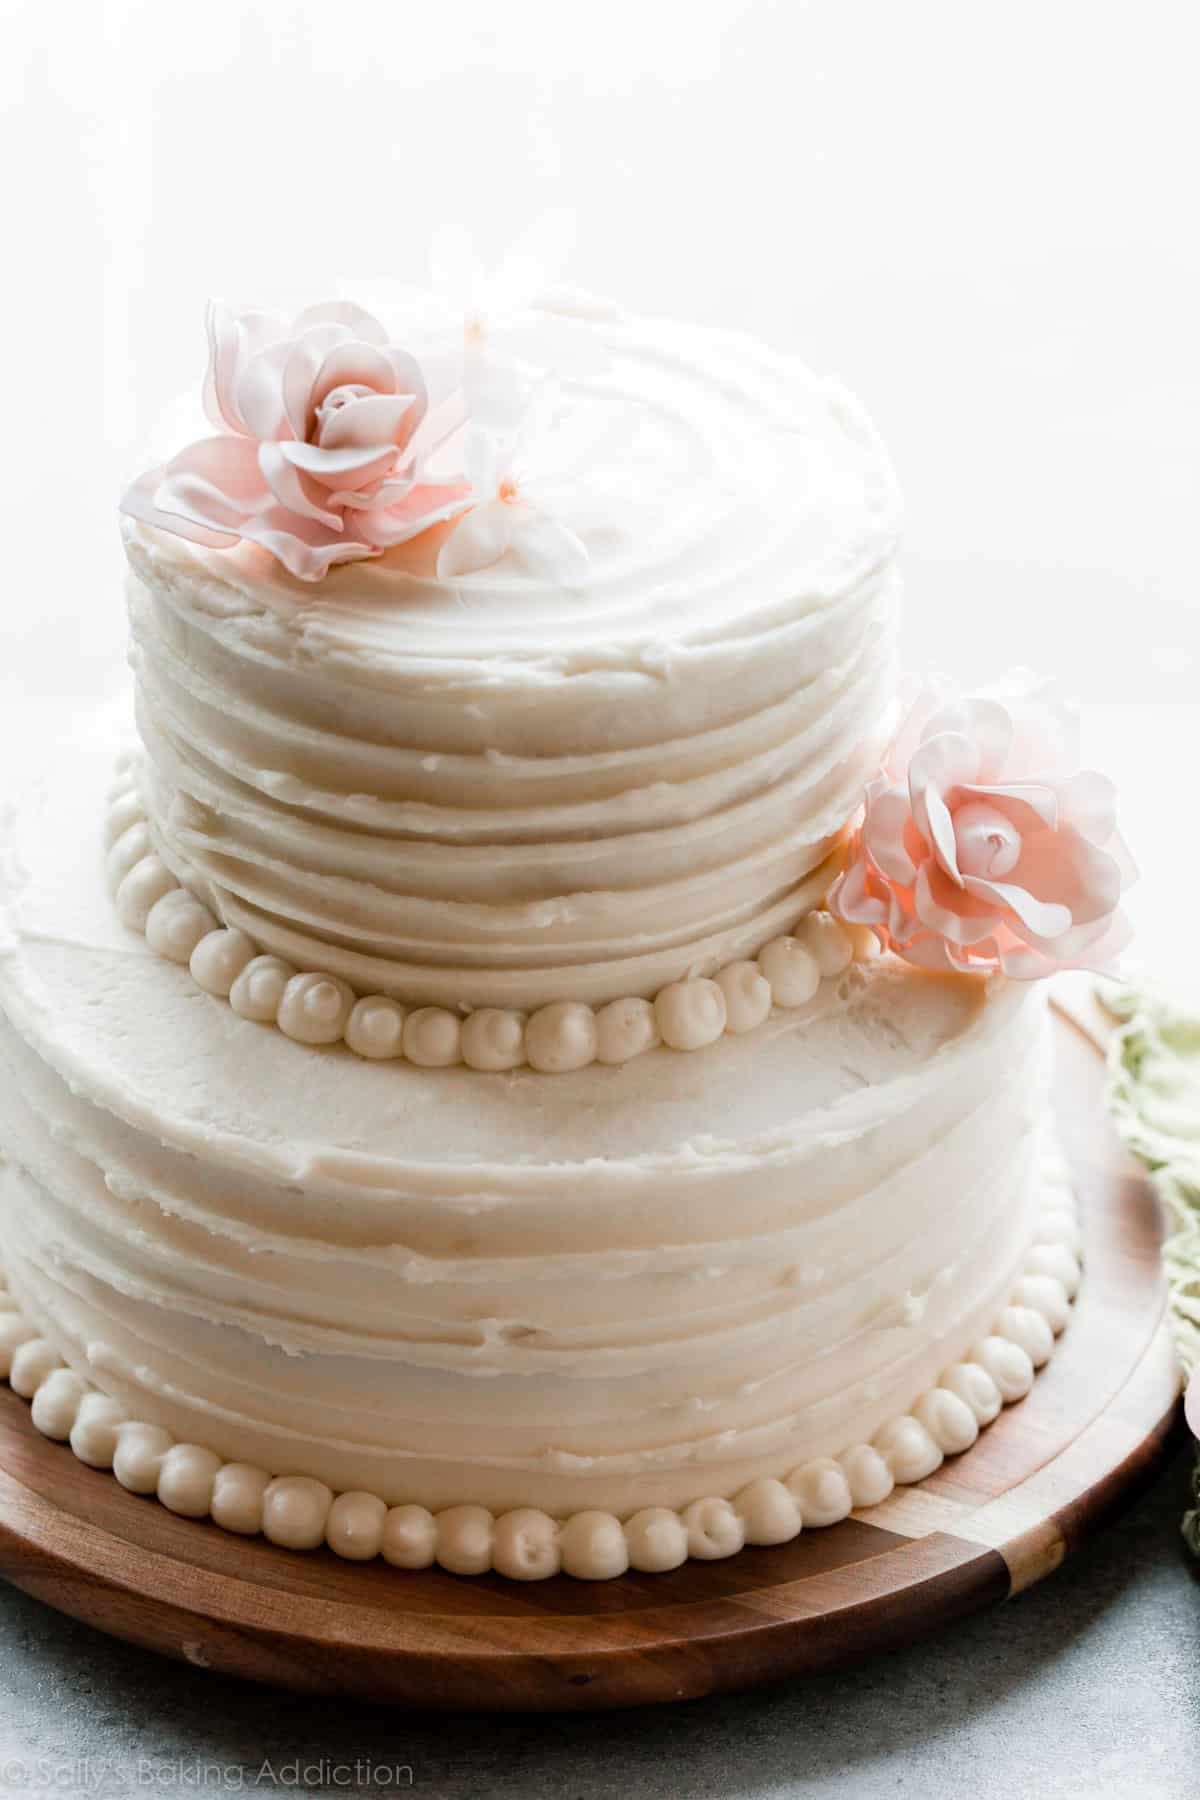
The textured look of the exterior frosting is very easy. (A big shoutout to my assistant, Stephanie, for suggesting this look!) As shown in my video, use a small icing spatula and run it around the cakes while spinning with the cake turner. You will love this look because it’s very easy, but resembles beautiful ruffles.
Piping
After placing the small tier on top, you can pipe frosting around the bottom of it. This covers up any spaces or smears that may have appeared when arranging the top tier. I pipe dots of frosting with a round piping tip between the tiers as well as around the bottom of the whole cake. They resemble pretty pearls. To smooth any peaks on these “pearls,” moisten your fingertip with water and gently press down on the peak.
More Decorating Inspiration
- Naked Cake style with flowers and berries
- Buttercream Flowers
- Two-Toned Frosting Roses
We’ll use my vanilla buttercream recipe (an increased amount, of course) for the decoration. Make two separate batches of frosting, 1 batch for each tier. There’s too much frosting for 1 batch—it will overwhelm your mixer.
You need at least 8-9 cups of frosting total which includes the filling, crumb coat, exterior ruffled frosting, and piping. If you desire other flavors of frosting, be sure to find a recipe that yields or adjust to yield 8-9 cups.
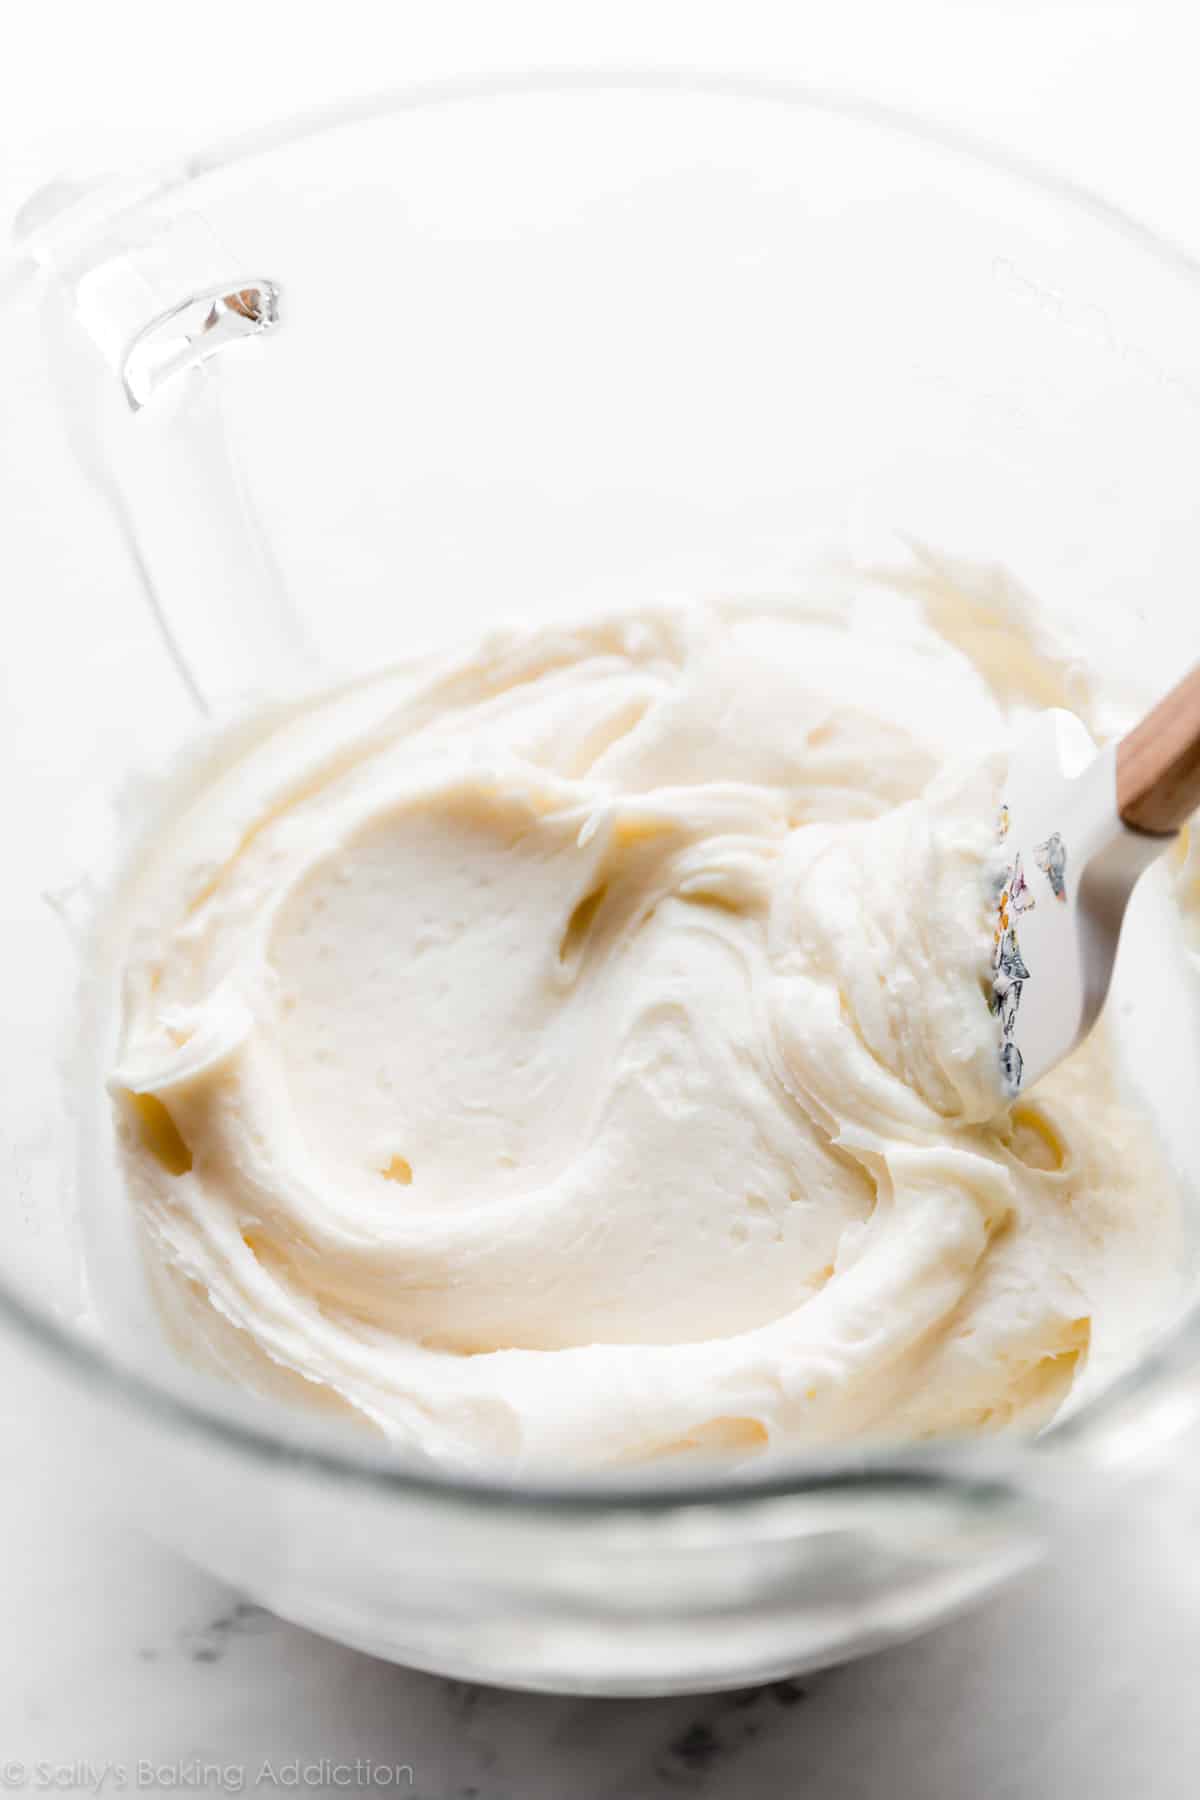
How to Keep Air Bubbles Out of Your Buttercream
Over-whipping vanilla buttercream creates air bubbles. The taste is no different, but the buttercream is no longer smooth and velvety.
Here’s how to get rid of air bubbles in your frosting: Ditch the mixer. Grab a wooden or metal spoon and begin stirring the buttercream by hand. Mash the frosting up against the side of the bowl to “pop” the bubbles. Do this until most of the air bubbles pop, about 1-2 minutes. This trick requires a lot of arm muscle!
Recommended Special Tools
(Affiliate links)
- Mixer (Handheld or Stand Mixer)
- Egg Separator
- 3 9×2 inch Round Cake Pans
- 3 6×2 inch Round Cake Pans
- Cake Boards (I use 1 6 inch and 1 10 inch. A 9 inch board works for the bottom cake, too. Or purchase this set which also includes cake dowels.)
- Cake Dowels (You need 4. You can use plastic cake dowels too. Plastic dowels are easier to cut.)
- Large Icing Spatula (for large cake)
- Small Icing Spatula (for small cake and for ruffled edge)
- Bench Scraper
- Cake Turner
- Piping Bag (disposable or reusable)
- Round Piping Tip
- Artificial Flower Decor (I used “Cozy Blush” color. Love these!)
- Large Serving Platter or Cake Stand (Pictured is a wooden cake stand I found at Target last year. You can see some of my other favorite cake stands in my list of Gift Ideas for Bakers.)
Simple Homemade Wedding Cake Recipe
- Prep Time: 5 hours (includes baking, cooling, decorating)
- Cook Time: 45 minutes
- Total Time: 6 hours
- Yield: 30-35 servings
- Category: Dessert
- Method: Baking
- Cuisine: American
Description
This is a recipe for a completely homemade 2 tier wedding cake. For best taste and texture, and to avoid overwhelming your mixer, make each tier (cake) and each batch of frosting separately.
Ingredients
9-Inch Bottom Tier
- 3 and 2/3 cups (433g) cake flour (spooned & leveled)
- 1 teaspoon salt
- 1 teaspoon baking powder
- 3/4 teaspoon baking soda
- 1 and 1/2 cups (340g) unsalted butter, softened to room temperature
- 2 cups (400g) granulated sugar
- 3 large eggs + 2 additional egg whites, at room temperature
- 1 Tablespoon pure vanilla extract (yes, Tbsp!)
- 3/4 cup (180g) full-fat sour cream, at room temperature
- 3/4 cup (180ml) whole milk, at room temperature
6-Inch Top Tier
- 1 and 3/4 cups (207g) cake flour (spooned & leveled)
- 1/4 teaspoon salt
- 3/4 teaspoon baking powder
- 1/4 teaspoon baking soda
- 1/2 cup (8 Tbsp; 113g) unsalted butter, softened to room temperature
- 1 cup (200g) granulated sugar
- 1 large egg + 1 additional egg white, at room temperature
- 2 teaspoons pure vanilla extract
- 1/2 cup (120g) full-fat sour cream, at room temperature
- 1/2 cup (120ml) whole milk, at room temperature
Frosting for 9 inch cake & piping
- 2 cups (452g) unsalted butter, softened to room temperature
- 8 cups (960g) confectioners’ sugar
- 6 Tablespoons (90ml) whole milk or heavy cream
- 1 and 1/2 teaspoons pure vanilla extract
- 1/8 teaspoon salt
Frosting for 6 inch cake
- 1 cup (16 Tbsp; 226g) unsalted butter, softened to room temperature
- 4 – 5 cups (480-600g) confectioners’ sugar
- 1/4 cup (60ml) heavy cream or whole milk
- 1 teaspoon pure vanilla extract
- salt, to taste
Instructions
- Before beginning this recipe, watch the video tutorial above, read the entire blog post, read the recipe instructions, and review the recipe notes. Make sure you’re prepared with the recommended special tools, which are listed right above this recipe and in the recipe Notes section.
- Make each cake separately. Start with the bottom tier (9-inch cake). Preheat oven to 350°F (177°C). Grease three 9×2 inch round cake pans, line with parchment paper rounds, then grease the parchment paper. Parchment paper helps the cakes seamlessly release from the pans. (If it’s helpful, see this parchment paper rounds for cakes video & post.)
- Whisk the cake flour, salt, baking powder, and baking soda together. Set aside. Using a handheld or stand mixer fitted with a paddle or whisk attachment, beat the butter and sugar together on high speed until smooth and creamy, about 3 minutes. (Here’s a helpful tutorial if you need guidance on how to cream butter and sugar.) Scrape down the sides and up the bottom of the bowl with a silicone spatula as needed. Beat in the 3 eggs, 2 egg whites, and vanilla extract on high speed until combined, about 2 minutes. (Mixture will look curdled as a result of the egg liquid and solid butter combining.) Beat in the sour cream. Scrape down the sides and up the bottom of the bowl as needed. With the mixer on low speed, add the dry ingredients until just incorporated. With the mixer still running on low, slowly pour in the milk until combined. Do not over-mix. Whisk it all by hand a few times to make sure there are no lumps at the bottom of the bowl. The batter will be slightly thick. You’ll have 8-9 cups of cake batter. Pour batter evenly into cake pans. Weigh them to ensure accuracy, if desired. Bake for around 23-26 minutes or until the cakes are baked through. To test for doneness, insert a toothpick into the center of the cake. If it comes out clean, it’s done. Allow cakes to cool completely in the pans set on a wire cooling rack. The cakes must be completely cool before frosting and assembling.
- Keep the oven on.
- For the top tier (6-inch cake) prepare three 6×2 inch round cake pans just as you did with the 9-inch cake pans in step 2. (Greasing with parchment paper rounds.)
- Prepare the 6-inch cake batter the same exact way as the bottom tier. You’ll have about 4 cups of cake batter. The batter will be thinner than the bottom tier’s cake batter. Pour batter evenly into cake pans. Weigh them to ensure accuracy, if desired. Bake for around 18-22 minutes or until the cakes are baked through. To test for doneness, insert a toothpick into the center of the cake. If it comes out clean, it’s done. Allow cakes to cool completely in the pans set on a wire rack. The cakes must be completely cool before frosting and assembling.
- Using a large serrated knife, slice a thin layer off the tops of all the cakes to create a flat surface. This is called leveling off the cakes. Discard the leveled off piece (or crumble over ice cream!).
- Make the frosting for the 9-inch cake (which is enough for the piping detail, too): In a large bowl using a handheld mixer or stand mixer fitted with a paddle attachment, beat the butter on medium speed until creamy, about 2 minutes. Add confectioners’ sugar, milk, vanilla extract, and salt with the mixer running on low. Increase to high speed and beat for 2 minutes. Add more confectioners’ sugar if frosting is too thin, more milk if frosting is too thick, or an extra pinch of salt if frosting is too sweet.
- You can prepare the rest of the frosting now (step 11), if desired, or begin decorating the 9-inch tier. Place your 9-10 inch cake board on your cake turner. Place 1 cake layer on your cake board. Using a large icing spatula, evenly cover the top with a scant 1 and 1/2 cups of frosting. Top with 2nd cake layer and evenly cover the top with a scant 1 and 1/2 cups of frosting. Top with the third cake layer. Using about 1-1 and 1/4 cups of frosting, spread it all over the top and sides in a thin layer, also called a crumb coat. A large icing spatula and bench scraper are helpful for applying the crumb coat. Set leftover frosting aside at room temperature. If you are decorating this cake in stages over 1-2 days, cover and refrigerate this leftover frosting.
- Using the cake board to pick up the cake (be careful, it’s heavy), place the cake in the refrigerator to help set the crumb coat as you work on the top tier.
- Make the frosting for the 6-inch cake, just as you prepared the 1st batch of frosting. (Step 8.) Before adding any salt, taste the frosting, then add a pinch if desired. I always add a small pinch.
- Place your 6-inch cake board on your cake turner. Place 1 6-inch cake layer on your cake board. Using a small icing spatula, evenly cover the top with a scant 3/4 cup of frosting. Top with 2nd cake layer and evenly cover the top with a scant 3/4 cup of frosting. Top with the third cake layer. Using about 3/4 cup of frosting, spread it all over the top and sides in a thin layer, also called a crumb coat. A small icing spatula and bench scraper are helpful for applying the crumb coat. Set leftover frosting aside at room temperature. If you are decorating this cake in stages over 1-2 days, cover and refrigerate this leftover frosting.
- Using the cake board to pick up the 6-inch cake, carefully place the cake in the refrigerator to help set the crumb coat as you work on the exterior frosting on the top tier.
- Remove the bottom tier from the refrigerator (along with the cake board) and place on the cake turner. Apply the remaining frosting for the bottom tier on the cake, reserving about 6-8 Tablespoons for piping detail. I recommend a large icing spatula and bench scraper to apply the outer layer of frosting. For the decorative textured frosting as pictured, see my video above. As shown in the video, use a small icing spatula and run it around the cake while spinning with the cake turner. You will love this look because it’s very easy, but resembles beautiful ruffles. Carefully lift the cake (with the cake board) and place on your serving platter or cake stand.
- Wash and dry 4 cake dowels. Measure the height of the bottom cake. Measure and cut the cake dowels to match. Staying within a 6 inch circle diameter (you can use another 6 inch cake board to “imprint” a 6-inch circle in the very center of the top of the 9-inch cake), insert the dowels into the cake, spacing them about 2 inches apart to form 4 corners of a square. Push the dowels straight down until each touches the bottom cake board. Set aside.
- Remove the top tier from the refrigerator (along with the cake board) and place on the cake turner. Decorate just as you did the bottom tier, including the ruffled textured frosting. I also turn the cake on the cake turner and apply this ruffled look on top of the 6-inch cake, too. This is optional. Along with the cake board, carefully lift the small cake and gently place it in the very center of the bottom tier.
- Piping: After placing the small tier on top, you can pipe leftover frosting around the bottom of it. This covers up any spaces or smears that may have appeared when arranging the top tier. I pipe dots of frosting with Wilton piping tip #12 between the tiers as well as around the bottom of the whole cake. They resemble pretty pearls. To smooth down pointy peaks on these “pearls,” moisten your fingertip with water and gently press down on the peak.
- Add any decorative pieces, such as artificial flowers.
- Cake is best enjoyed within 3 days. Refrigerate cake until ready to serve. After a few hours, the frosting will “set” and you can lightly cover with plastic wrap.
- Cover any leftover cake tightly and refrigerate for up to 1 week.
Notes
- Make Ahead & Freezing Instructions: Assembled cake is best enjoyed within 3 days. Refrigerate assembled cake until ready to serve. After a few hours, the frosting will “set” and you can lightly cover with plastic wrap until ready to display and serve. You can make the cake ahead of time before assembling it, too. The cake layers can be baked, cooled, and covered tightly at room temperature overnight. Likewise, the frosting can be prepared then covered and refrigerated overnight. Let the frosting sit at room temperature to slightly soften for 20 minutes before assembling and frosting. (You may need to beat the refrigerated frosting in the mixer for 1-2 minutes if it’s particularly solid. Feel free to add a Tablespoon of milk or heavy cream to soften it up as it mixes, too.) Crumb-coated cakes can be frozen up to 2-3 months. Cover with 2 layers of plastic wrap and 1 layer of aluminum foil. Freeze. When ready, thaw overnight in the refrigerator. Unfrosted cake layers can also be frozen up to 2-3 months. Thaw overnight in the refrigerator and bring to room temperature before decorating/serving. See how to freeze cakes for detailed instructions on freezing cake layers.
- Special Tools (affiliate links): 9-inch Round Cake Pans | 6-inch Round Cake Pans | Glass Mixing Bowls | Whisk | Electric Mixer (Handheld or Stand) | Silicone Spatula | Egg Separator | Kitchen Scale (optional) | Cooling Rack | Cake Boards (1 6 inch and 1 10 inch, or this set which also includes cake dowels) | Wooden Cake Dowels or Plastic Cake Dowels | Cake Turner | Large Icing Spatula | Small Icing Spatula | Bench Scraper | Piping Bag (Disposable or Reusable) | Wilton #12 Round Piping Tip | Artificial Flower Decor
- Cake Flour: If you can’t get your hands on cake flour, use this cake flour substitute.
- More flavors, fillings, sizes, decoration ideas, and special tools: See blog post above.
- Why is everything at room temperature? All refrigerated items should be at room temperature so the batters mix together easily and evenly. Read here for more information about the importance of room temperature ingredients.


Reader Comments and Reviews
Thank you so much for this post. Your step by step instructions were perfect. I made a two tier cake for a bridal shower using your cake as a guide. Sorry, I used by own recipe for the cake and frosting, BUT this tutorial gave me the confidence to frost, decorate and assemble it. I love the simplicity of this cake. I was struggling with how much batter for each layer and this post guided me through that (among other things). Wish I could take a pic and show you mine. Topped with different colored zinnias and lavender and greenery. It was perfect. Thanks again.
Hello :). The 9” cake recipe includes sour cream, but the article notes that buttermilk used for the bottom cake will make it a bit denser than the 6” cake, and will help stability. Do I just substitute an equal amount of buttermilk to replace the milk and sour cream amounts? Hope I didn’t miss an obvious answer. Thanks 🙂
Hi Julia! There’s no difference with regards to stability if using sour cream/milk vs buttermilk. I use the sour cream/milk option in both layers for convenience. If desired, though, you can use buttermilk in both tiers. Replace both the sour cream and milk with buttermilk. 1 and 1/2 cups (360ml) in the bottom tier and 1 cup (240ml) in the top tier.
Hi Sally! Is it possible to make this into a three-tier cake? Thanks!
Hi Adriana, You can add a tier if you wish and as long as everything is properly supported. For different size cake pans you can use the post Cake Pan Sizes & Conversions to help calculate how much batter you would need.
Hi Sally,I’m planning to make a two tier cake for my daughter’s birthday party.For the top tier I want to make a 3 layer 6″chocolate cake and for the bottom tier I want to make 3 layer 8″cake in 3 different colors (pink,yellow &blue)and make a checkerboard cake.I’ve read all your wonderful recipes for best vanilla cake,checkerboard cake,funfetti cake& favorite white cakes but I can’t choose which one is the best choice for the bottom tier(to be the 3layer checkerboard cake) to also be enough strong to support the top tier and be smooth,moist and not to be very dense and thick.I think funfetti layer cake is the best choice because it has both whole and white eggs so the best structure that I’m looking for & also I think the white cakes have the best result for colorful cakes(rainbow,checkerboard and….)Now I would be very thankful if You could help me to reach the best result for the bottom tier to have the best taste,being strong enough for supporting top tier and also have best colorful cake.sorry it gets too longThank u so much
Hi Sahar! Sounds like such a fun cake for the celebration! The vanilla cake would be great as the bottom tier– it’s nice and sturdy and is already 3 layers. It’s always a big hit! You can, of course, choose the sprinkle layer cake instead. It’s quite sturdy and a little more dense than the vanilla cake.
Hi Sally! I was wondering whether it would be risky to add an extra tier (ideally, in the middle, then adjusting to make the bottom layer slightly bigger)? Or would I risk the cake collapsing? And if that doesn’t sound like a good idea, what about an extra layer, to make each tier four layers? Any advice appreciated! And thanks so much for your amazing recipes!
Hi Erika, Either way should be just fine as long as your tiers are properly supported (and level!)
Hi Sally!
I want to make this cake and wanted to do a carrot cake on the bottom and a lemon cake for the top tier using both your recipes, using the lemon cupcakes recipe for the top tier. Do you think that would work? Am I being too ambitious? What frosting should I use? I love your cream cheese frosting with your carrot cake, would that work with the lemon as well? Will it work for a wedding cake? Sorry for all the questions. I am just learning. If you don’t think these will work, can you recommend any other combinations that will work with your carrot cake recipe? Thats my absoulte FAVORITE!
Hi Nancy, Yes you can do a carrot cake on the bottom and lemon on the top! Both of those recipes are linked in the section above called “Other Flavor Options” and cream cheese frosting would be delicious on both.
Hey Sally,
Just for clarification, the recipe for the 9″ and 6″ is set for each pan? not all 3 in one?
Yes. The 9-inch recipe is the batter for the 9 inch layer cake and the 6-inch recipe is the batter for the 6 inch layer cake on top. Hope I’m understanding your question correctly!
I ended up making this cake style (for a bridal shower) using your white cake recipe and it turned out phenomenal. It was the first tiered cake I’ve ever made. I also used your tutorial for a naked cake for the decorating. All three of these recipes were so amazing and helpful to achieve the look and taste I was going for! I can’t thank you enough!! Thank you for all your recipes and tips, I swear by your blog!
Hi sally, I’m really looking forward to making this cake. The only thing is I can’t really afford to buy six tins. Do you think it’s better to bake all together and then cut into three parts or just take turns baking each section of the 6 and 9 inch layer? Thanks so much for your help
Hi Louisa, There is too much batter to bake at once. Overfilling your pans will cause the cakes to not rise or bake properly. Best to divide the batter and bake one layer at a time while keeping the remaining batter covered at room temperature.
Have you ever tried putting fresh fruit in the filling instead of jam? Strawberries for example. Would it effect the stability of the cake or would the layers hold okay still with the dowels?
Yes I have! If you are serving the cake very soon after decorating then fresh fruit is a lovely option. You can see how I layer berries in my Vanilla Naked Cake.
Oh no! I’m making cake and just realized I only have salted butter left for icing!!!! Can I use this and leave out salt in recipe? Thank you!
Yes, salted butter is fine in the frosting and you can cut the added salt in half but not leave it out completely.
Thank you so much, Sally! I promise my questions will slow down. 🙂
Hi Sally!
I’m hoping to make this for my daughter’s first birthday, but thought I could add in some food colouring to make it a rainbow cake? Would that work?
I also wondered about the size of the pans – I have 6 inch bans but they are 3 inches deep, would that be a problem?
Thanks so much!
Hi Emily, You can add food coloring to the batter for a rainbow cake! As long as you still divide the batter equally between three 6-inch pans it’s absolutely fine that they are three inches high. I hope she has a great first birthday celebration 🙂
Can you make this into cupcakes?
We’re sure you could, but these cake recipes would yield a TON of cupcakes. Here’s our favorite vanilla cupcakes recipe as well!
Thank you the recipe and tutorial! I ended up making my own wedding cake as plans for my wedding in April changed drastically. This is hands down the best vanilla cake I’ve ever had, and thankfully did not add to the stress of re-planning a wedding!
Hi. My daughter’s wedding is on June 6, and I will be making her wedding cake. When I saw your recipe, I think it will be perfect. I hope it will turn out as good as your video looks. My question is, she and her fiance are not fans of vanilla cake. So I thought I would make it a chocolate chip cake by adding mini chips. Do you think this is a good idea? Should anything be done differently with the batter to accommodate the chocolate chips? Thank you.
Hi Susan, you can definitely add mini chocolate chips to this cake batter. No changes to the bake time or anything. The amount is up to you. I’d say 1 cup for the larger tier and 2/3 cup for the smaller tier.
This recipe looks wonderful! I am using your tutorial to make a cake for my friend’s small wedding this weekend and I’m so thankful for such a fabulous resource. I would love to get a few additional tips from you. I am planning to follow the instructions exactly with the only change being 10″ and 8″ cakes instead of 9″ and 6″. Would you recommend simply making a 1.5 batch of each layer recipe? My brain is about to explode as it is, so I’m hoping I can avoid complex calculations. Thanks in advance!
Thanks so much for getting in touch. Though I haven’t tested this, making 1.5x the batter for each of those size layers would be ideal. If you have leftover cake batter, you can use some for a few cupcakes on the side. I’m unsure of the best bake time for those size cakes. My Cake Pan Size and Conversions post will helpful, too!
Hi Sally! I am getting married in August at our house and with so much uncertainty and keeping a very low budget, I was looking for a wedding cake recipe to make. I’ve baked for years and taken some decorating classes for fun in the past. Anything I should consider in August humidity for success with this recipe? I am going to do a dry run in the next couple of weeks to make sure it is doable for me. So glad I found you on Pinterest. Thanks!
Hi Jen! I’m glad to help. The only thing I would be concerned about is the frosting. You can substitute half of the butter for shortening, which is more stable in heat. I think you’ll really love this cake– it’s definitely doable as far as wedding cakes go!
I would like to make this with the lemon curd filling. Does this replace the icing between layers, or is it in addition to icing?
I would add it in addition to the frosting between the layers or mix it with the frosting. It’s too thin to fill the cake on its own– the cake would squish it.
Hiii sally! I’m planning on baking this cake for my wedding (wish me luck ahaha) and was wondering if I wanted to use buttermilk instead of sour cream and milk, how much buttermilk should I add? I’m Backing a 2 tier cake and using This 6” recipe for the top and your 10” chocolate cake for the bottom! (I made the chocolate on last time and everyone loved it) Thank you soo much for you time!
Hi Irium, Yes, in the 6 inch layer you can use 1 cup of buttermilk instead of the 1/2 C sour cream and 1/2 C whole milk. Enjoy!!
The flavor was great but the cakes fell flat. What did I do wrong? I even opened up a new can of baking powder for the second attempt hoping that would fix the issue but no joy
I’m glad you enjoyed the taste, Elisa. To help troubleshoot I suggest taking a look at my 10 Baking Tips for Perfect Cakes.
Hi Sally,
Im making first 2 tiered cake but havent got the 3 x 6 x 2inch pans. Can i make the recipe and put it into taller pan then cut into 3 pieces?
Do you mean put all of the batter for the 6 inch tier into one tall 6 inch pan? I would be afraid it would be too much batter for one pan and would not bake through evenly and that it would be too heavy to rise properly.
Amazing recipe! I used this recipe with your naked tiered cake decorating (with lemon curd filling in the bottom and fresh raspberries in the top). The buttercream holds it together so well!
Looked beautiful and tasted even better. It got rave reviews. Thank you for the recipes and inspiration!
Hi Sally! Successfully made a tier cake using this guide. Everyone raved about the flavors (chocolate chip cake w/ salted caramel and chocolate cake with PB buttercream) I’m being asked to make another one but it needs to be a bit bigger. Do you know if your Strawberry cake as a 10 inch 3 layer with your chocolate cake as a 8 in 3 layer on top would work? Strawberry cake is a vanilla base so hopefully sturdy enough?
Thanks!
Hi Kristin! Thank you so much for reporting back that this tutorial was helpful for you! My Strawberry Cake batter isn’t enough to yield a 10 inch 3 layer cake– you’d likely have to 1.5x or make the batter twice to ensure you have enough. With dowels for support, it should be fine to hold up the chocolate cake on top.
Wherever I don’t know what to make for dessert I heard over to your page, and always find something delicious! I told my 3.5 year old son he could pick any of the cakes for Dad’s birthday, figuring he’d pick funfetti, chocolate, or something super colorful. Nope! We made Dad a wedding cake! Your instructions were perfect, and the cake was delicious. We did a red velvet top tier with the vanilla bottom. I am a novice Baker, and had no issues at all. Thank you so much for this recipe and making my husbands birthday such a hit!
P.s. I’ve also had it got breakfast and lunch, still delicious!
I made this for a friend’s engagement party. Delicious and lovely. Used 8” instead of 9” pans and put all the batter in them, increasing the baking time a bit.
The frosting recipe is exactly the right amount to fill, crumb coat, finish and trim the cake with barely any left over.
Thanks for this recipe. It makes a true scratch wedding cake with precise instructions. (Next time I will add some
almond extract as the flavor is fairly one note.)
Hi Sally,
I promise this is my last question 🙂
We were wondering if we could safely cut down the sugar in the recipe by about 1/3rd for both the cake and the frosting. As much as I have a sweet tooth, considering it will be just 4 of us eating the cake, we were thinking of cutting down the sugar.
Do you think it would affect the quality, baking wise?
Hi Nabeela, The sugar is responsible for the moisture and texture of the cake as well as the flavor. You can try slightly reducing it but it may not be as moist. You can also use less confectioners sugar in the frosting but it will result in a thinner frosting.
Hi Sally! Quick question can you tell the recipe for a 7 inch cake? I just ordered a new set but it gives 7 not 6. Please,
Thank you
Hi Melanie, I think you will find this post on Cake Pan Sizes and Conversions helpful to scale the recipe to a different size.
My wedding cake, 27 years, was simple…but not as simple and lovely as this one! I do love wedding cakes like this. Thanks for posting such a sweet wedding cake!
Thank you so much, Amy! 🙂
Sally, we are celebrating 37 years of marriage and since we didn’t have a wedding cake those many years ago I thought I would bake one and this will be the one! thanks immensely and you will be a part of the celebration!
Oh how exciting! If you end up making this wedding cake, let me know how it goes 🙂 Happy 37th anniversary!
Hi. I read the whole post but I still don’t understand why you used yogurt and milk instead of buttermilk… what is the difference between the outcomes? Can I not use your original vanilla recipe for a wedding cake??
Hi Alyssa, you can use buttermilk in the bottom tier and sour cream/milk in the top tier. The reason I use milk and sour cream is so both tiers have the same exact ingredients. You could also use buttermilk in both tiers. The taste and texture remains the same. Buttermilk is always a fine replacement for an equal combination of sour cream and milk.
Sally, honestly what other blog would tell us aspiring bakers how to make a wedding cake? Only our Sally!! Thank you for your advice, inspiration and teaching style. When people ask me for a recipe 99% of the time I say, “Oh, it’s Sally’s!”
For your chocolate sturdy cake, couldn’t you use your vanilla cake (3) 9 inch layers and add cocoa to make it chocolate? Just wondering…..
Hi Denise! Unfortunately it’s not that easy. Cocoa powder is a naturally drying ingredient, so the ratio of wet to dry would need to change. And while cocoa powder can replace some flour, it can’t replace all. It’s also much lighter than cake flour (if you can imagine) so we’d likely need to crutch the batter with all-purpose flour too.