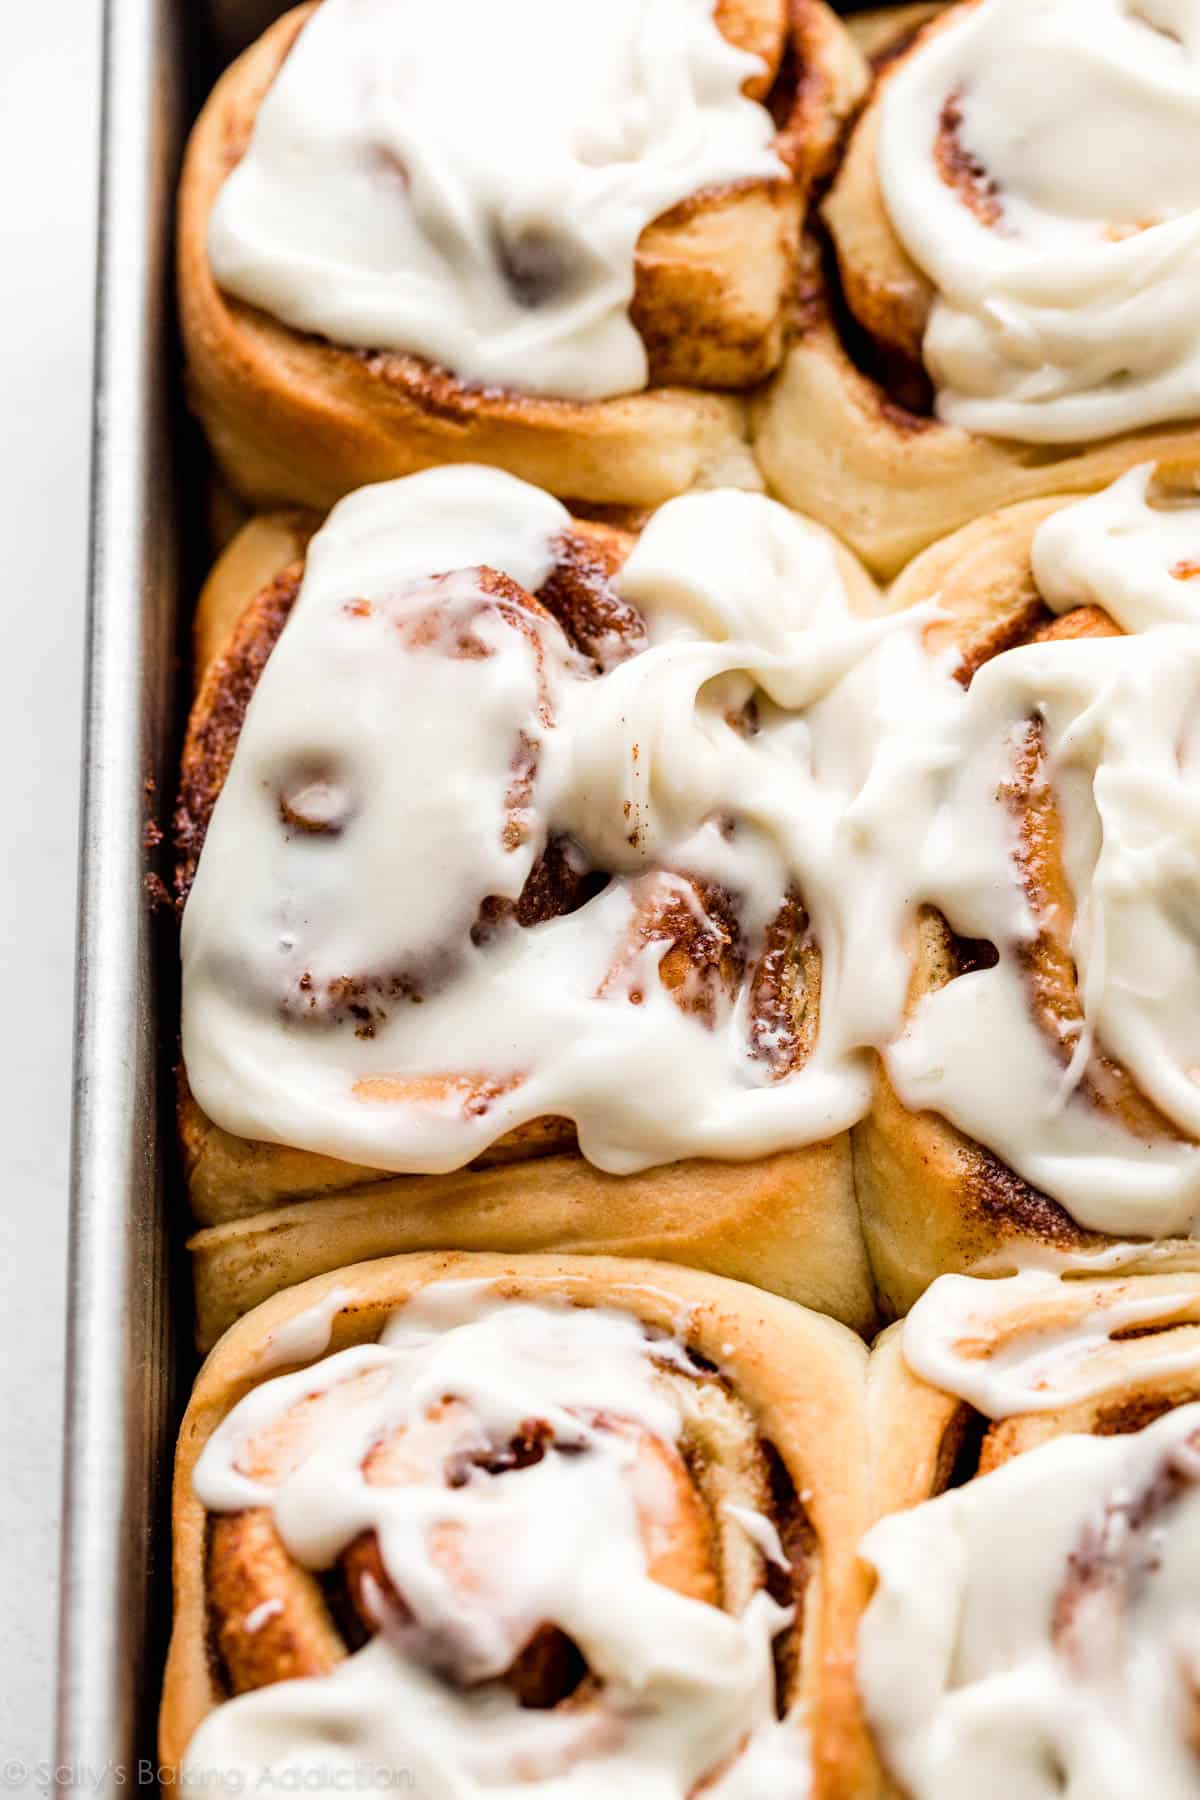
This recipe yields a pan of buttery soft, gooey cinnamon sweet, and extra fluffy homemade cinnamon rolls topped with tangy cream cheese icing. It’s been a reader favorite recipe for years and I love it so much that I turned this rich dough into apple cinnamon rolls, pecan sticky buns, maple cinnamon rolls, and even a cinnamon roll wreath. You can make the cinnamon rolls within a few hours or get started the night before using the overnight preparation option.
This recipe is brought to you in partnership with Red Star Yeast.
This cinnamon rolls recipe has lived on the site since 2014. After making countless more batches since I published the recipe plus answering readers’ comments and questions, I thought it would be beneficial to update the post with more helpful information and success tips. Homemade cinnamon rolls are a popular breakfast choice, so I want to make sure you have all the resources you need for this classic recipe.
By the way, if you love this dough, be sure to try it as raspberry sweet rolls or strawberry sweet rolls with lemon glaze next. Or for a sprinkle loaded treat, my birthday cake cinnamon rolls use the same dough, too!
Tell Me About These Homemade Overnight Cinnamon Rolls
- Texture: This is one of my richest homemade doughs, so you’re already promised a soft, springy, and fluffy texture. I usually use all-purpose flour, but if you use the optional bread flour, your rolls will be a little chewier. I find that these homemade cinnamon rolls are even fluffier than my easy 1 rise cinnamon rolls (and that’s because there’s the additional rise here!).
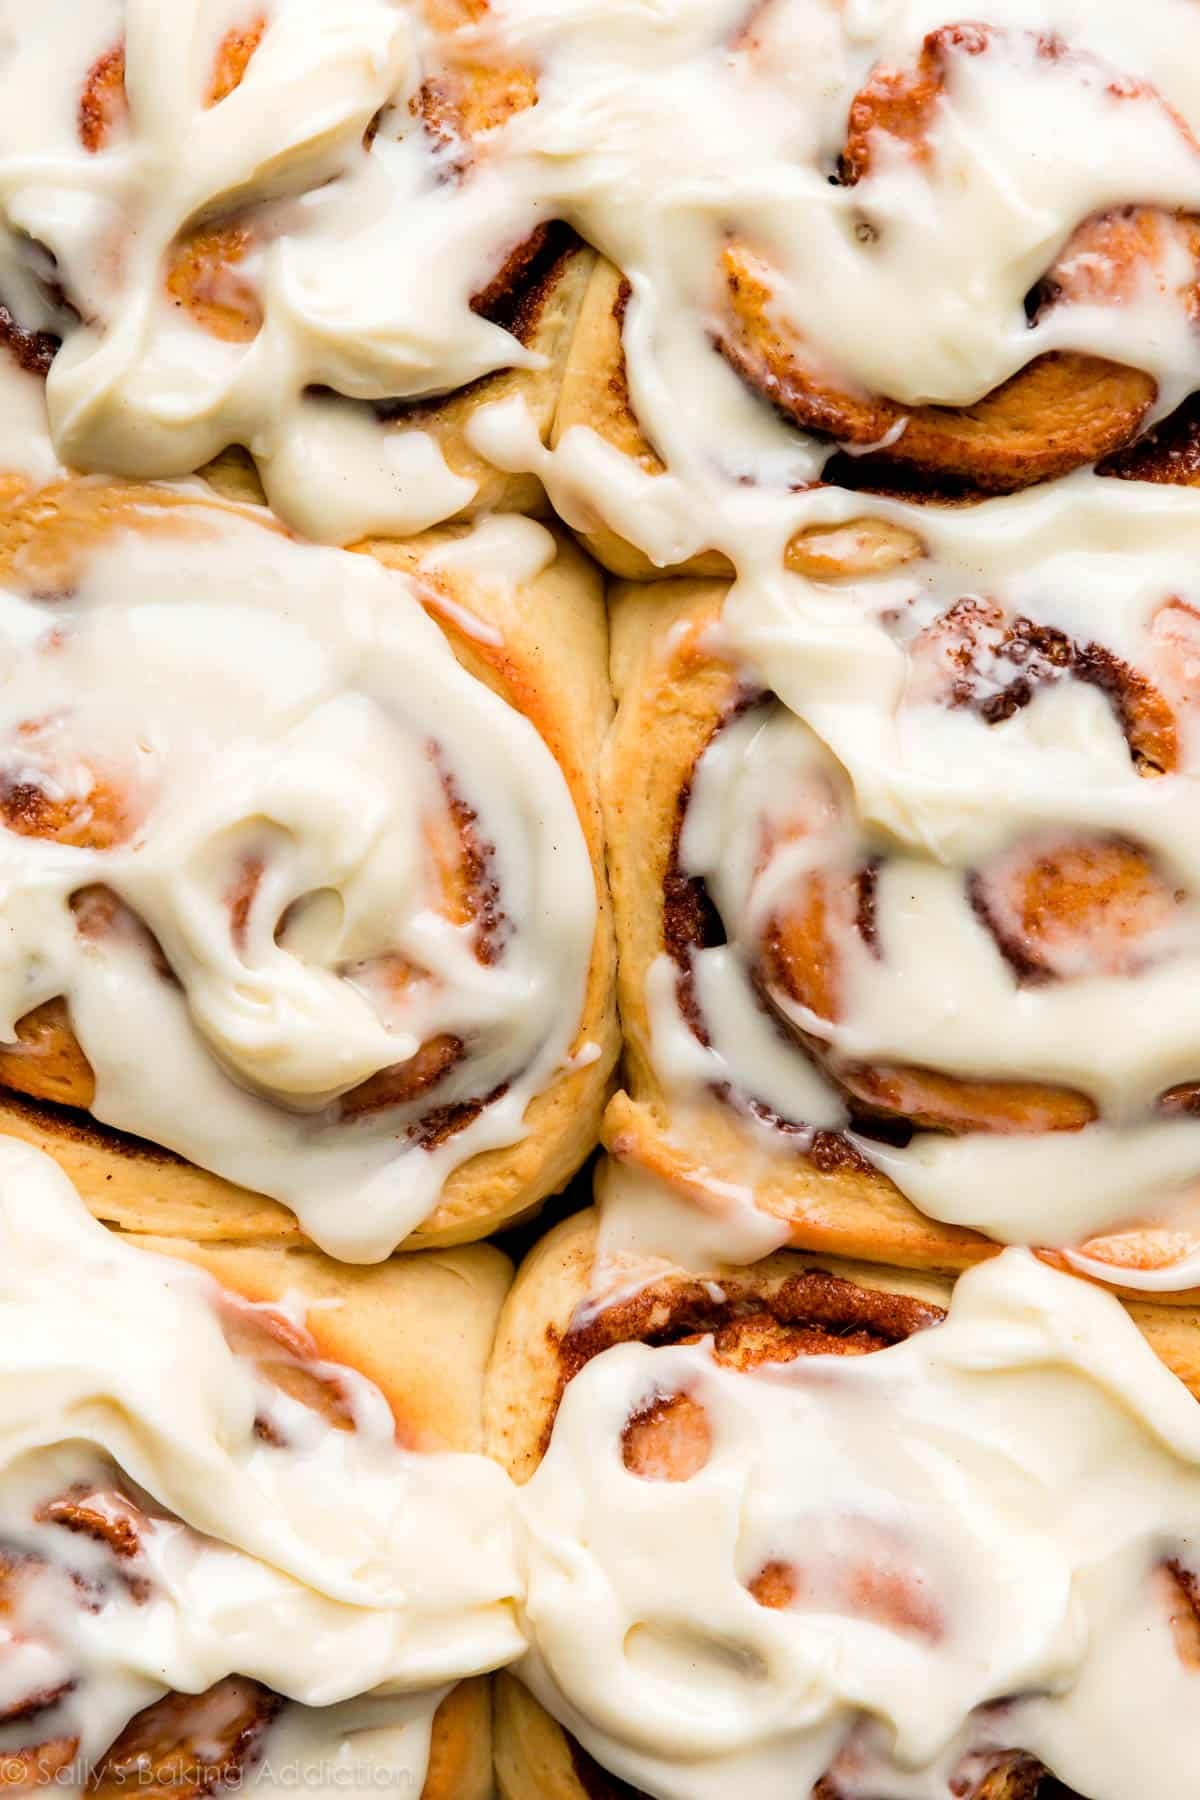
- Flavor: The smell of warm cinnamon rolls is oh-so-irresistible and inviting. Once you take that first bite, you’ll enjoy a fresh homemade dough that’s swirled with endless pockets of (Cinnabon style!) sweet and gooey cinnamon.
- Ease: Homemade dough and shaped breads require more precision and effort than making say, a coffee cake. But the dough is pretty straightforward and simple to shape, as long as you have enough flour nearby for your hands, work surface, and rolling pin.
- Time: This dough requires 2 rises. Once you understand the assembly process, the prep moves pretty quickly. Set aside at least 4-5 hours from start to finish or divide between 2 days with the overnight option. Whichever method you choose, keep in mind most of that time is hands off as the dough rises.
If you are craving cinnamon rolls right now, and just can’t wait for dough to rise, try these no yeast cinnamon rolls!
What Readers are Saying:
“I HAD to come and leave this rave review. I just baked and iced these cinnamon rolls ay 9:05 am. It’s now 10:55 am in a household of only 3 people only two are left. This recipe is the best I’ve ever tried. ★★★★★” – Chelsea
“Delicious and easy to follow! This was my first time cooking with yeast and my first time making homemade cinnamon rolls and this was a great recipe to start with. Everyone at brunch was blown away. ★★★★★” – Hannah
“Delicious! I have tried many cinnamon roll recipes, and this is my new favorite. I prefer a roll that is large, more fluffy than dense/gooey, and buttery without being overly sweet. This fit the bill! ★★★★★” – Brice
Are You a Yeast Beginner?
This Baking with Yeast Guide is a wonderful starting point for beginners. I answer many common yeast FAQs in easy-to-understand explanations, so you can learn the basics before beginning.
7 Crucial Ingredients in These Homemade Cinnamon Rolls
Feel free to skip straight to the recipe. But if you’re new to making bread, the following explanations are points that I’ve learned over the years and will be massively helpful.
- Whole milk: Whole milk is ideal for the richest tasting cinnamon rolls. Buttermilk works just as well without any changes to the recipe. Many readers have successfully substituted nondairy milks. In a pinch, you can use 2% or 1% milk, but do not use nonfat milk.
- Sugar: You need 2/3 cup of white granulated sugar in the dough. Use 2 Tablespoons in step 1 below (the proofing step), then add the rest in step 2.
- Yeast: You can use active dry or instant yeast. Follow the directions exactly as written regardless of which you choose. You’ll still proof the yeast in warm milk with some sugar even if you use instant yeast. This step ensures that the yeast is active and not expired. Most yeast these days is already active, but it’s a quick 5-10 minute step that prevents you from wasting your time just in case the yeast has expired. If using active dry yeast, the rise times will be a little longer. For the past 10+ years, my go-to brand has been Red Star Yeast. I always recommend Platinum Yeast from Red Star.
- Butter: This is a rich dough, meaning it has fat to help guarantee softness. Use 1/2 cup of softened butter and to help it blend easier, cut it into 4 pieces before adding.
- Eggs: Like butter, eggs promise a softer, richer dough.
- Salt: Dough is bland without salt.
- Flour: Flour is the structure of the dough. You can use either all-purpose flour or bread flour. You’ll notice the rolls are a little chewier if you use bread flour. It’s not a huge difference, so don’t worry if you only have all-purpose flour. (That’s what I usually use!)
Note: You’ll notice that I use more yeast in this recipe compared to my easy cinnamon rolls. Why? These are much fluffier and larger—about twice the size.
Step-by-Step Photos
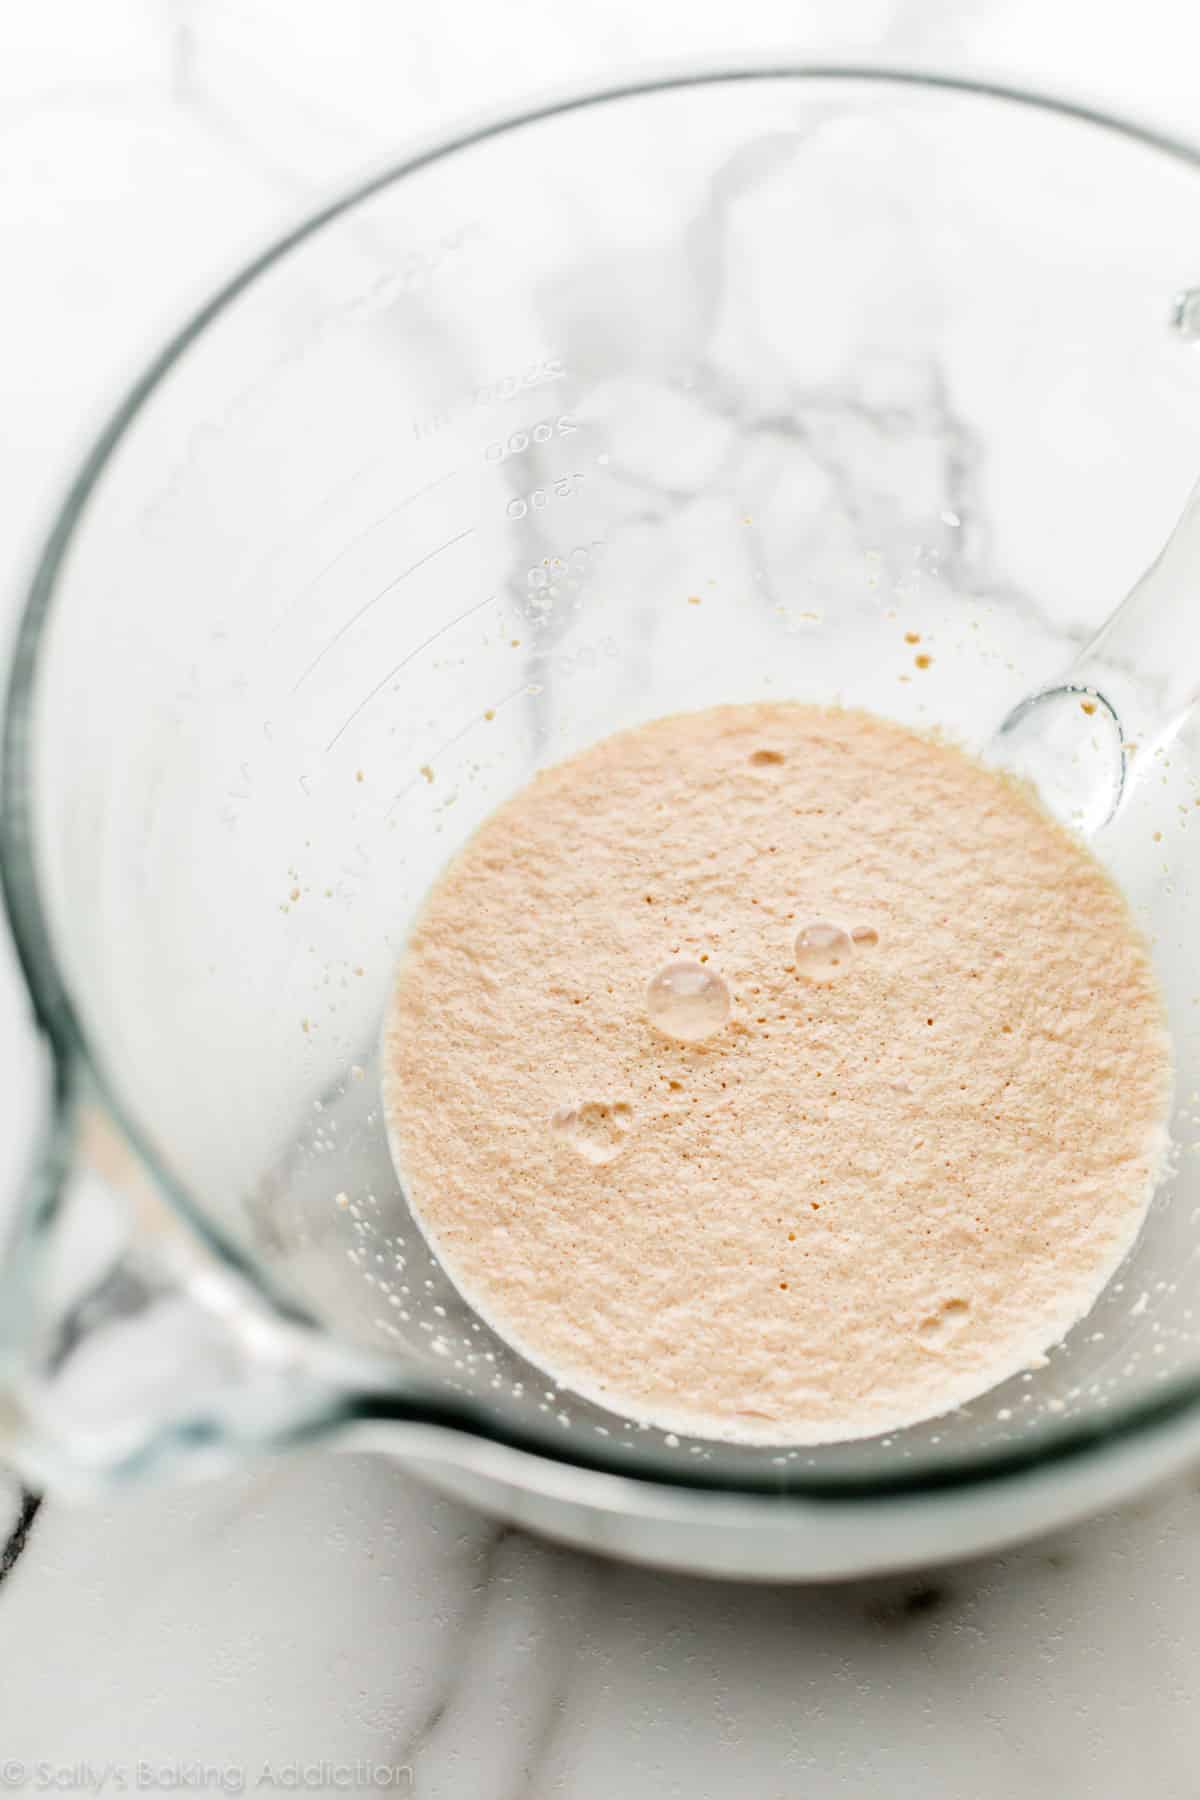
Here’s what you’re looking for after you let the warm milk, some of the sugar, and yeast sit for about 5-10 minutes. The top will be a little foamy:
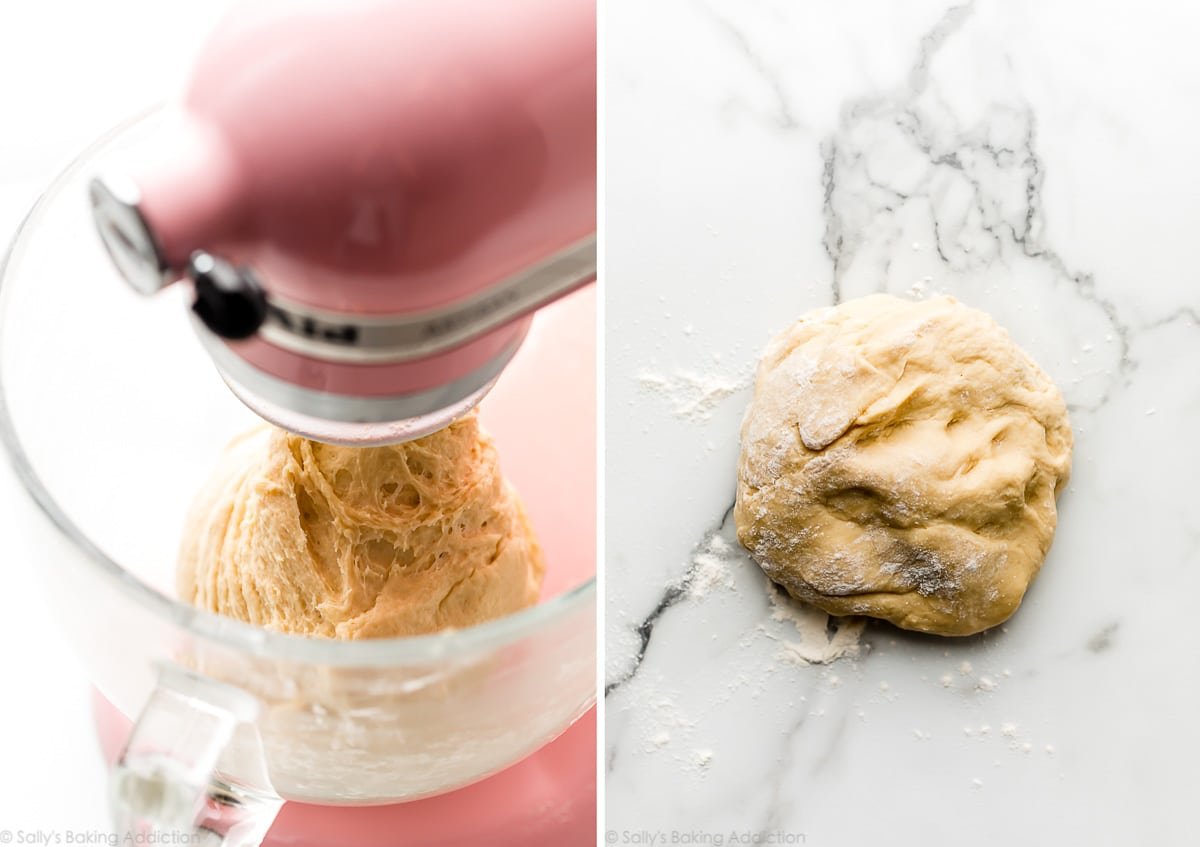
After the dough comes together, it will be a little soft and sticky—that’s normal. As explained in step 3 below, knead the dough on a floured counter or keep it in the mixer for kneading. If you’d like a visual of how to knead the dough by hand, you can watch the full video tutorial in my post on how to knead dough.
What If I Don’t Have a Stand Mixer? If you do not own a mixer, you can mix the dough together with a large wooden spoon/silicone spatula. It will take a bit of arm muscle. A hand mixer works, but the sticky dough repeatedly gets stuck in the beaters. Mixing by hand with a wooden spoon or silicone spatula is a better choice.
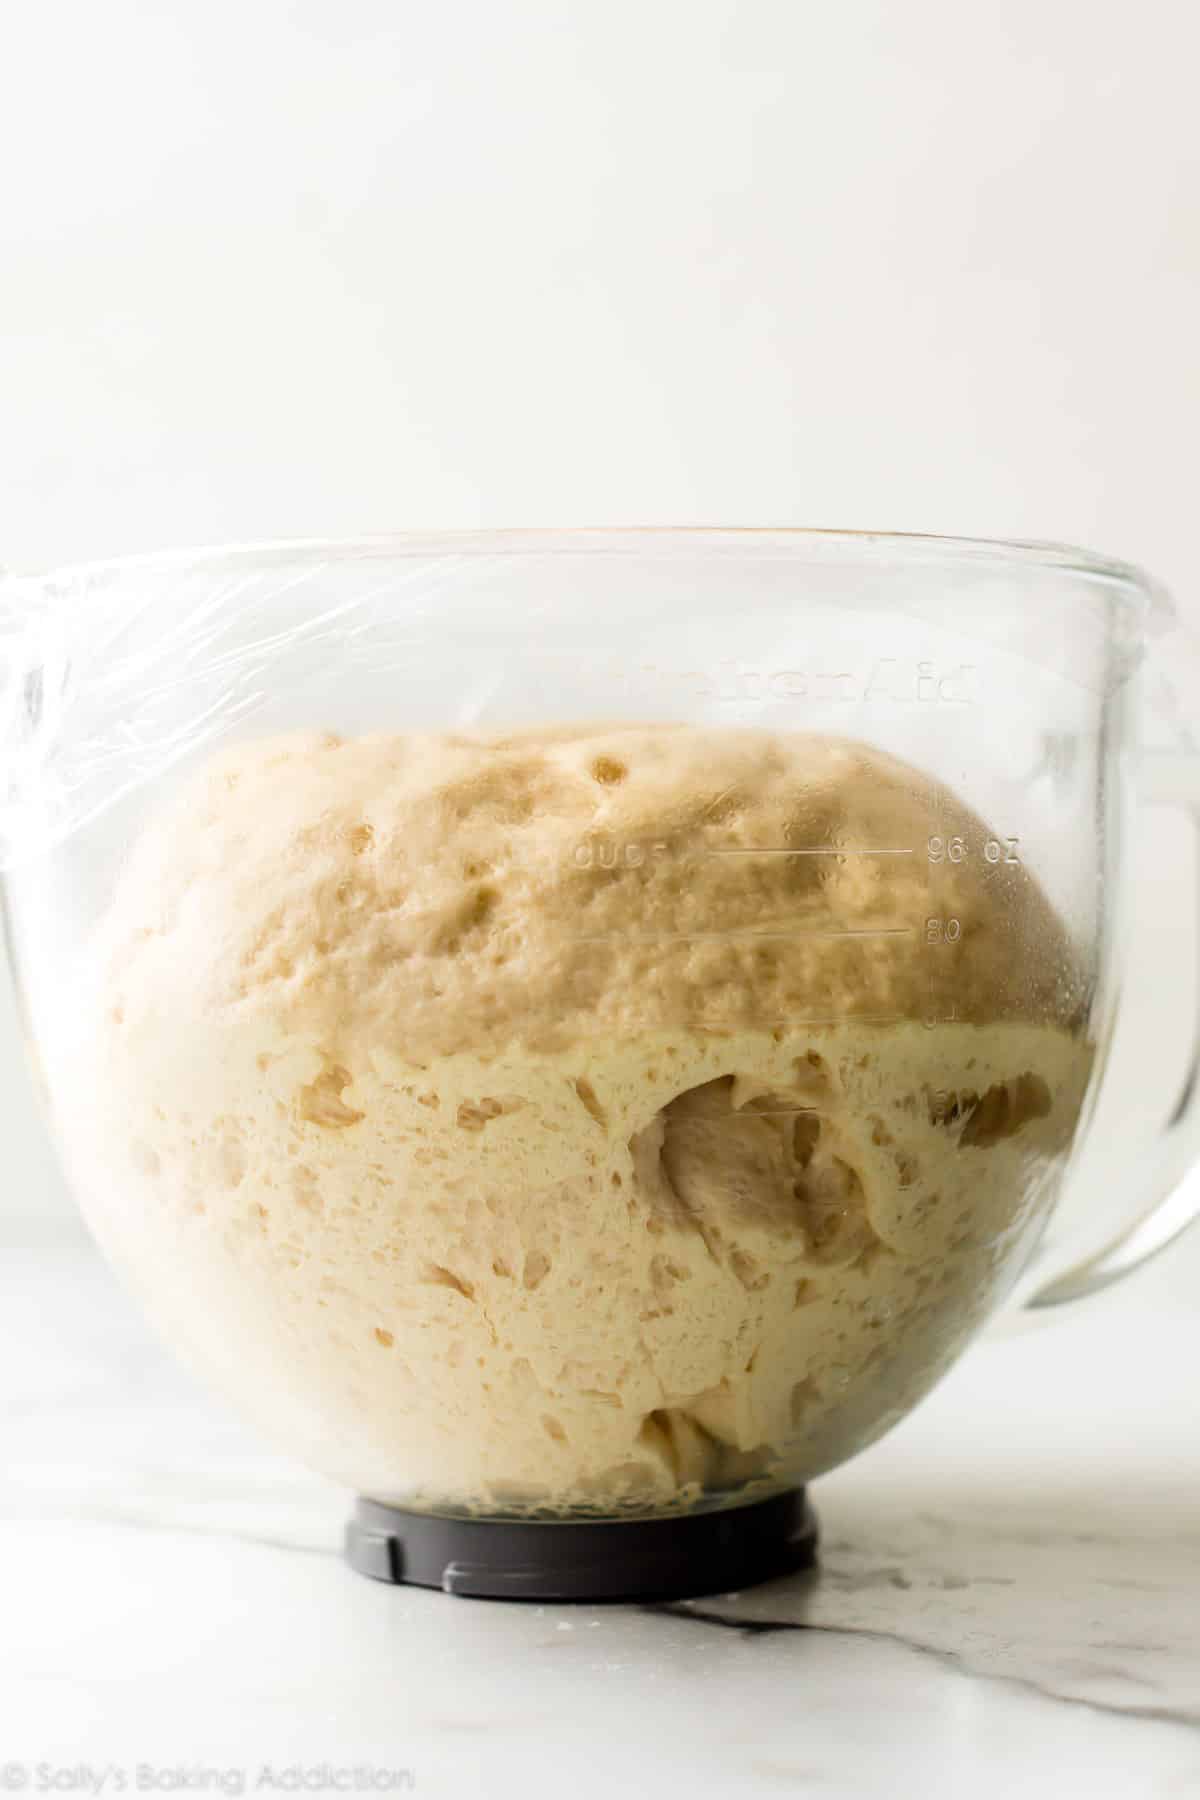
Let the dough rise until doubled in size:
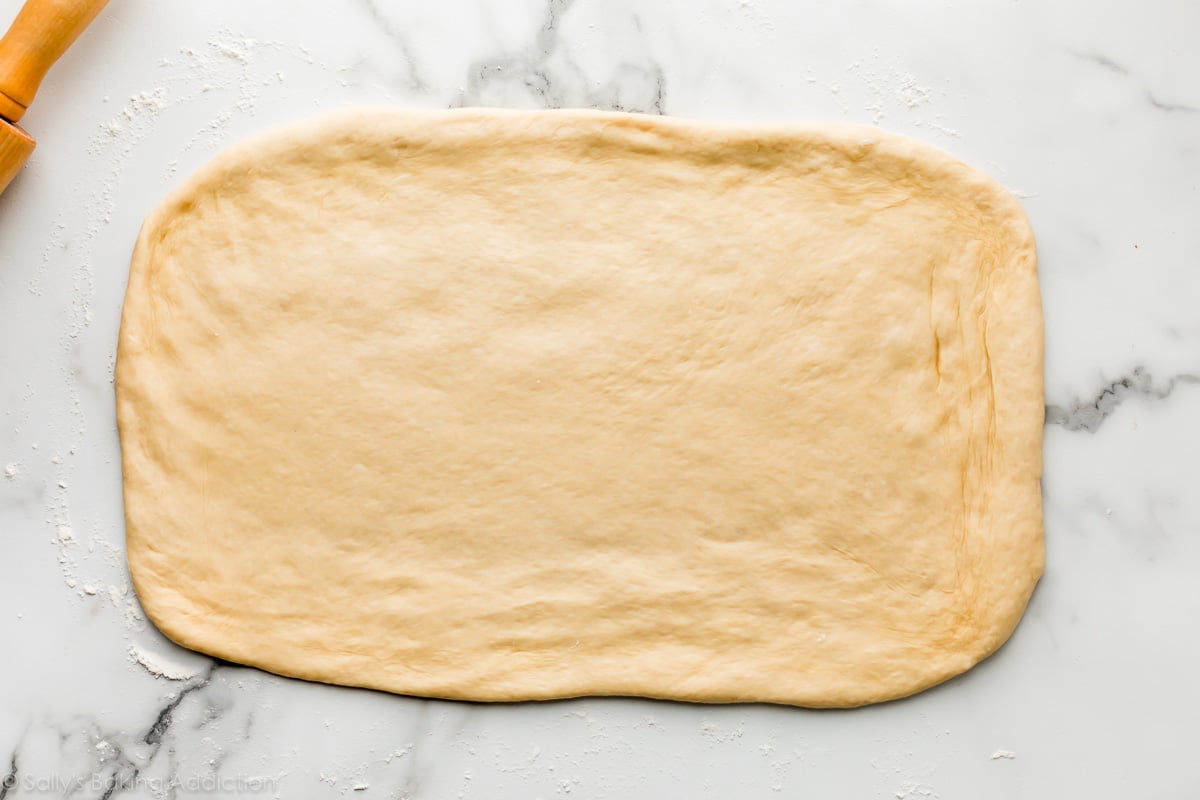
Punch the risen dough down and roll it out.
Baker’s Tip: If the dough keeps shrinking as you roll it out, stop what you’re doing, cover it lightly, and let it rest for 10 minutes to relax the gluten. When you return to the dough, it should stretch out much easier.
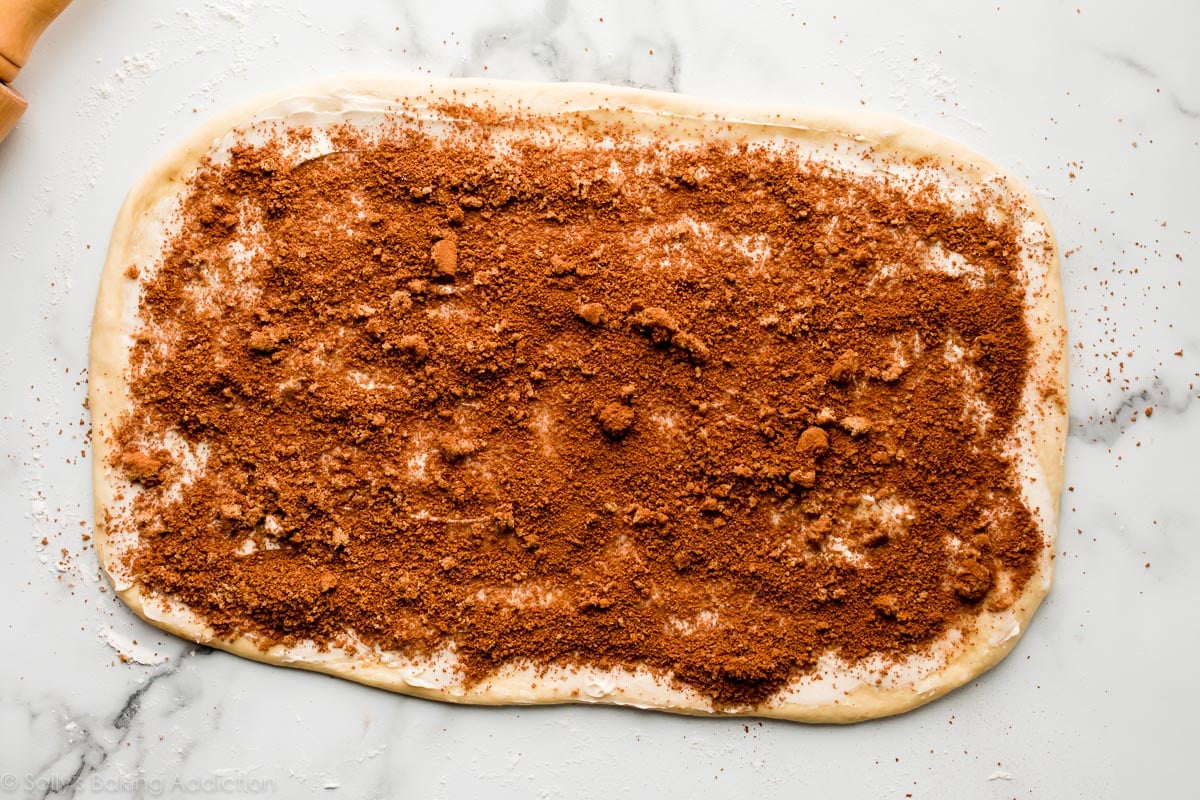
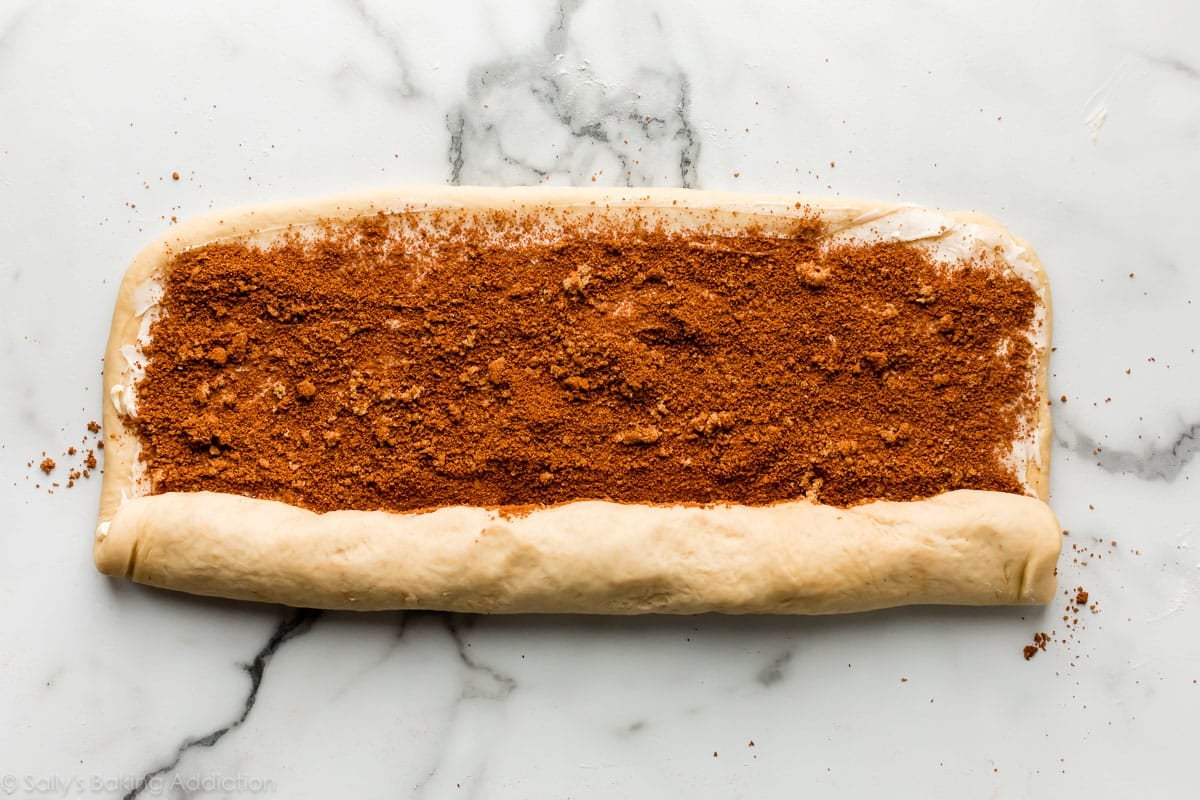
Spread softened butter on top, then sprinkle on a mixture of cinnamon and sugar (brown sugar or white granulated sugar).
Roll it up:
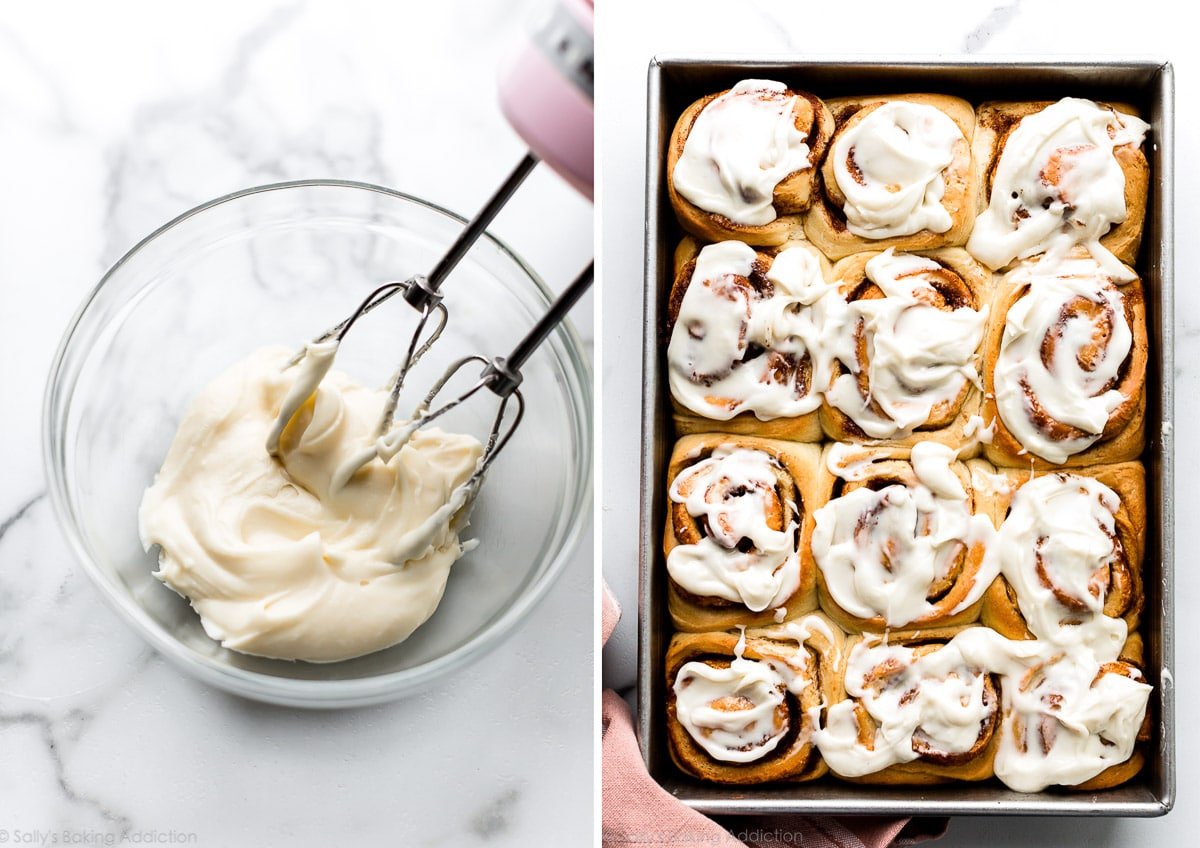
Use a very sharp knife to cut the roll into 12 rolls, each about 1.5 inches. Arrange in your greased baking pan, cover, then let the rolls rise until doubled in size and puffy, usually about 1 hour. The left photo is before rising and the right photo is after rising:

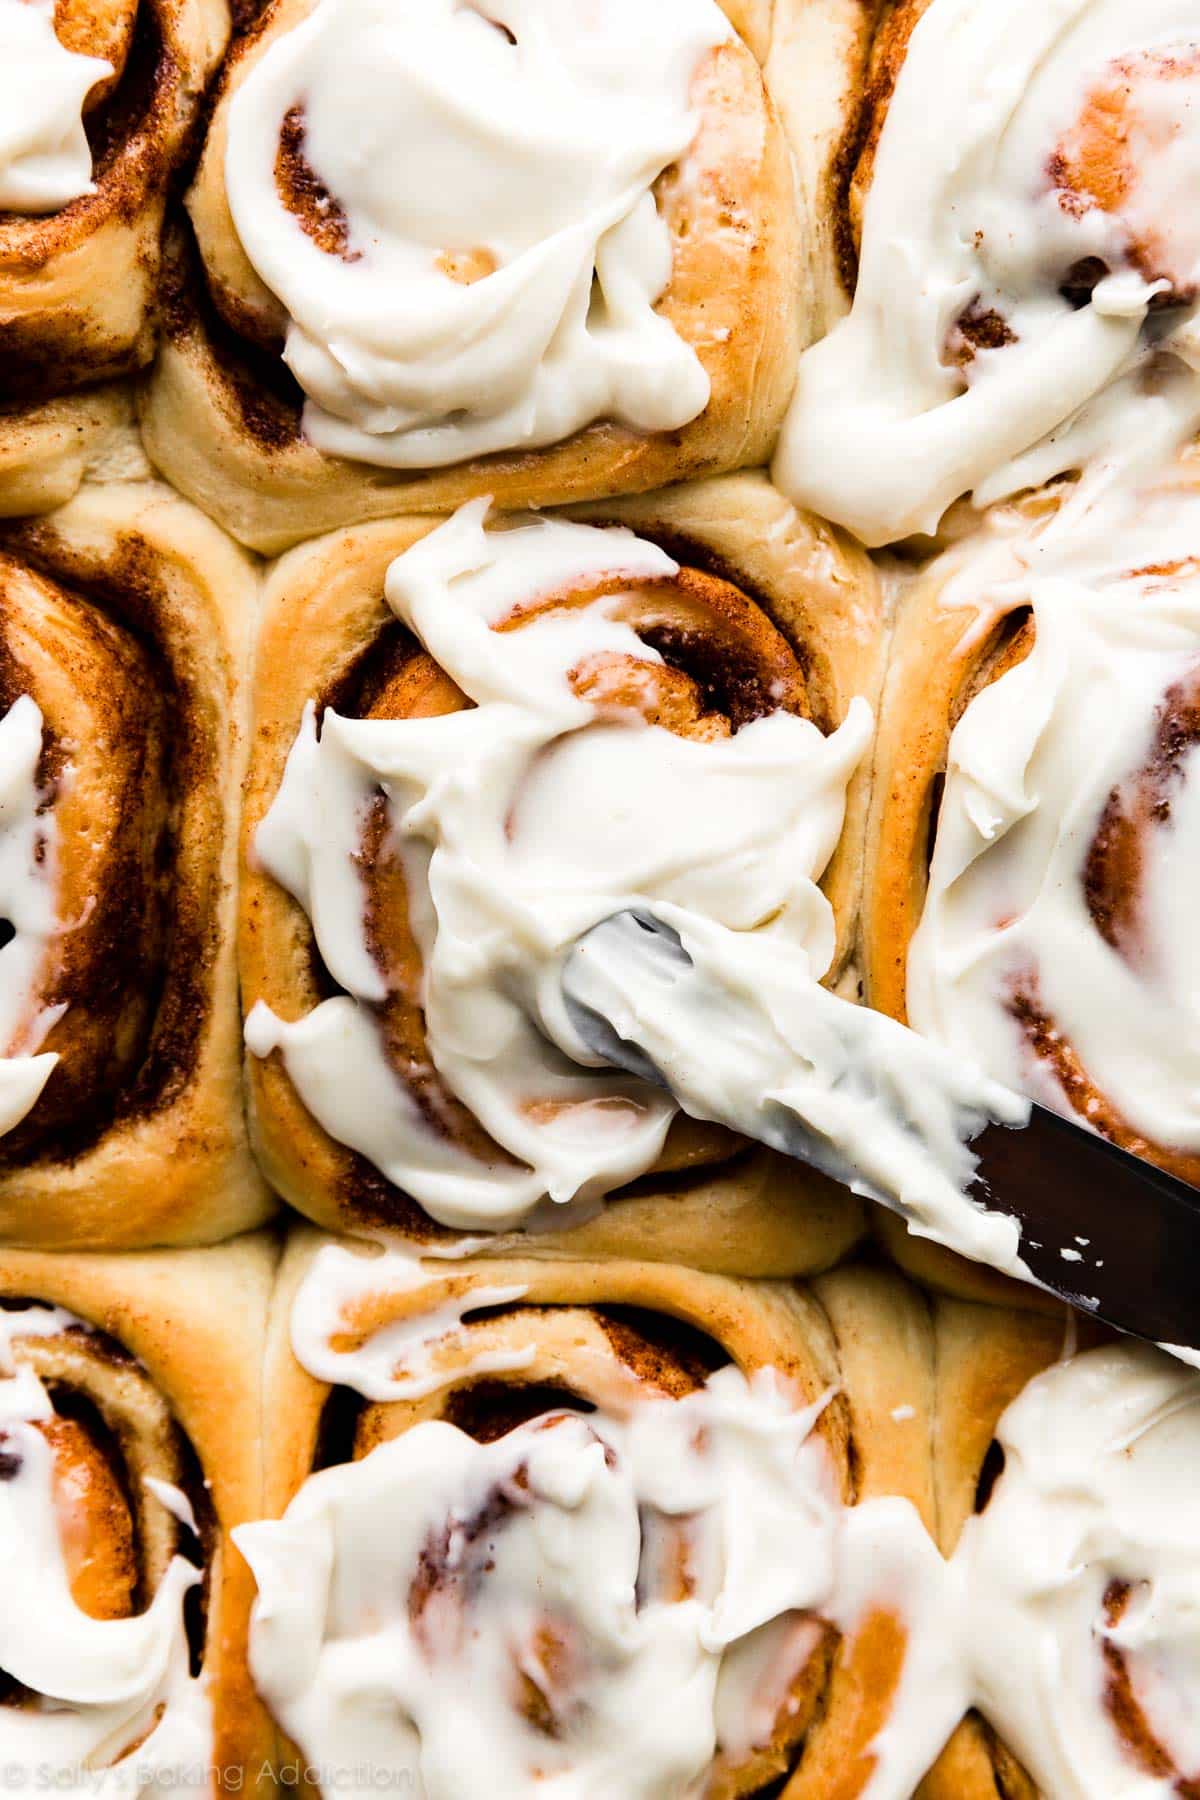
Bake the rolls and then make the tangy cream cheese icing to smother on top. If cream cheese isn’t your favorite, you could top the rolls with vanilla icing, the brown sugar icing from these pumpkin donuts, maple icing from maple cinnamon rolls, or even the caramel icing from apple cinnamon rolls. Lots of options!
5 Success Tips
- Use brown sugar or granulated sugar in the filling: I used to use granulated sugar in the cinnamon sugar filling, but recently switched to brown sugar for extra flavor. Brown sugar doesn’t necessarily make the filling more moist—there’s so much butter, so it’s moist and gooey either way. Use whichever sugar you prefer.
- Best pan to use: I recommend a 9×13-inch glass pan or metal pan. Avoid ceramic pans. If you must use ceramic, keep in mind that the rolls will likely take longer to bake through.
- Evenly baked cinnamon rolls: These are extra big and fluffy cinnamon rolls, so to help guarantee the centers AND tops cook evenly, tent a piece of aluminum foil over the rolls after about 15 minutes in the oven. This will protect the tops from browning too quickly before the centers can cook.
- Don’t have all morning to spend on this dough? Feel free to prep the dough the night before. This is a wonderful way to save time in the morning so you can wake up and eat sooner. See my make-ahead/overnight instructions in the written recipe below.
How to Freeze Homemade Cinnamon Rolls So They Still Taste Fresh
Let me share a tip I’ve learned after working with this dough for several years. You can prep the rolls and freeze them ahead of time so they still taste fresh.
- Here’s how: Bake the rolls in step 9 for only about 10 minutes. Cool completely, then cover and freeze. To serve, take the rolls out of the freezer and place in the refrigerator overnight to thaw. Once thawed, finish baking them for about 15-20 minutes.
I often use this method when I gift cinnamon rolls to others—just copy/paste or write these freezing instructions down. This method is also helpful if you have company over, want to cut down on time, or are entertaining. I like to make these cinnamon rolls ahead when I’m hosting holidays like Easter. See more Easter brunch recipes, like savory quiche and frittata, to complete your menu.
Print
Homemade Overnight Cinnamon Rolls
- Prep Time: 3 hours, 30 minutes (includes rises)
- Cook Time: 25 minutes
- Total Time: 4 hours (or overnight)
- Yield: 12 rolls
- Category: Breakfast
- Method: Baking
- Cuisine: American
Description
This recipe yields a pan of buttery soft, gooey cinnamon sweet, and extra fluffy homemade cinnamon rolls topped with tangy cream cheese icing. You can make the cinnamon rolls within a few hours or get started the night before using the overnight preparation option.
Ingredients
Dough
- 1 cup (240ml) whole milk, warmed to about 100°F (38°C)
- 2/3 cup (135g) granulated sugar, divided
- 1 and 1/2 Tablespoons (14g) active dry or instant yeast (2 standard size packets)*
- 1/2 cup (8 Tbsp; 113g) unsalted butter, softened to room temperature and cut into 4 pieces
- 2 large eggs, at room temperature
- 1/2 teaspoon salt
- 4 and 1/2 cups (563g) all-purpose flour or bread flour (spooned & leveled), plus more as needed
- 2 teaspoons canola, vegetable, or olive oil for bowl (or use nonstick spray)
Filling
- 1/2 cup (8 Tbsp; 113g) unsalted butter, softened to room temperature
- 2/3 cup (135g) packed light or dark brown sugar
- 1 and 1/2 Tablespoons ground cinnamon
Cream Cheese Icing
- 4 ounces (113g) full-fat brick cream cheese, softened to room temperature
- 1 cup (120g) confectioners’ sugar
- 1 Tablespoon (15ml) heavy cream or milk
- 1/2 teaspoon pure vanilla extract
Instructions
- Prepare the dough: Whisk the warm milk, 2 Tablespoons sugar, and the yeast together in the bowl of your stand mixer fitted with a dough hook or paddle attachment. Cover and allow mixture to sit for about 5 minutes or until foamy on top. *If you do not own a mixer, you can do this in a large mixing bowl and in the next step, mix the dough together with a large wooden spoon/silicone spatula. It will take a bit of arm muscle. A hand mixer works, but the sticky dough repeatedly gets stuck in the beaters. Mixing by hand with a wooden spoon or silicone spatula is a better choice.*
- On medium speed, beat in the remaining sugar (which should be 1/2 cup/100g) and the softened butter until it is slightly broken up. Add the eggs and salt and beat on medium speed until combined. The butter won’t really be mixing into the mixture, so don’t be alarmed if it stays in pieces. Switch the mixer down to low speed and with it running, add 1 cup of flour at a time, making sure it’s fully incorporated before adding the next. Stop the mixer and scrape down the sides of the bowl as needed. After 4 cups have been added, add the last 1/2 cup and beat until the dough comes together and pulls away from the sides of the bowl, about 3 minutes. Dough will be soft.
- Knead the dough: Keep the dough in the mixer (and switch to the dough hook if you used the paddle) and beat for an additional 5 full minutes, or knead by hand on a lightly floured surface for 5 full minutes. (If you’re new to bread-baking, my How to Knead Dough video tutorial can help here.) If the dough becomes too sticky during the kneading process, sprinkle 1 teaspoon of flour at a time on the dough or on the work surface/in the bowl to make a soft, slightly tacky dough. Do not add more flour than you need because you do not want a dry dough. After kneading, the dough should still feel a little soft. Poke it with your finger—if it slowly bounces back, your dough is ready to rise. You can also do a “windowpane test” to see if your dough has been kneaded long enough: tear off a small (roughly golfball-size) piece of dough and gently stretch it out until it’s thin enough for light to pass through it. Hold it up to a window or light. Does light pass through the stretched dough without the dough tearing first? If so, your dough has been kneaded long enough and is ready to rise. If not, keep kneading until it passes the windowpane test.
- 1st Rise: Lightly grease a large bowl with oil or use nonstick spray. Place the dough in the bowl, turning it to coat all sides in the oil. Cover the bowl with aluminum foil, plastic wrap, or a clean kitchen towel. Allow the dough to rise in a relatively warm environment for 2 hours or until double in size. (I always let it rise on the counter and it takes about 2 hours. For a tiny reduction in rise time, see my answer to Where Should Dough Rise? in my Baking with Yeast Guide.)
- Grease the bottom and sides of a metal or glass 9×13-inch baking dish (glass or metal) or line with parchment paper.
- Roll out the dough: Punch down the dough to release the air. Place dough on a lightly floured work surface and using a lightly floured rolling pin, roll dough into a 12×18-inch rectangle. Make sure the dough is smooth and evenly thick. If the dough keeps shrinking as you roll it out, stop what you’re doing, cover it lightly, and let it rest for 10 minutes to relax the gluten. When you return to the dough, it should stretch out much easier.
- For the filling: Spread the softened butter all over the dough. The softer the butter is, the easier it is to spread in this step. (Microwave it for a few seconds to soften if needed.) In a small bowl, mix the sugar and cinnamon together. Sprinkle evenly over the butter. Tightly roll up the dough to form an 18-inch-long log. If some filling spills out, sprinkle it on top of the roll. With an extra sharp knife, cut into 12 even rolls, about 1.5 inches each. Arrange in the prepared baking pan.
- 2nd Rise: Cover the rolls tightly and allow to rise until puffy, about 1 hour. (Or use the overnight option in the Notes below.)
- Preheat the oven to 350°F (177°C).
- Bake for about 25–28 minutes or until they are lightly browned on top. After about 15 minutes, tent a piece of aluminum foil over the top of the pan to prevent the tops from browning too quickly. Remove pan from the oven and place pan on a wire rack for about 10 minutes as you make the icing.
- Make the icing: In a medium bowl using a handheld or stand mixer fitted with a paddle or whisk attachment, beat the cream cheese on medium speed until smooth and creamy. Add the confectioners’ sugar, cream/milk, and vanilla. Beat on low speed for 30 seconds, then switch to high speed and beat for 1 minute. Spread the icing over the warm rolls and serve immediately.
- Cover leftover frosted or unfrosted rolls tightly and store at room temperature for up to 2 days or in the refrigerator for up to 5 days.
Notes
- Make Ahead Instructions – Overnight: To prepare the night before serving, prepare the rolls through step 7. Cover the rolls tightly and refrigerate for 8–12 hours. (16 hours max. 8–12 hours is best, but 16 hours is OK if absolutely needed. Do not exceed 16 hours.) The next morning, remove from the refrigerator and allow to rise on the counter for 1–2 hours before continuing with step 9.
- Make Ahead Instructions – Freezing: Baked rolls can be frozen for up to 3 months. Thaw overnight in the refrigerator and warm up before enjoying. You can also freeze the unbaked rolls and here’s how: bake the rolls in step 9 for only about 10 minutes. Cool completely, then cover tightly and freeze. To serve, take the rolls out of the freezer and place in the refrigerator overnight to thaw. Once thawed, finish baking them for about 15–20 minutes.
- Special Tools (affiliate links): Stand Mixer or Large Glass Mixing Bowl with Silicone Spatula or Wooden Spoon | Rolling Pin | 9×13-inch Glass Baking Pan or Metal Baking Pan | Cooling Rack
- Milk: I recommend using whole milk for the best, richest-tasting dough. You could also use buttermilk. Reduced-fat, low-fat, or nondairy milk works in a pinch. Do not use nonfat milk.
- Yeast: You can use active dry or instant yeast in this recipe. Follow all of the same instructions. If using active dry yeast, the rise times are usually slightly longer. Reference my Baking with Yeast Guide for answers to common yeast FAQs.
- Other Icing Options: Instead of cream cheese icing, you can top the warm rolls with vanilla icing, the brown sugar icing from these pumpkin donuts, maple icing from maple cinnamon rolls, or even the caramel icing from apple cinnamon rolls.
- Gluten Free: We have not tested this recipe with gluten-free flour, so we are unsure of the results.
Keywords: overnight cinnamon rolls, homemade cinnamon rolls


I’ve made this twice and it’s phenomenal, though I’ve never did the icing but chose a caramel-cinnamon-maple sauce of sorts. I have a question – I wish to use this dough and make a garlic -herb butter to spread as a filling, roll up, twist, slice, and bake. Do you believe this dough would be suitable to do this? My family prefers slightly sweet and super soft, fluffy rolls, and they adore the dough for these cinnamon rolls.
★★★★★
Hi Pam, you could certainly give that a try! Please do let us know if you try it. Or, here are all of our yeasted bread recipes, including many savory options.
Once again, Sally, for the win, absolutely amazing!! I choose to do the overnight option and the directions were spot on. Only thing I’m gonna change next time is I’m gonna double the filling. Looking for more oughey-gooey ❤️
I’m not an experienced baker, so my expectations were non-existent, however this dough and recipe exceeded my wildest dreams!! Chewy, moist…better than anything I’ve ever bought in both a bakery or shop!! I didn’t use the tin foil so they took a little longer to bake, but absolutely no over-browning. I’ll be using this recipe again tomorrow…thank you!!
★★★★★
The cinnamon rolls were so fluffy and delicious!!! They are the best!!!
★★★★★
I am an avid baker, this dough recipe didn’t work. The dough never came together to even pass the windowpane test. Very sticky. Went again my knowledge and added more flour, it was still sticky. I think the heat of the mixer caused some of the stickiness. Disappointed already and still haven’t baked them.
★
The cook time in the recipe is ambiguous. Should they bake for 28 minutes and then tent with foil for 15 or after 15 minutes tent with foil and continue to bake for another 13 minutes.
Glad to help. The total time is 25 to 28 minutes. If the tops are browning quickly after 15 minutes, tent them.
This is a great recipe. Easy and the end result is very tasty. I will definitely make these again with a few changes. Was not a fan of the icing. Way too sweet and way too much. I am thinking next time I might just dust with some cinnamon icing sugar or make some sort of a crumble. I also didn’t roll the out the dough very evenly…this was my fault, not the recipe. Will pay more attention next time.
★★★★
I made these rolls on sat and baked on Sunday…little disappointed because there were dry…followed the recipe …in fact dough did rise almost out of bowl. Easy to make good just a bit dry
Hi Jane, we’re happy to help troubleshoot. How did you measure your flour? Be sure to spoon and level (or use a kitchen scale) to ensure the flour isn’t overmeasured, which can cause the rolls to dry out. It sounds like your dough may have been over-proofed too, which can cause the final rolls to taste a bit dry/dense. Both easy fixes should you wish to try this recipe again!
I have seen where people recommend pouring warm heavy cream over the rolls just before baking…what do you think of that? Have you tried that?
This is the best recipe I have tried. Well, anything from Sally is the absolute best!
I do have a question: What happens if this is refrigerated for more than 16 hours?
Hi Flora, we’re so glad to hear that! We don’t recommend waiting longer than 16 hours if following the overnight option in the refrigerator. Too much additional time will cause the rolls to over proof and once baked, they will collapse in the oven. They’ll likely be quite dense, too.
Great recipe for fluffy rolls! I added dried chopped apricots and cranberries to my filling. Added orange zest to the frosting. Delicious!
★★★★★
I cannot wait to make these for my son’s birthday! Question: would it be ok to do half all-purpose and half bread flour? Or would it be better to do all bread flour since that’s what I have more of? (Knowing they will be chewier)
Thank you !
Hi Katy, you can use half of each flour. I do find using all bread flour makes for an extra chewy and fluffy roll, but you’ll still get a nice lofty roll with lots of chew using half of each flour.
I definitely loved the texture of these and the frosting was great but noooot enough cinnamon at all. I will definitely be doing extra next time!
Perfection!! Fluffy, melt in your mouth goodness.
★★★★★
Wonderful recipe. Turned out perfect. Pulled it from the oven when internal temperature was 190F. I did slip 1 ml of maple flavoring into the icing to give it a maplish twist to the flavor. Definitely expect to make this again in the future. It is much easier and simpler to make than the Cinnamon Leaf Ring from Farmer’s Journal that I make at Christmas and New Year’s.
★★★★★
I loved this recipe! It seems more complicated than it is but if you’re going to be home for a while anyway it’s really not. I appreciate that they can be made the day before (to serve in the morning) but I did make them in the afternoon and eat them for dessert and they were divine. I’m pregnant and was really craving them and they hit the spot!
I have one question: I only had a 9×9 metal pan, so I made 9 huge rolls which were amazing. I added about 9 minutes to the bake time (although unfortunately I opened the oven and checked on them probably too many times during this added time) and they were a little dry and bready on the outside by the time the center most roll was juuuuust baked through in the center.
Is there a different time and temperature that could be recommended for using a 9×9 pan?
TIA!
Hi Kaitlyn, we’re so glad you enjoyed the cinnamon rolls! For next time, you can tent the pan with aluminum foil towards the end of bake time. This will allow the middles to continue baking, while preventing the outside rolls from drying out. Thank you again for giving these a try!
I’ve made this recipe four times and they get rave reviews!!! I wonder if I could do them in cupcake tins instead of one big pan…
★★★★★
Love loooove this recipe. I made these rolls for my mother’s birthday brunch and it was a huge success, everyone enjoyed and they turned out bakery-beautiful. I have a question though : I made half a batch so I divided every quantity by 2 of course. But when kneading (in a stand-mixer) the dough was very very sticky and I had to gradually add around 60~80 grams of flour for the dough to form but still be soft. I used an all-purpose flour Type 45 (I’m in France, I think the equivalent would be Type 00). Do you think I should use some “coarser” flour ?
Thank you for all those great detailed recipes !
★★★★★
Hi Marie, we’re so glad you enjoyed the cinnamon rolls! There are a lot of factors that go into the consistency of yeasted doughs, even down to the humidity and weather. So it’s no problem if you need to add just a bit more flour to help bring the dough to a kneadable consistency. A flour with a slightly higher protein content should help, too. Hope this helps for your next batch!
Can’t miss using this recipe. Great outcome. My only change was to soften the butter up a bit for the filling and mix it up with the brown sugar and cinnamon ahead of time. Spreads great and fewer problems with spills out the ends were found.
Another home run for you, Ms. Sally.
Ciao.
★★★★★
Love this recipe, followed it exactly and it turned out amazing. Did you try freezing the raw cinnamon rolls and take them out the freezer and put them in the fridge the night before baking?
★★★★★
I have tried and loved many of your recipes! I only have whole wheat flour (I use it for everything) and I am planning to make these this afternoon. Am I able to do this without any changes?
Hi Sabrina, using whole wheat flour will dry out the texture of these rolls and we don’t recommend swapping all the flour. You could try replacing half to begin with to see how it goes. Let us know if you give it a try!
I love this recipe because It is so specific! Sally thought of everything one needed to know when baking these rolls! Love Sallysbakingaddiction, everything always comes out tasty and perfect!
I’m just about to start this recipe, I need to make 3 dozen for a breakfast tomorrow. Can I possibly double or triple the recipe in my giant stand mixer? Or should I stick with 3 individual batches? Thank you!!
Hi Tiffany, we recommend making a batch at a time, because the amount of dough can quickly overwhelm most mixers. If your mixer is especially large, you can try doubling it, but I can’t tell you for sure whether or not it will work! Hope the rolls turn out great for you.
Everyone raves about this product and recipe. I found the recipe problematic but that may be more due to my own lack of baking skills than any shortcoming with Ms. Sally’s recipe (let’s call a spade a spade). I’ve made this recipe twice now. First batch was with bread flour and this second batch was with AP flour. The AP flour batch was more problematic, but again – I cannot say exactly why.
This one takes everyone to Flavortowne on the express bus. I served them to my girl’s office workers this morning and told them to please be honest with their critiques. Everyone said great things about the flavors and texture (and wanted more). So setting aside my nitpicking stuff regarding execution, the public has voted – Sally has another winner, here!
Thank you, ma’am.
★★★★
Hoping to make these this weekend. Quick question – Is there an internal temperature the rolls should be when they are done baking to ensure they’re properly cooked through? TIA!
Hi Audrey! The temperature of the inside of the rolls should be 190–200°F (88–93°C). If it’s in that range, they’re done!
My last few rostered days off work have been consumed with baking since I found sallysbakingaddiction.com. Reason being is that for once in my life all of these recipes are working for me first time thanks to the excellent recipes and easy to follow guides as well as a lot of the reasoning behind the ingredients. I’m actually learning about baking and not just baking blind!
Needless to say these came out great even with me, an amateur, changing a few things. So in Australia a popular cousin of this cinnamon roll is the coffee scroll. There are recipes specifically for these but with all the great ratings and my own experience, I didn’t want to risk using anything other than Sally’s expertise. So with the addition of 100g of sultanas added to the dough during step 6, a teaspoon of instant coffee dissolved in as little water as possible and 30g of butter added to the icing this recipe successfully produced the best coffee scroll I have ever eaten! ….And I mean better than any bakery I have ever purchased a coffee scroll from, no exaggeration. Opps, not to forget I also glazed the tops of the rolls 5 minutes after coming out of the oven with a 50/50 water/sugar mix and sprinkled a few chopped walnuts to the icing while it was still soft.
Thanks again Sally! You have made baking enjoyable for me with all of these successful and delicious recipes. My friends and family are amazed but I always make sure you get the credit.
For those who are interested here is my nutrition breakdown for the 10 large, 1 1/2″ high (37-40mm) scrolls I managed from the recipe:
Calories – 612, Net carbs – 84.2 (fiber – 1.2g, starch – 0.2, sugar – 43,1g, added sugar – 26.7g, sugar alcohols – 6.8g), Fat total – 2.5g (monounsaturated – 0.5g, polyunsaturated – 0.3g, Omega-6 – 0.3g, saturated – 16.1g, cholesterol – 9.5mg), Protein – 4.6g, sodium – 654.9mg.
★★★★★
Sorry everyone. It seems I’ve confused my version of this recipe with the one Sally has here (as well as some typos too!) when I listed the nutritional information. So let’s try again:
Calories – 612, Net carbs – 88.3g (fiber – 1.2g, starch – 0.2, sugar – 47.21g, added sugar – 26.7g, sugar alcohols – 6.8g), Fat total – 24.6g (monounsaturated – 0.5g, polyunsaturated – 0.3g, Omega-6 – 0.3g, saturated – 15.4g, cholesterol – 14.1mg), Protein – 4.8g, sodium – 652.5mg.
Sorry for any confusion.
I’m going to try the recipe
Love the taste of these but for some reason the bread portion is ver cakey? My dough felt a little extra sticky when I mixed it. I did
Add more 2 tablespoons of flour
I’ve read some bakers asking about using a bread machine for recipes. Well let me tell you, these wonderful rolls do well, with only a few tweaks.
I compared the ingredient list from the recipe and the maker and they were basically the same except for the amounts. I decided to play safe and use the amounts for the machine.
Sally’s calls for milk the machine calls for powdered milk. I had some dry buttermilk so used it.
Used the ” multipurpose dough” recipe and the dough setting. Perfect!!
Used the filling and icing from Sally’s, except no cream cheese.
Already been told to make again.
If you are interested I posted pictures on Facebook.
Sally, it’s another winner. Thanks.
★★★★★
My family said these are the best cinnamon rolls they’ve ever had!
As usual, this recipe is so well done! Thorough and easy to follow. When I rolled out the dough, I was quite enamored by how pretty it was! Delightfully soft, velvety, and smooth!
I did add some cream like some other commenters mentioned 🙂
★★★★★