

Red velvet cake is much more than vanilla cake tinted red. This recipe produces the best red velvet cake with superior buttery, vanilla, and cocoa flavors, as well as a delicious tang from buttermilk. My trick is to whip the egg whites, which guarantees a smooth velvet crumb.
This is my forever favorite red velvet cake recipe. I published it on my blog a few years ago and decided it’s time for clearer recipe instructions and a video tutorial. Many of you love this recipe too, so let’s roll up our sleeves and rev up our mixers!
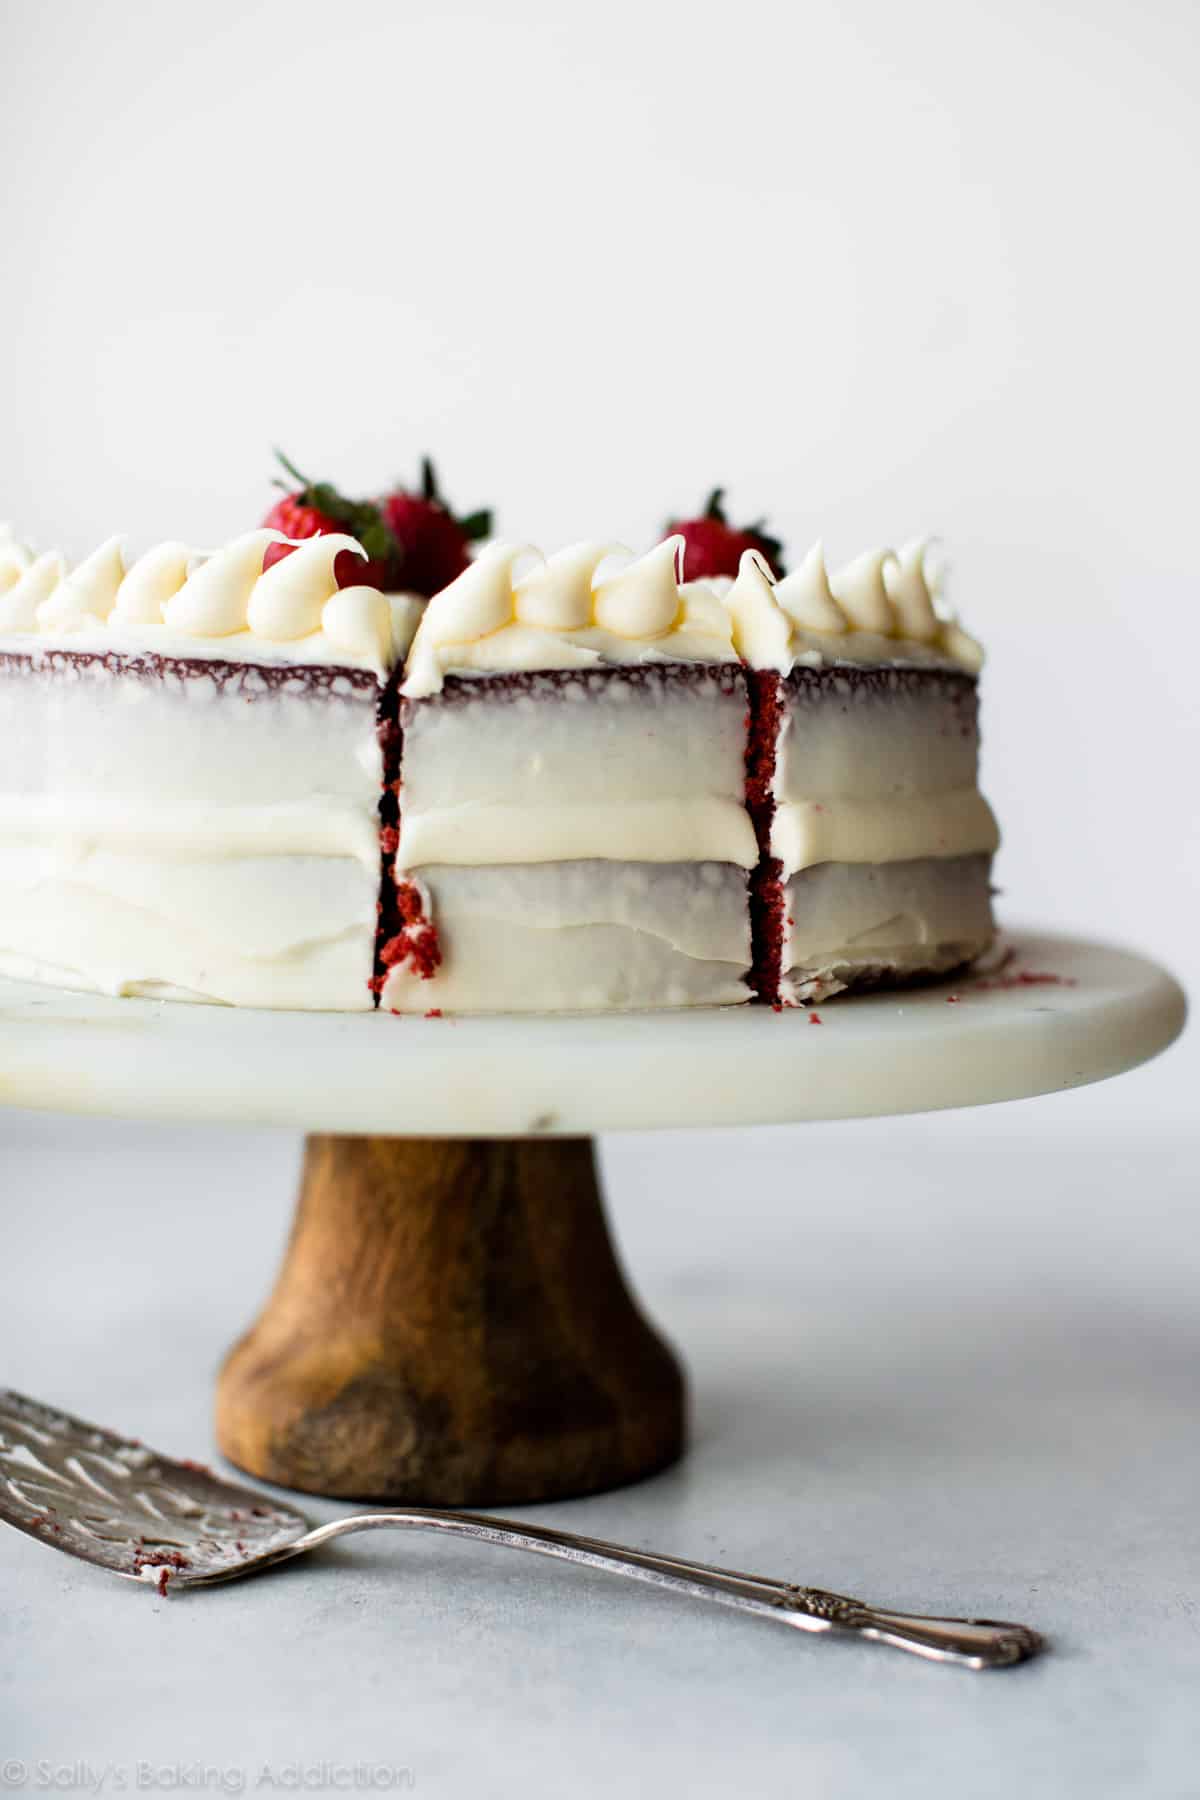
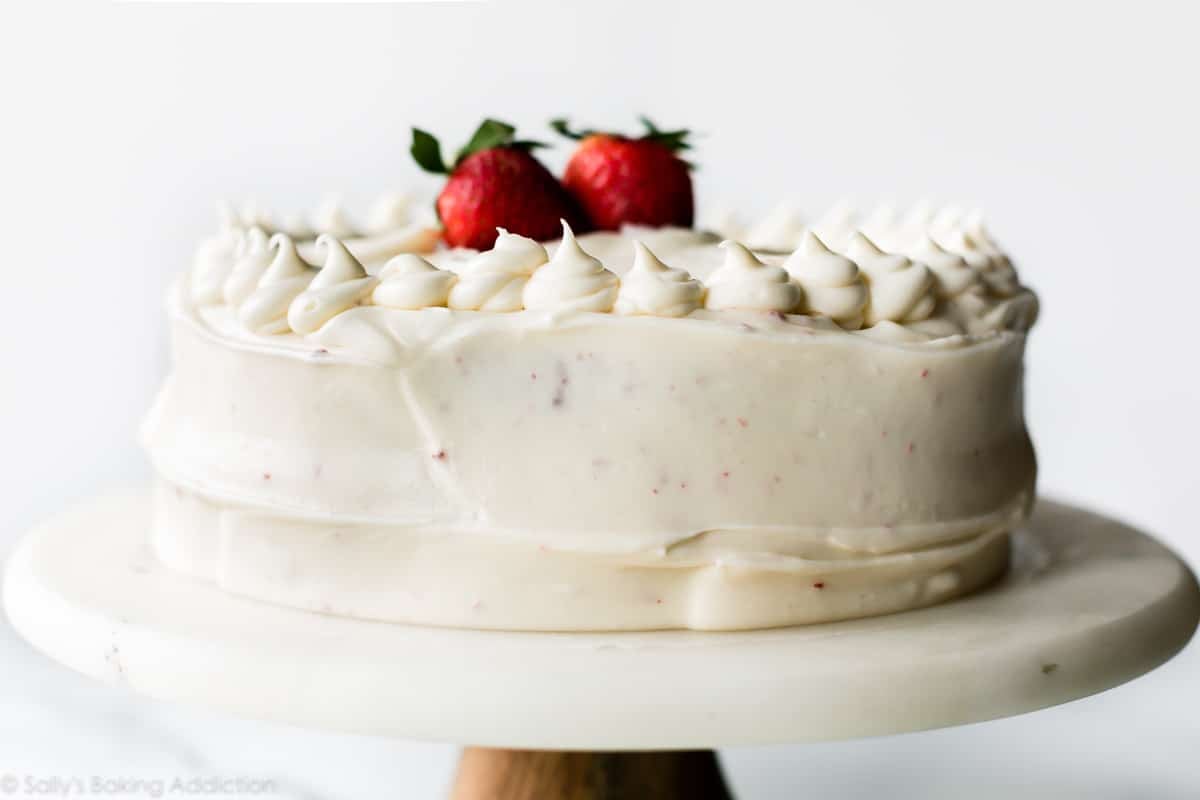
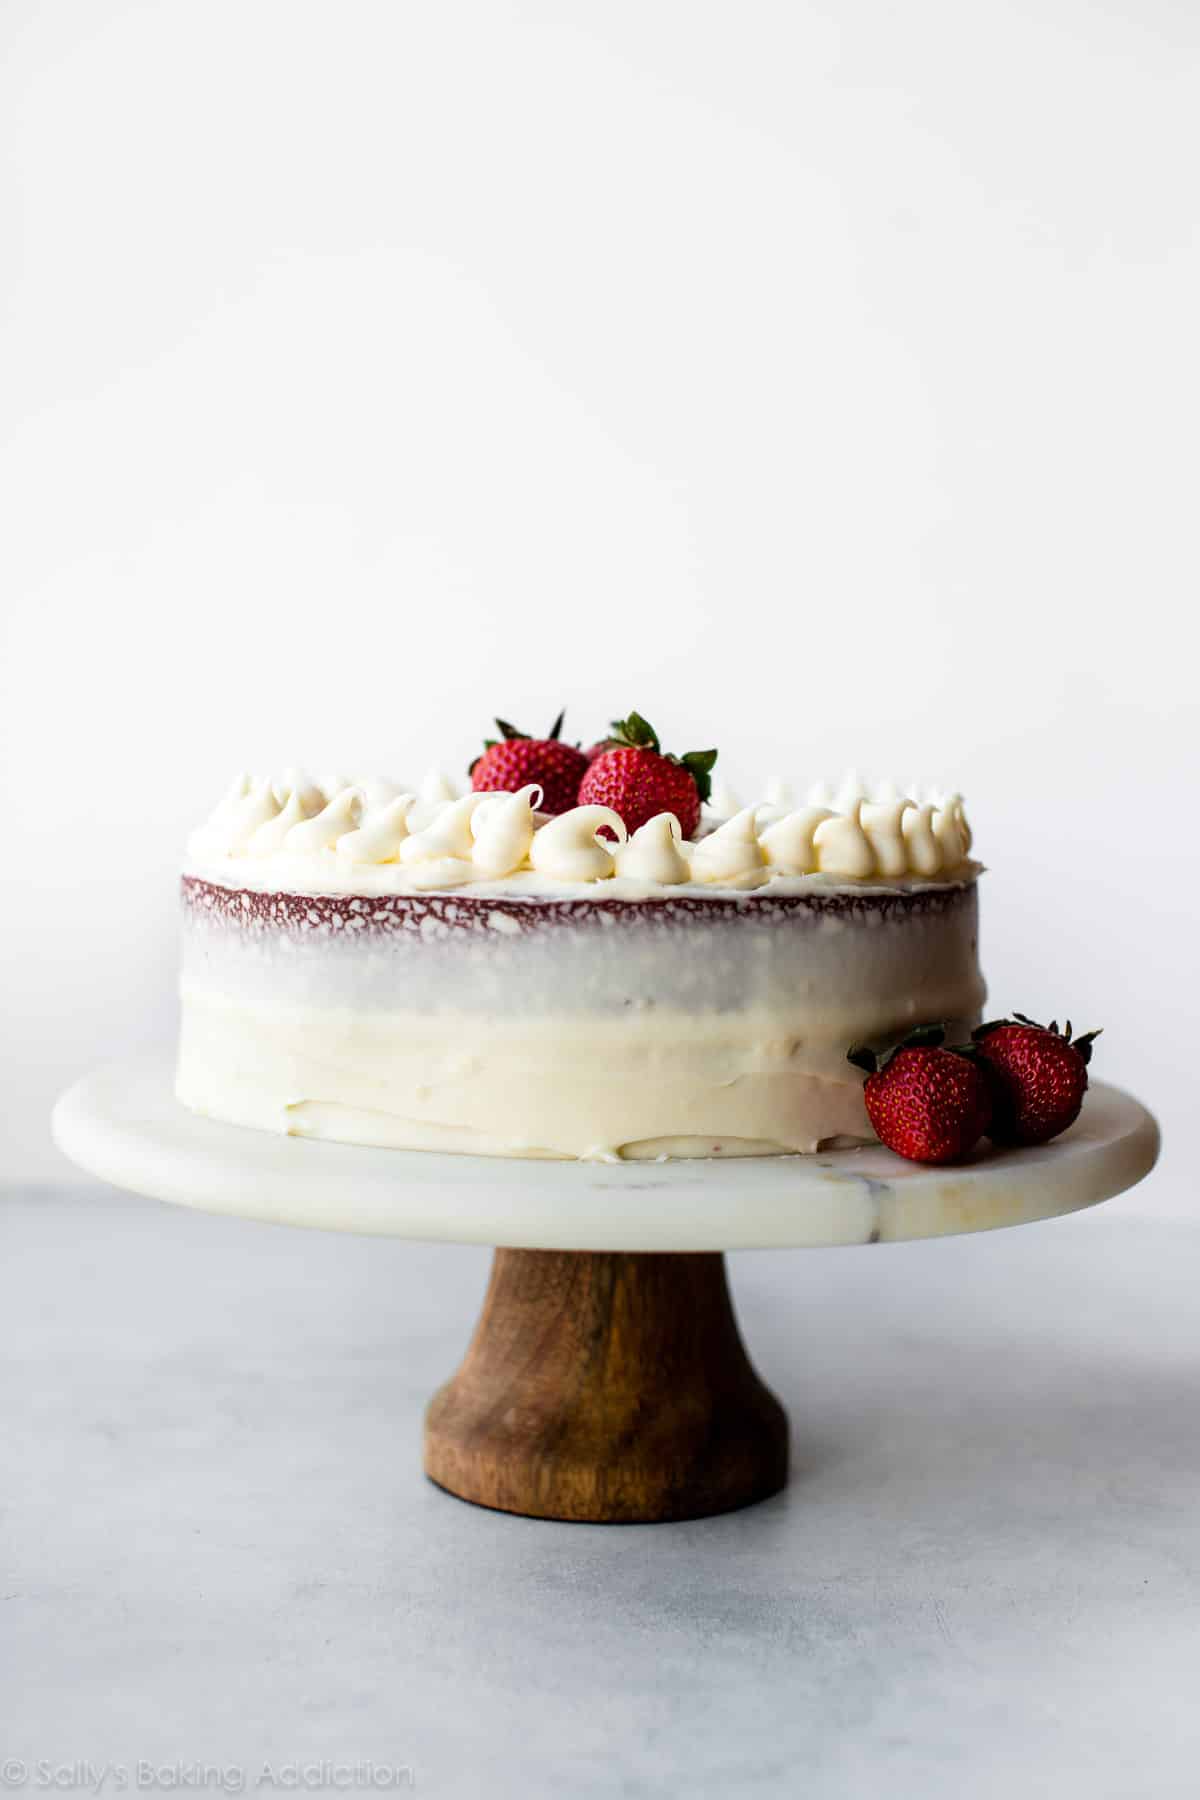
Red velvet cake is the queen of all layer cakes. The “I can’t quite put my finger on the flavor” cake. It’s the sweet marriage of buttermilk and vanilla with a little cocoa for good measure. She’s tall, dramatic, and completely covered in silky cream cheese frosting. This is my best red velvet cake.
What Does Red Velvet Cake Taste Like?
I used to be unsure about red velvet. I don’t really trust a cake that has a mystery flavor. What is red velvet? Is it more like vanilla cake, chocolate cake, or just a butter cake tinted red? From red velvet brownies and red velvet cookies and red velvet cupcakes, I’ve had a lot of fun getting to know red velvet. Red velvet is:
- Mild cocoa flavor
- Tangy buttermilk
- Sweet vanilla
- Very buttery
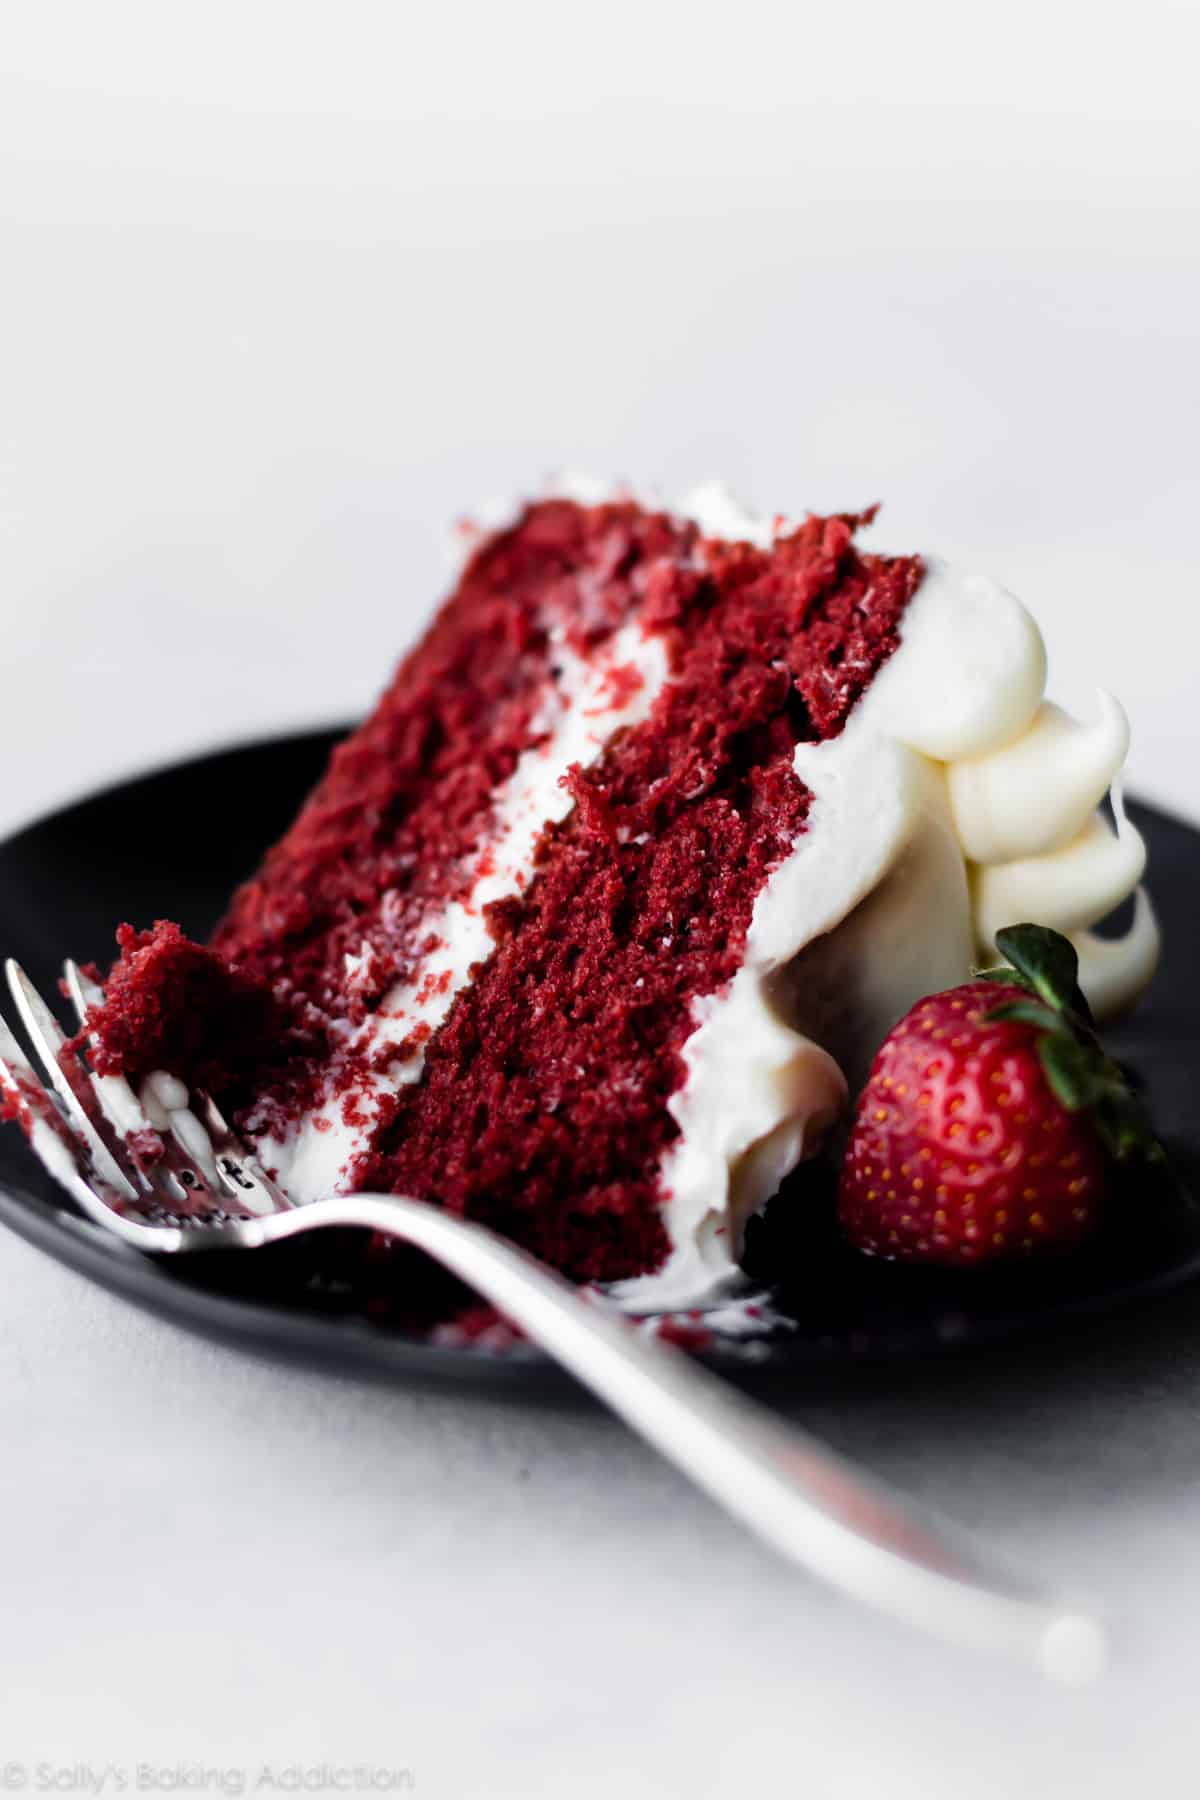
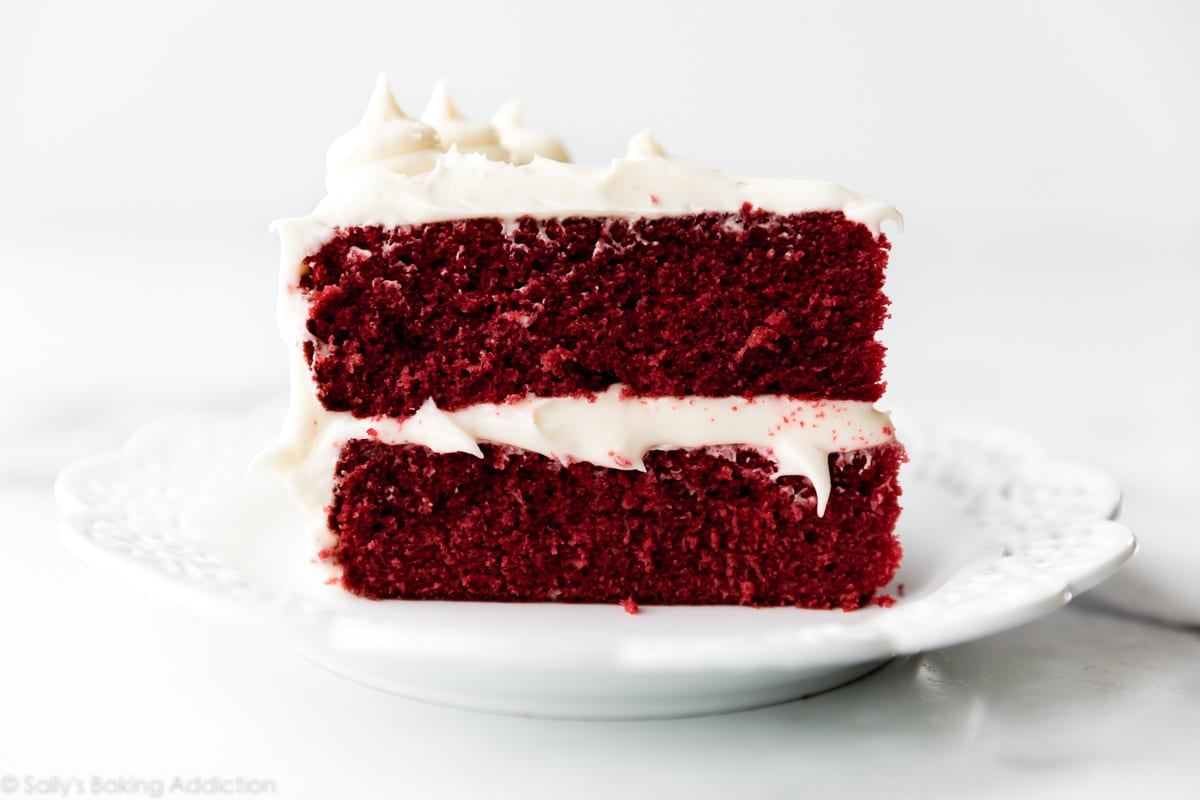
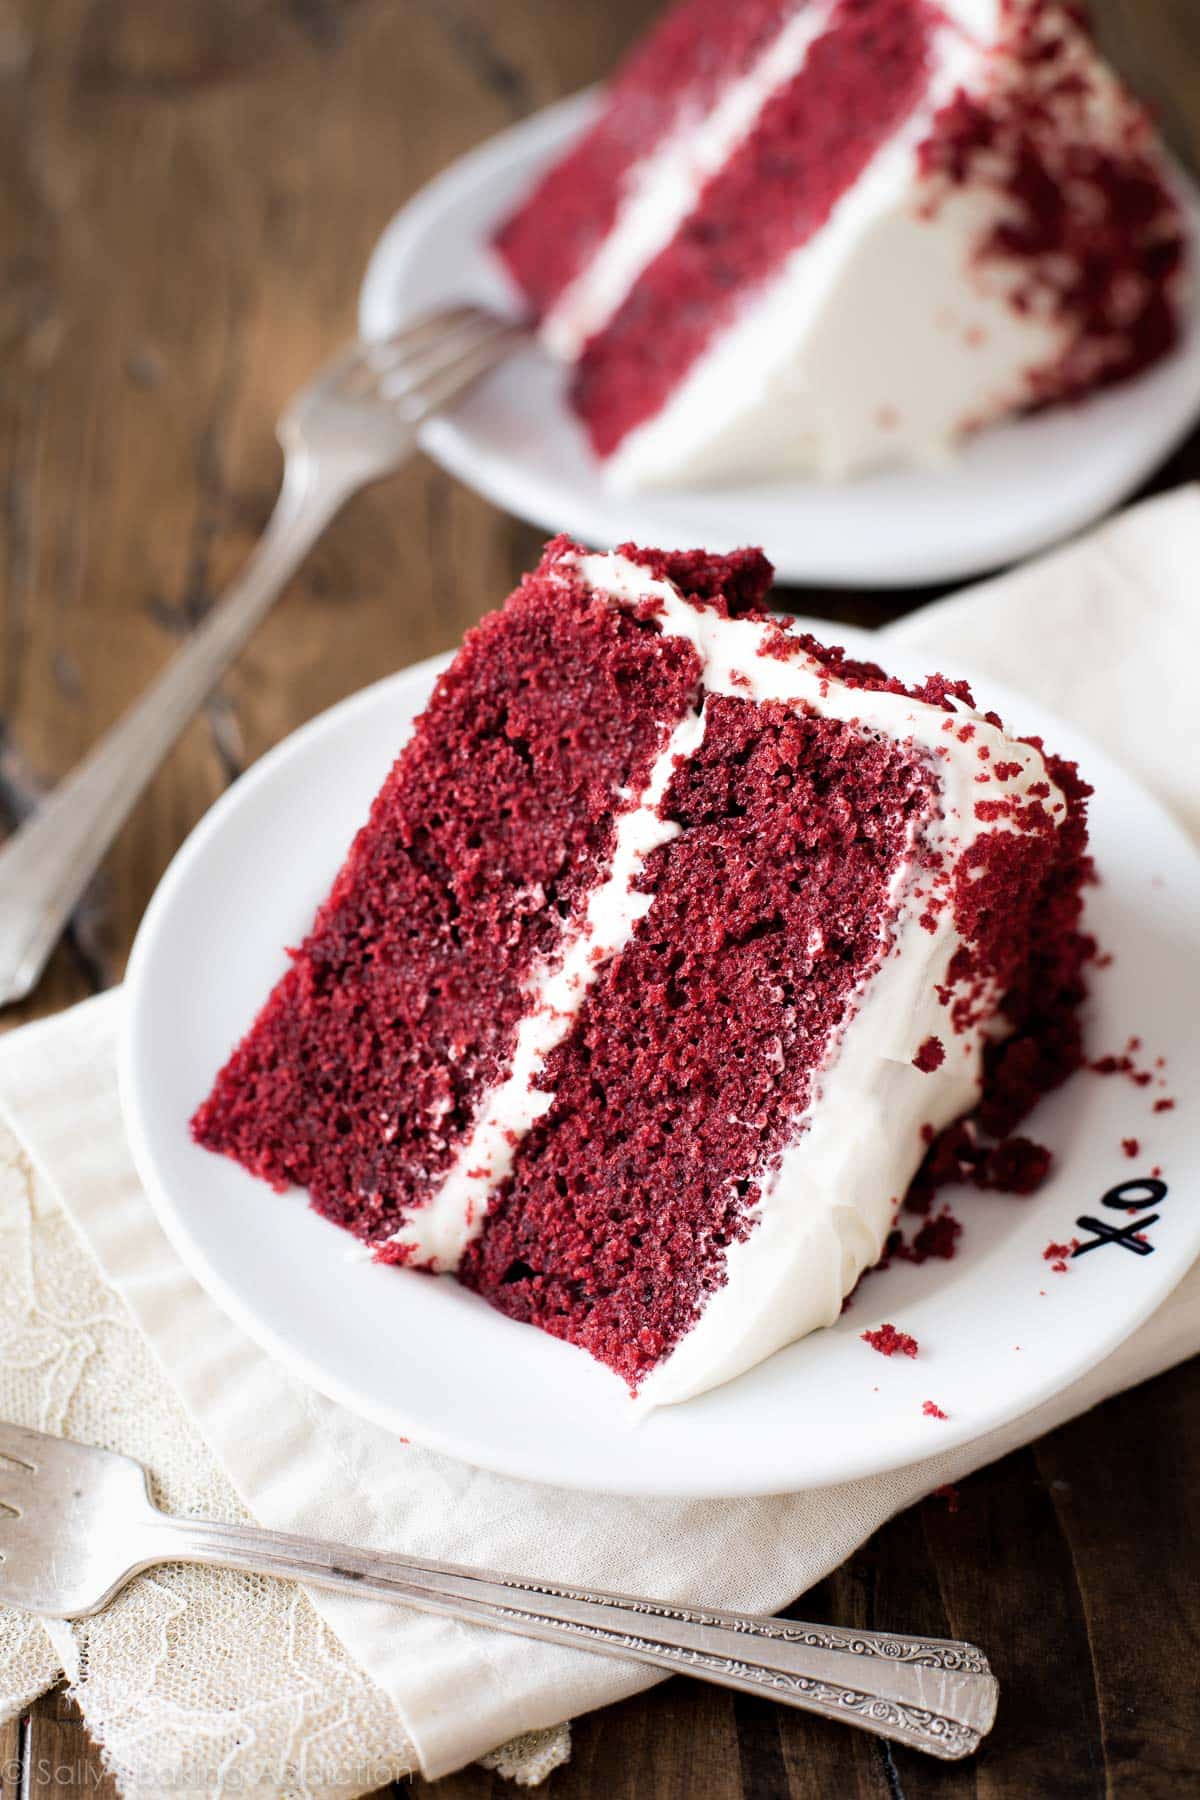
These 4 flavors are essential to the perfect red velvet layer cake. Not only is the flavor outstanding, red velvet cake’s texture is worth writing home about. It’s dense and soft with a moist and velvety crumb. However, the absolute best part about red velvet cake is the cream cheese frosting. Slathered on thick, my cream cheese frosting recipe is delicately sweet and undeniably creamy.
How to Make Red Velvet Cake
I use specific ingredients, certain amounts, and unique mixing techniques to produce my best red velvet cake recipe. Begin by whisking the dry ingredients together, then beat together the wet ingredients. We’ll combine the two, add buttermilk and tint the batter red. More on food coloring below.
- Cake Flour: I highly recommend cake flour. Cake flour is much lighter than all-purpose and the perfect base for a light, soft-crumbed cake texture. Like I mention above, red velvet’s texture is important to the authenticity of the flavor. You will thank me for the recommendation after you taste how incredibly soft this cake is. It’s the texture you find at professional bakeries.
- Unsweetened Cocoa Powder: 2 Tablespoons is plenty for a little cocoa flavor without overpowering the vanilla and butter flavors.
- Butter & Oil: What sets red velvet cake apart from chocolate is its buttery flavor. With only butter, we risk a dry cake. With only oil, we lose the butter flavor and softness that comes with creaming butter & sugar together. So all that’s to say, use both butter and oil. Moist texture, soft and cakey texture, buttery flavor.
- Buttermilk: Buttermilk is tangy, creamy, and makes baked goods extremely moist. You can’t make delicious red velvet cake without it! Additionally, buttermilk helps activate the baking soda to leaven the cake. If you’re interested, I have plenty more on this topic in my Baking with Buttermilk post (including a DIY buttermilk substitute recipe). It’s also a key ingredient in these black velvet cupcakes!
What About the Food Coloring?
Red velvet cake wouldn’t be red without food coloring. I recommend gel food coloring because the color is concentrated, so you need less of it. For natural coloring, use beet powder. If you don’t want to use food coloring, leave it out! The cake will have the same flavor and be a lovely shade of cocoa.
My #1 Trick
I add one simple step to this red velvet cake recipe and it guarantees the BEST texture.
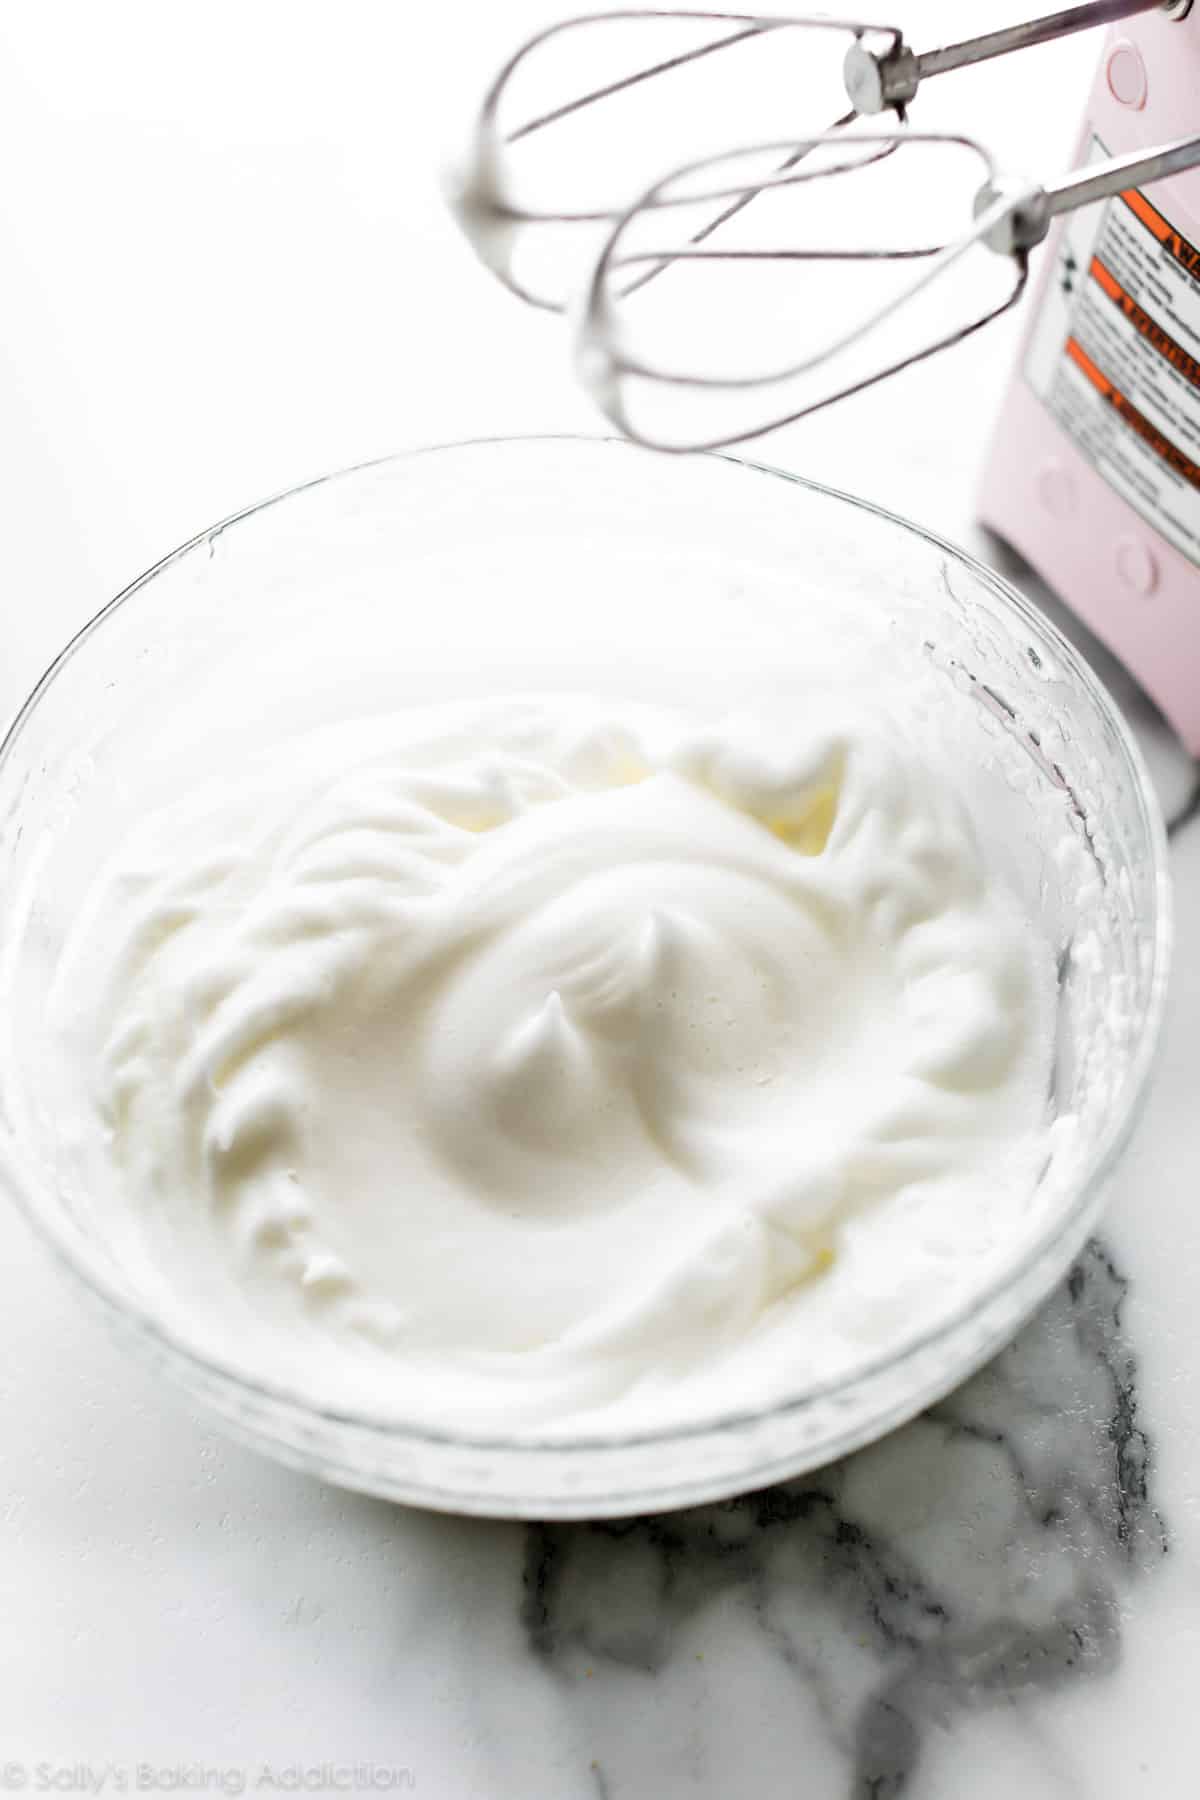
Whip the egg whites separately, then fold into the batter.
This cake recipe requires 4 large eggs. Separate the eggs before starting. Beat the egg yolks with the wet ingredients, then beat the egg whites into fluffy peaks and fold them in last. Beating the egg whites incorporates air and promises a velvet-rich texture.
You will never go back.
Red Velvet Cake Video Tutorial
Cream Cheese Frosting
In my opinion, cream cheese frosting pairs best with red velvet’s flavor and this frosting recipe is really simple. You need brick-style cream cheese, butter, confectioners’ sugar, vanilla extract, and a pinch of salt to offset the sweetness. It glides on seamlessly and is silky smooth. If you’re looking to pipe decoration with this cream cheese frosting, chill it in the refrigerator for 20 minutes. This guarantees the creamy frosting will hold its shape.
Of course, feel free to use traditional vanilla buttercream or Swiss meringue buttercream here if you prefer. Or try white chocolate buttercream frosting!
This recipe converts red velvet skeptics. I should know because I used to be one!
Interested in turning this red velvet beauty into a tiered wedding cake? See my homemade wedding cake for details.
More Classic Cake Recipes
- Vanilla Cake
- Banana Cake
- Pumpkin Cake
- Chocolate Cake
- Strawberry Cake
- Lemon Cake
- German Chocolate Cake

Red Velvet Cake with Cream Cheese Frosting
- Prep Time: 30 minutes
- Cook Time: 30 minutes
- Total Time: 3 hours
- Yield: 12 servings
- Category: Dessert
- Method: Baking
- Cuisine: American
Description
Red velvet cake is much more than vanilla cake tinted red. This recipe produces the best red velvet cake with superior buttery, vanilla, and cocoa flavors, as well as a delicious tang from buttermilk. My trick is to whip the egg whites, which guarantees a smooth velvet crumb.
Ingredients
- 3 cups (360g) cake flour (spooned & leveled)
- 1 teaspoon baking soda
- 2 Tablespoons (10g) unsweetened natural cocoa powder
- 1/2 teaspoon salt
- 1/2 cup (8 Tbsp; 113g) unsalted butter, softened to room temperature
- 2 cups (400g) granulated sugar
- 1 cup (240ml) canola or vegetable oil
- 4 large eggs, room temperature and separated
- 1 Tablespoon pure vanilla extract
- 1 teaspoon distilled white vinegar
- liquid or gel red food coloring
- 1 cup (240ml) buttermilk, at room temperature
Cream Cheese Frosting
- 16 ounces (452g) full-fat brick cream cheese, softened to room temperature
- 3/4 cup (12 Tbsp; 170g) unsalted butter, softened to room temperature
- 5 cups (600g) confectioners’ sugar
- 1 and 1/2 teaspoons pure vanilla extract
- pinch of salt, to taste
Instructions
- Preheat oven to 350°F (177°C). Grease two 9-inch cake pans, line with parchment paper rounds, then grease the parchment paper. Parchment paper helps the cakes seamlessly release from the pans. (If it’s helpful, see this parchment paper rounds for cakes video & post.)
- Make the cake: Whisk the flour, baking soda, cocoa powder, and salt together in a large bowl. Set aside.
- Using a handheld or stand mixer fitted with a paddle attachment, beat the butter and sugar together on medium-high speed until combined, about 1 minute. Scrape down the sides and up the bottom of the bowl with a rubber spatula as needed. Add the oil, egg yolks, vanilla extract, and vinegar and beat on high for 2 minutes. (Set the egg whites aside.) Scrape down the sides and up the bottom of the bowl with a silicone spatula as needed.
- With the mixer on low speed, add the dry ingredients in 2-3 additions alternating with the buttermilk. Beat in your desired amount of food coloring just until combined. I use 1-2 teaspoons gel food coloring.
- In a separate medium bowl, vigorously whisk or beat the 4 egg whites on high speed until fluffy peaks form as pictured above, about 3 minutes. Gently fold into cake batter. The batter will be silky and slightly thick.
- Divide batter between cake pans. Bake for 30-32 minutes or until the tops of the cakes spring back when gently touched and a toothpick inserted in the center comes out clean. If the cakes need a little longer as determined by wet crumbs on the toothpick, bake for longer. However, careful not to overbake as the cakes may dry out. Remove cakes from the oven and cool completely in the pans set on a wire rack. The cakes must be completely cool before frosting and assembling.
- Make the frosting: In a large bowl using a handheld or stand mixer fitted with a whisk or paddle attachment, beat the cream cheese and butter together on medium-high speed until smooth, about 2 minutes. Add the confectioners’ sugar, vanilla extract, and a pinch of salt. Beat on low speed for 30 seconds, then increase to high speed and beat for 3 minutes until completely combined and creamy. Add more confectioners’ sugar if frosting is too thin or an extra pinch of salt if frosting is too sweet. Frosting should be soft, but not runny.
- Assemble and frost: Using a large serrated knife, slice a thin layer off the tops of the cakes to create a flat surface. Discard or crumble over finished cake. Place 1 cake layer on your cake stand or serving plate. Evenly cover the top with frosting. Top with 2nd layer and spread remaining frosting all over the top and sides. I always use an icing spatula and bench scraper for the frosting. I used Wilton piping tip #12 for decoration around the top.
- Refrigerate cake for at least 30-60 minutes before slicing. This helps the cake hold its shape when cutting.
- Cover leftover cake tightly and store in the refrigerator for 5 days. Frosted cake or unfrosted cake layers can be frozen up to 2-3 months. Thaw overnight in the refrigerator and bring to room temperature before decorating/serving.
Notes
- Make Ahead Instructions: The cake layers can be baked, cooled, and covered tightly at room temperature overnight. Likewise, the frosting can be prepared then covered and refrigerated overnight. Let the frosting sit at room temperature to slightly soften for 10 minutes before assembling and frosting.
- Special Tools (affiliate links): 9-inch Round Cake Pans | Glass Mixing Bowls | Whisk | Electric Mixer (Handheld or Stand) | Red Gel Food Coloring or Beet Powder | Silicone Spatula | Cooling Rack | Cake Stand, Serving Plate, or Cake Turntable | Icing Spatula | Bench Scraper | Piping Bag (Reusable or Disposable) | Wilton Piping Tip #12 | Cake Carrier (for storing cake)
- Cake Flour: For best texture and taste, I strongly recommend cake flour. You can find it in the baking aisle and I have many more recipes using it. If you can’t get your hands on cake flour, you can make a DIY cake flour substitute.
- Vinegar: The vinegar helps brighten the red color. Don’t get scared, a touch of vinegar is normal in red velvet desserts! You can’t taste it.
- Why is everything at room temperature? When everything is near the same temperature, they mix together easily, evenly, and produce a uniform texture. It’s important!
- Food Coloring: The amount of red food coloring is up to you. I tested with varying amounts. To get the dark red color you see here, use 2 teaspoons of gel food coloring. You could use liquid food coloring too, but gel food coloring is more potent. You’ll need at least 1 Tablespoon of liquid. Dye the batter until you are pleased with the color. Use beet powder for a natural alternative (mix 1/2 teaspoon beet powder with 2 teaspoons of water before adding) or leave the food coloring out completely.
- Buttermilk: Buttermilk is a key ingredient and flavor in this recipe. You can use low fat or full fat. If you don’t have buttermilk, you can make your own buttermilk substitute. To do so, add 1 and 1/2 teaspoons of fresh lemon juice or white vinegar to a liquid measuring cup. Add enough regular milk (whole milk is best) to make 1 cup. Stir the two together, then let it sit for 5 minutes before using.
- Sheet Cake: This batter fits nicely into a 9×13-inch cake pan or 12×17-inch sheet pan. Same oven temperature. Bake for about 40-45 minutes or 20-25 minutes, respectively. Keep your eye on the cake and use a toothpick to test for doneness.
- 3 Layer Cake: Prepare 3 9-inch cake pans in step 1 and divide the batter evenly between the pans. Bake for about 22-25 minutes.
- Bundt Cake: This cake batter fits into a 10-cup or larger bundt pan. I’m unsure of the exact bake time (likely around an hour), but use a toothpick to test for doneness. Same oven temperature.
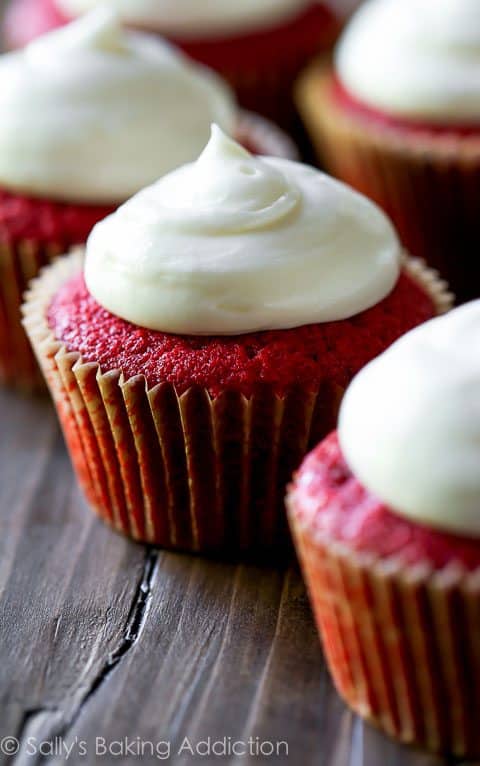
- Cupcakes: You can use this cake batter for 2-3 dozen cupcakes. Fill cupcake liners 1/2 – 2/3 of the way full. Bake for 20-21 minutes or until the tops of the cupcakes spring back when gently touched and a toothpick inserted in the center comes out clean. Use my red velvet cupcakes recipe if you need fewer.
Recipe originally published on Sally’s Baking Recipes in 2015.
Need something smaller? Here are my red velvet cupcakes!


Reader Comments and Reviews
Absolutely delicious and moist.
I am not a big red velvet cake fan.
I always thought red velvet was overrated, but I needed to have a red or pink cake for an event and chose red velvet as a result.
It was good! It’s still not my favorite flavor, but I really liked the cake.
It was very moist which is opposite of some of the red velvet cakes I’ve eaten in the past. The flavor was great as well.
I especially loved that it was not too sweet. You could taste the butter. Yum!
I could see adding extra cocoa if I make the recipe again.
I just tried this recipe last night and it came out great! The cake had a good flavor and was very moist. I actually doubled the recipe so I was able to make 3 round layers and one whole sheet cake. Will be keeping this.
I used this recipe for a Red Velvet Cake and a Blue Velvet Cake at work! I run teams named after colors so I have a Red Team and a Blue Team. They were a huge hit!
Hi, Sally I have tried the red velvet cake, it was delicous . the fact is that it is very difficult to have butter milk in my country, Can you tell me with what product can I replace it in this recipe, please.
I just made this cake. It’s a lot of work and when it was all said and done, the cake tasted like a commercial box cake! How disappointing!! (Red Velvet cake is my favourite cake, too). ..So I’m giving the cake, 1 star.
However, the cream cheese frosting is the BEST I’ve ever made. (A pinch of salt was genius!!) I would give the frosting 5 stars. I will use this frosting recipe on my carrot cake, as well.
I made this cake for my wife’s birthday today. Easy and delicious. I cut the top of one layer and toasted it . Then I cut the remaining cakes in two to make four thinner layers. The amount of icing was just fine for this. I was able to frost it all, albeit a thin layer on the sides. Then I used the crumbled toasted cake bits from the extra top layer to coat the sides. Everyone seemed to like it. Might be a go to recipe for us. Thanks!
Thanks so much for your tips.
Hi Sally,
If I increase the amount of cocoa powder (say, to 3 tablespoons) for a more chocolaty taste, what other ingredients should I increase as well? And will the baking time still be the same?
Thank you in advance.
Hi Tracee! If you decide to add more cocoa flour, reduce the flour by that same amount.
Hi Sally! Can i use this recipe to make red velvet cake pops? I was thinking about crumbling the cake, using the frosting to bring the crumbled cake together, then dipping them in white chocolate? 🙂
Absolutely! You won’t need nearly as much frosting though– I’d say less than half– so make sure you reduce that down. Let me know how they turn out! By the way, here are all of my tips for making homemade cake pops.
Hi Sally:
I want to bake this in three 8 inch pans for a tall cake for a baby shower. About how long should I bake? Or should I double the batter? Thanks so much!
Hi Sarah! I recommend using the recipe as written and dividing between 3 8-inch cake pans. The cakes will each be tall, making a lovely tall layer cake.
I made your lemon blueberry cake a few years ago for Easter and the cream cheese frosting was the most delicious thing I’ve ever tasted. I knew I wanted to use it for whatever cake I made for my son’s second birthday and what goes better with cream cheese frosting than red velvet cake? This recipe is amazing. Also, thank you for having everything converted to metric measurements. It makes my life so much easier!
We love this recipe! I converted it to gluten free and make it all the time now. For gluten free I substituted my own gf cake flour blend. Combine 2 c. Almond flour, 4 c. Brown rice flour, 2c. Tapioca flour, 4 c. Potato starch, 1-1/2 c. Arrowroot powder and 2T+2t xanthan gum. Mix it together well then measure out 355 grams. Use that in place of the cake flour. Also when you bake it reduce the temperature to 325 degrees and bake longer. In a 9×13 pan it took 47-52 minutes. Other than that follow the recipe exactly.
So I was looking for Red Velvet recipe to make for my daughter’s bday. ( her fav cake). I found your page and something about this recipe made me feel good. I dont bake and this was my first cake ( literally). Well first i made round and took it work. Everyone approved and loved. Next i did bday cake and i did number 13 . Then i did this cake for Easter. Now im making it for this 92 years old neighbor bday. So I guess i can say we love your recipe and I wanted to thank you for that.
I have a question…I was wondering if this work dyeing the cake with blue rather than red? I’m making cupcakes for my sons Eagle Court of Honor and I was going to lay them out in a flag….
You can tint the batter blue instead of red, yes.
Used this to make my niece a Spider-Man cake for her sixth birthday. It was a big hit, both with the kid and with my brother and I. Will definitely be using this recipe again
This recipe was a hit at Easter Dinner. I made a sheet cake and it was gone when I came back for the container. Tips and tricks for keeping the cake moist were super helpful.
Hi Sally! Would love to try your recipe but I only have 8″ round cake pans. How long should be the baking time for this pan size? Thanks in advance!
Hi Icon! Unfortunately, there is too much batter for 2 8-inch pans. Bake in 3 8-inch pans for about the same time as listed, perhaps a couple minutes less. Keep your eye on the cakes and use a toothpick to test for doneness.
SALLY! You’re the bomb. I’m thinking about making this cake for Easter (random, I know). I’m not always the biggest fan of red velvet cake, but I love the red velvet bundt cake from Nothing Bundt Cakes. They add in chocolate chips which I love. How do you feel about that? Suggestions as to the amount or type to use if I throw some in there?
Thank you!
Hi Sarah! Chocolate chips would be fantastic! I recommend about 1 cup, but you can go a little heavier if you want– maybe even 1 and 1/2 cups. 🙂
I’ve never tried ketofying a cake recipe! I’m doubtful that the results would be the same making these substitutions but let me know if you try!
This is a great recipe, it always makes an amazing tasting cake (the nicest red velvet cake I have ever eaten, and that’s from me making it haha), but I do have a couple of issues to point out that I always experience:
– it always takes around double the time for the cakes to bake by my estimation. I most recently made them for a birthday yesterday and found it took me 1hr10min to finally get them baked fully
– the recipe for the cream cheese frosting is most likely more than needed. I always end up with a nice tub full of extra frosting that I use over the course of a few days either to serve on the side of the cake as a decorative flair, or I dip other treats in it.
But I always come back to this recipe because it is just so tasty.
Hi Tony, I’m so glad you enjoy this recipe so much! What size cake pans are you using? Using a different size can affect the bake time. Also I like to use an inexpensive oven thermometer inside my oven to be sure it’s at the right temperature. Most ovens are just a few degrees off! Feel free to cut the frosting recipe in half next time if you don’t use it all!
We used every bit of icing although I did cut the powdered sugar a bit because I ran out! But I agree the cakes took longer to bake — more like 40 minutes total (but I checked them every 2 minutes). Best red velvet recipe I’ve ever made. Gorgeous fluffy rise!! Your site is my first stop for fantastic home baking. I am an avid baker and your recipes deliver every time. Your overnight cinnamon rolls were a huge hit last weekend!
Great recipe! I followed it to the letter including letting the ingredients sit out to get to room temp. The cake was dense but still very tender and moist. I did have to keep it in the oven an extra 10 minutes. The frosting had a nice tangy flavor that offset the sweetness of the cake. I made this for my teen’s birthday and it was a big hit with everyone.
Sally’s is my most favourite blog when it comes to baking. Love all your recipes and the detailed instructions you give. Yesterday made this cale for my daughter’s birthday, everyone loved it. Thank you
My friend asked me to bake her birthday cake, and she requested a Red Velvet cake. I have never eaten, nor baked this cake. I tried another recipe first with good review, but found the ratio between fat and flour wrong, with too little eggs, which resulted in a very dense cake. I tried this one next, and it turned out amazing. Very easy to make, and all the proportions were perfect. The cake is light and fluffy, and very tasty. I did reduce the sugar by ½ cup though, and also used only 2 cups of sugar for the frosting, since I prefer my baked goods a little less sweet. If anyone ever asks for a red velvet cake again, this will be my go-to recipe.
I love this recipe. Do you have any advice if I wanted to make it into a bundt?
Hi Ashley! See recipe note.
Hi Sally
my daughter goes crazy for red velvet cakes but never manage to make it my self .I tried your recipe last week and its the best i ever tasted very soft .the second one Im going ti make it today for her BIRTHDAY thanks for sharing.
regards from Malta.:)
Great tasting cake. The recipe makes a ton of batter, and I had to bake for an additional 10 to 15 minutes.
Finally I found the best recipe for Red Velvet Cake. Nice tricks. I made your recipe on Valentine’s Day and it came out perfectly. It’s moist, soft and fluffy. Even your frosting recipe was heavenly delicious and I only put milk instead of heavy cream because we don’t have it in our country. I used the Dutch processed still my cake turns beautifully red. I must say this is the best I’ve had. I love your website. Thank you Sally. From now on I’ll keep reading your website and to try your other recipes as well.
I love red velvet cake and have been using the same recipe for years. I decided to try yours and it is the best red velvet I’ve ever had! The cake flour makes a huge difference! My mom, who doesn’t like red velvet at all, loved it too! It’s a keeper!
Wow that looks so good! Can I make this cake into cupcakes instead?
Definitely. Use the same bake temp/time as my red velvet cupcakes. The separate cupcake recipe yields less.
Actually the recipe called for 1 and 1/2 Tbl of vanilla before. I’m going to make it again, for my birthday this time, and I’m not going to mess with perfection so I’m going off the original!
Hi Kathy! I did slightly reduce the vanilla extract, but by all means- use 1 and 1/2 Tbsp!